The Campaign
Welcome to the third part of the Belisarius Campaign – series of articles describing feats of the greatest Byzantine general against Sassanid Empire in sixth Century AD, beautifully depicted in Commands Colors Medieval game. We have already covered two skirmishes at Thannuris (528 AD) and Melebasa (528 AD) and today we will see what came out of them.
Belisarius Campaign:
Thannuris (528 SD) => Melebasa (528 AD) => Dara (530 AD) => Satala (530 AD) => Callinicum (531 AD) Part 1
The Scenario
The battle of Dara took place in 530 AD as a result of unsuccessful peace negotiations between Justinian and Sassanid king to finish the so called Iberian War – a conflict raging between Byzantine Empire and Sassanid Empire from 526 AD to 532 AD over the eastern Georgian kingdom of Iberia. The hostilities resumed and soon a large eastern army was at the gates of the Dara city – located on the border of both empires and provinces of Syria and Mesopotamia. Roman army – personally led by Belisarius – was outnumbered 2 to 1 but much better prepared. A trench was dug, which to large extent neutralized the superior numbers of Persians as well as their cavalry. On top, Pharas and contingent of byzantine cavalry was hidden behind nearby hills, so when a large frontal assault came, they were able to appear on Sassanid flank and turn the tide of the battle. That was a great victory for Romans, which for some time broke the Persians will to fight – but as we will see, not for long.
The scenario also features pretty new rule, regarding city gates. Each gate that is stormed and opened gives 1 VP to Sassanid. There is also a special rule about the entry of Pharas and his concealed cavalry – a detachment which really can turn the tide of the game.
GAME 1

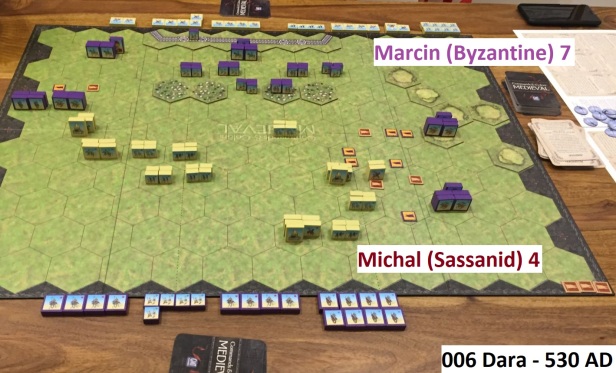
The initial set-up depicts the Byzantine preparations – broken ground imitating the ditch as well as a cavalry formation, hidden on the left wing, waiting to be activated by the play of specific cards. In the first game I took lead of Romans while Marcin was in charge of the numerous but historically less capable Sassanids.

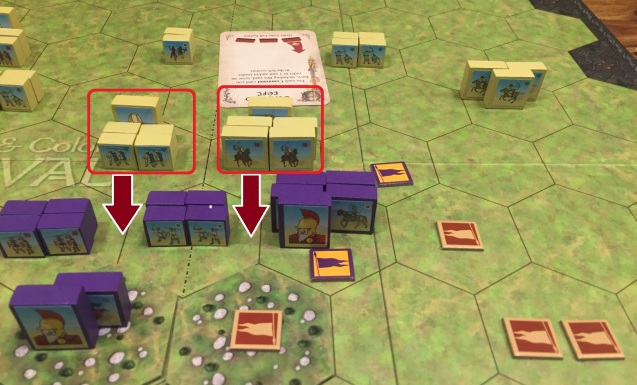
The game started from devastating Persian attacks on my right – under no circumstances my opponent was willing to go for a bait of a ditch, instead he focused on outflanking my infantry. That was possible specially once Byzantine Cavalry was dispersed (2 victory banners above scored by Marcin).

Not everything is lost! – I thought, charging headlong into the weakened left Sassanid wing. However, I was surprised by a nasty First Strike – fortunately I managed to survive and do some really nice damage. So maybe there is still hope?

No, there is none. Another Mounted Charge by Persians finally crushed my defenses…Both Auxilia and Super Heavy Cataphracts were killed.

The most astounding thing happened at the end of the game. Finally, the infantry started to fight! In an old CC Ancients style two Heavy Infantry clashed with each other. A fight in which Marcin took the upper hand and won the whole scenario.

Final look at the board – I tried to do some damage on the left with my hidden forces and managed to get 2 victory banners but Sassanids were simply too strong. Marcin deserved a victory and won 7-6. What was really interesting was the importance of the ditch and infantry behind / on it – that really made a difference.
GAME 2

We immediately sat-down to play a rematch. Looking from the perspective of Persian invader, I felt much better – so many units and many of them of the good quality. Let us check how the Romans will perform against such might!

The beginning was very good – armed with bows and using Darken the Sky, my archers managed to inflict significant loses on the enemy.

The attack of hidden Byzantine units was expected – they of course used Mounted Charge – but the loss of only 1 Auxilia unit was a small price for knowing where they will appear.

And then the real havoc of war and carnage began. Charges, counter-charges ensued in decimation of both sides and dead leaders. Unfortunately for me, unlike in first game, the Sassanid forces started to crumble…
 So I have tried a desperate charge on the other, left wing to score some banners and put a pressure into the other direction. I got some points but my losses were staggering and the charge was a failure.

In the end my attacking forces were crushed – I cannot name 4-7 defeat otherwise, especially having such an amount of troops and advantage in position. Well, that simply was not my evening!

And the last look at the Sassanid right / Byzantine left where most of the action took place.
Summary
Dara is an interesting, asymmetric scenario which can finish in any side gaining victory – as it was in the above example. The ditch is a real cavalry-breaker and well placed infantry gives good base of operations to the byzantine forces. The special rule with concealed cavalry was a bit ambiguous, but the thread and clarifications on the boardgamegeek resolved all the issues.
In my opinion Dara should be played by more experienced CCM players, not as an introductory scenario. It has some interesting mechanics, asymmetric set-up, important special rule about hidden cavalry and requires players to know strengths and weaknesses of their units before committing them. Also, for the first time we used city walls as well as storming gates rules. Similar challenges will await us in the next episode of the Belisarius Campaign – soon to be published!
Thank You!
The BoardGames Chronicle

