You can find the earlier parts of this replay here plus a great video by Volko about the historical setting of the game, enjoy!
- Inferno – Replay and Tutorial by Christophe Correia, Part 1
- Inferno – Replay and Tutorial by Christophe Correia, Part 2
- Inferno – Replay and Tutorial by Christophe Correia, Part 3
- Inferno boardgame – Tuscan Politics
Volko Ruhnke’s Levy & Campaign series from GMT Games presents medieval warfare at the operational level in various settings. Volume I, Nevsky, is set on the 13th-Century Baltic frontier with Novgorodan Russia. Volume II, Almoravid, took us to 11th-Century Spain and the Reconquista conflict among Christians and Muslims—you can read Michal’s first impressions and session reports of that volume on The Boardgames Chronicle here. Soon to be released, Volume III, Inferno, will travel to 13th-Century Italy.
Levy & Campaign volumes share core systems simulating medieval Levy of armies by individual great Lords and lesser Vassals, equipping of those armies with transport such as Carts and special Capabilities such as crossbowmen, trebuchets, or stonecutters, to name a few. For each Campaign, players then form stacks of Command cards to preset the order that Lords will March, Forage, Siege, and so on. Logistics loom large, as Provender must be gathered and moved to Feed Troops in the field or suffer curtailed Lords’ Service and Disband.
But each volume in the series features widely different geographic, cultural, and political settings, each with twists on the core rules to help bring out these differences. Inferno concerns fighting between the Guelph and Ghibelline political factions in the well-to-do and densely populated Tuscany of the mid-1200s. You can here all about this setting from Volko directly in this video.
My name is Christophe, and I am a Levy & Campaign developer and designer. Below, I face off against fellow L&C designer Antoine McNicoll in a run through of Inferno’s full-length scenario, which covers the years 1259 to 1261 that historically saw the Ghibelline victory over the Guelphs and the seizure of Firenze in 1260. I played the pro-Papal Guelphs and Antoine the pro-Imperial Ghibellines, all on Brian Reynolds’ beautiful production Vassal module that will be available cost-free once the game is released. Our play-time for this epic scenario was 6-7 hours.
Here is a multi-part blow by blow, including a climactic battle of Asciano that would decide the conflict. Along the way, I will add rules orientation and historical comparisons, plus notes from both players to give an insight into the strategies that we planned. Our scenario replay portions are highlighted, in case you want to skip past the more general explanations. Please enjoy this trip to medieval Tuscany!
Setup and Arts of War
The Guelph side is the purple in the northern and eastern parts of the map, while the Ghibellines are of gold color and are in the south and west. The full-length scenario of Inferno starts with the Ghibellines at 4 victory points and the Guelphs at 6 VP. Three Towns (each worth 2 VP) in Ghibelline territory start with Guelph allegiance markers: they are the Towns of Volterra, Montalcino, and Montepulciano, while the Towns of Poggio Bonizzio and Cortona are of Ghibelline Allegiance inside Guelph territory.
Each side in Levy & Campaign has its own deck of “Arts of War” cards that bring in period Events (the top part of each card) and Capabilities (bottom part). The Guelphs start this scenario with the SURPRISE Event card, which historically simulates the Storming of Cortona by Guelph forces early on in the war.
Each Levy, each side first draws two Arts of War cards at random. On the first Levy of the game, the cards’ Capabilities are assigned to individual Mustered Lords or a board edge to affect an entire side. On subsequent Levies, instead the Events will be executed.
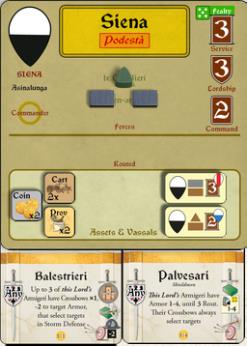
Antoine’s Ghibellines draw PALVESARI, which includes the words “This Lord”. “This Lord” means the card has to be assigned to a Lord included among the coat-of-arms icons to the left. PALVESARI shows “Any”, which means that it can be assigned to any Lord. Since Siena is the only Mustered Lord for the Ghibellines, he has to take them for the first turn. Antoine also draws TAGLIA, which does not say “This Lord” in its text. Even if none of the Lords shown by their coats of arms on the card are currently Mustered, this Capability still goes at Antoine’s board edge to help the Ghibellines in the future.
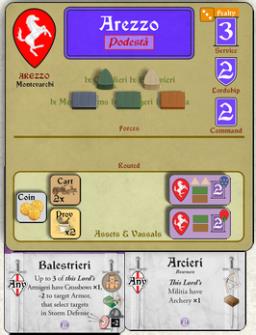
My Guelphs have drawn BALESTRIERI and ARCIERI, which can be put on any Mustered Lord, which means Firenze or Arezzo here. Each Lord in Levy & Campaign has a cylinder showing his position on the map plus a mat showing his Troops and Assets. “This Lord” cards are tucked under a Lords’ mat, as shown here.
There are two ways to remove a “This Lord” Capability in Inferno, by the way:
- Each mat has room for only two Capability cards, so if during Muster we assign a third Capability to Arezzo, we would remove one of the other two.
- We can discard cards during either Wastage or voluntary discard steps at the end of each Campaign phase.
Muster
The main part of each turn’s Levy is the Muster phase, during which each player takes Levy actions with each Lord up to that Lord’s Lordship value (for Arezzo, that number is 2), first Guelphs, then Ghibellines.
The Lord of Arezzo uses his 2 Lordship Actions to Levy his Vassals. To be able to Levy those Vassals, their Seats need to be Friendly to the Guelphs (small coat of arms near the Stronghold). The Troops are added to his mat and their Service marker is either slid up into the Forces section or flipped (as implemented here in the Vassal module). (If using advanced Vassal rules, you put the marker onto the Calendar a number of boxes rightward equal to the Vassal’s Service value, so they might Disband even before the Lord does; in that case, these Vassals would have been put at Turn 3.)
Firenze uses his first Lordship action to get a Capability card. Since he has many Cavalieri units (green wedges) at start and can get more later, he selects from the deck the FEDITORI card, which enhances those units in Battle.
Firenze’s two other Lordship actions select again from the deck the DISTRINGITORES and TAU COMPANY Capabilities. (They go at board edge since these two do not say “This Lord”.)
Note that the only Lords able to Levy these latter two cards are the ones who have icons at the left edge of the Capability. Since Firenze’s Lord is shown, he is eligible to Levy that Capability for the Guelph side, and it will affect all the Lords shown.
Antoine’s Ghibellines use 1 of Siena’s 3 Lordship to Levy BALESTRIERI to add to Siena’s PALVESARI and another one to Levy another Lord. These cards together make Armigeri (green blocks) very potent in combat; Siena does not have any such units yet but could get several via a later Call to Arms.
To Levy a Lord, his cylinder needs to be on the Calendar at the current turn Box (shown by the Levy marker) or in a box to the left), one of his Seats on the map must be free of Enemies, and the Levy action must succeed at a Fealty roll.
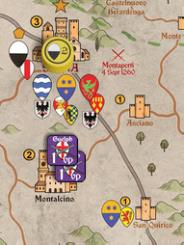
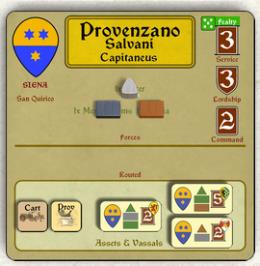
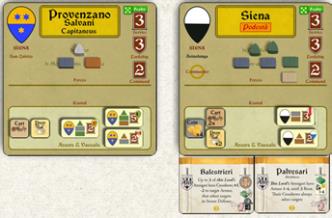
Provenzano cylinder is in box 1, the current turn. City of Siena and Castle San Quirico are Provenzano Seats (shown by his heraldry near the Stronghold name) & have neither Enemy Allegiance markers nor Enemy Lords there.

Antoine rolls a 1 and compares that to the target Lord’s Fealty rating (in that case Provenzano) shown by a die symbol at the top-right of Mat – and also clearly visible on his Service marker. The roll must be equal to or lower than the mentioned rating.
Provenzano Musters, and Antoine chooses to put him at Siena. He adds Troops, Assets (here, a Cart and Provender), and Vassal markers to Provenzano’s mat as shown there. Provenzano’s Service marker goes 3 boxes right of the current Turn (for his Service value of 3).
Once Muster is over, we would go to the last step of the Levy phase, Call to Arms. But that procedure occurs only occasionally, so I’ll come back to that later when it triggers.
Campaign Strategy for Turn 1
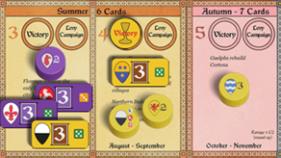
Levy done, we flip the Levy marker on the Calendar over to “Campaign” and formulate our strategies for maneuver during the rest of the turn. Each player arranges Command cards for specific Lords in an ordered “Plan” stack, here 7 cards each as shown on the Calendar for this Spring turn.
Guelphs – Christophe Ghibellines – Antoine
My Guelph strategy is for Arezzo to Storm Cortona right away with the SURPRISE Event card. I Levied Vassal Troops to Arezzo, DISTRINGITORES to help Arezzo during this Storm, plus ARCIERI and BALESTRIERI Capabilities to increase their hitting power.
Antoine’s Ghibelline strategy for the first turn is to quell the revolt at Montalcino through a Siege by Siena and Provenzano.
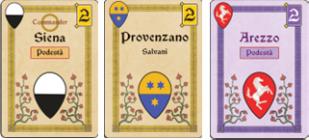
We flip the first Guelph Command card, Arezzo, and it goes as follows:
Arezzo has a Command rating of “2”, shown the card, on its Lord mat, and on its cylinder. The Lord’s first action is to gather supply.
You are usually able to get more supplies (“Provender”) from Supply actions in Inferno than in the earlier Levy & Campaign volumes Nevsky or Almoravid, thanks to the ability for a single Seat to provide up to its size in Provender (3 for the City of Arezzo). Since the Active Lord here is present at that Stronghold, he does not need any Transport to get those 3 Provender. With his 2 Carts, he could have added yet another 2 Provender from his second Seat at the nearby Town of Montevarchi. I add “Prov” markers to the “Prov x2” that Arezzo started with on its Lord mat.
Arezzo’s second action is a March from Arezzo to Castiglione. Rules of March actions are as follows:
Importantly, the first March, if Unladen and on a Road, costs 0 Command actions. And you can take along up to 2 Provender with each Cart and, on Road, still not be Laden (unless you are also bringing Loot with you). This makes it easier to March with more than in earlier L&C volumes, reflecting the smaller distances on Inferno’s map and better infrastructure of Tuscany.
Here, Arezzo discards Provender down to 4 Prov, twice its 2 Carts. The Lord then Marches to Castiglione, with 1 action from his 2 Command rating left to March again to Cortona.
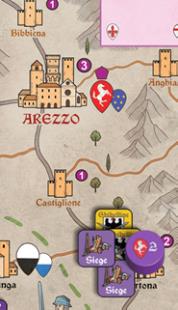
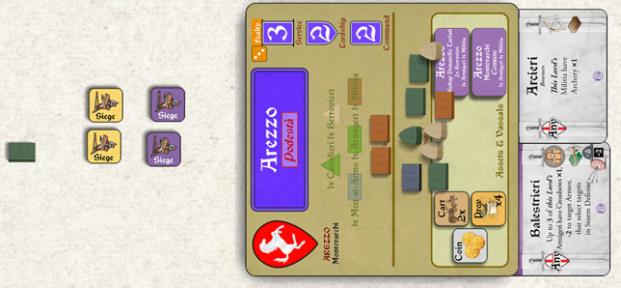
Playing the SURPRISE Event given to the Guelphs at scenario setup, Arezzo is able to put 2 Siege markers there on arrival (instead of the usual 1 marker), and then must instantly Storm the Town of Cortona, with additional bonuses.
The Storm of Cortona
Storm proceeds as follows, either on the Battle Mat or by arranging Lord mats:
- Place the Active Lord (the Lord whose Command card is currently shown) and only him at the Front Center. Other Lords (if any) are placed in Reserve.
- Then, see which Stronghold type is being Stormed. Depending on the Stronghold, the Garrison will be different.
- Place the corresponding Garrison either in the “Garrison” part of the Battle Mat or in front of the Storming Lord, facing him.
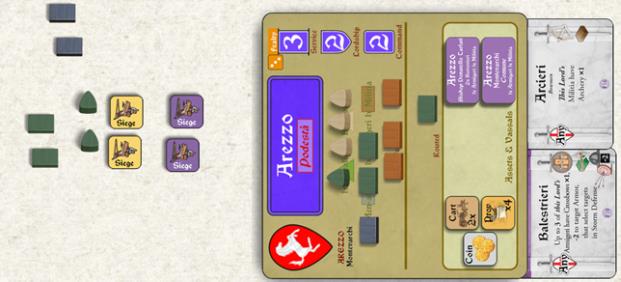
- In front of the Attacker, place a number of Siege markers equal to the current number of Siege markers at that Locale (Cortona has two). Those are Siegeworks.
- In front of the Defender, place 4 Siege markers. Those are Walls.
- Then apply any card effects adding or removing Walls to that Stronghold. The SURPRISE Event has a “Walls -2” modifier, so Arezzo is able to remove 2 Siege markers facing it. Cortona’s Town Walls protect on rolls of 1‑4 (placing 4 Siege markers, reduced by 2 due to the SURPRISE Event effect).
- Add the Troops shown on the Garrison section of the corresponding Stronghold, facing the Storming Lord. Note that the Garrison Foot units, as shown on the “Forces & Strongholds” sheet, have Crossbows, which means the Armigeri (green blocks) and Men-at-Arms (steel blocks) are able to shoot Archery, select their targets, and reduce the Enemy’s Armor -2
During each Round of Storm, sides exchange Strikes in the order illustrated here. In our game:
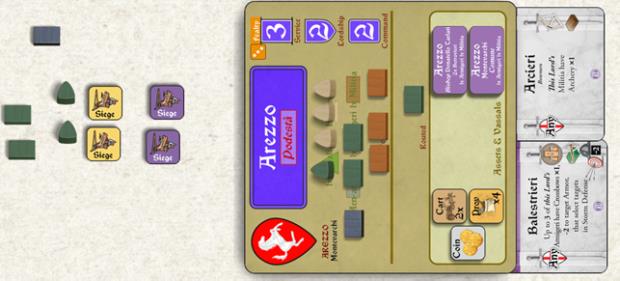
1) a) Defender Archery Strikes. The Garrison’s 2 Armigeri, as shown on the Forces graphic above, each generate 1 Hit, and its 2 Men-at-Arms ½ Hiteach, for a total of 3 Archery Hits, applying the Crossbow modifier of -2 to Armor.
The side receiving Hits first rolls 1 die per Hit for Walls protection. Here, the Guelph Siegeworks block a Hit on on a “1” or “2”, a roll equal to or less that its number of Siegeworks. So I roll 3 dice—only 1 Hit has gotten through the Siegeworks. The other 2 will not apply to the Lord.
Next, the units taking any Hits are selected. As this is a Storm, ALL Hits on the Storming side (the Attackers) have to be taken on Armored units first (see Protection column on the Forces chart), regardless of who is selecting the targets. It means that Arezzo’s last units surviving their Attack in Storm will be the Unarmored Militia.
Antoine’s Defenders, knowing the Attackers have Armigeri that also have Crossbows, elect to Hit one of Arezzo’s Armigeri. The unit rolls a “6” and Routs.
1) b) Attacker Archery Strikes. Arezzo’s Armigeri have Crossbowmen (BALESTRIERI Capability), and its Militia have ARCIERI Bowmen. Neither of those units are able to select targets here, so the Defenders will chose which of their own units will receive the Hits.
Arezzo Militia units yield a total of 3 Archery Hits, and his Armigeri add 2 that benefit from the -2 to target Armor for Crossbows—totaled for this Strike step but resolved separately to see how many Crossbow Hits get through the Walls.
- Rolls of “2” and “6” mean 1 Crossbow Hit gets through the Walls. The Defenders choose to apply it to their Men-at-Arms, rolling a “3”. Usually, a Protection roll of 3 is enough to save Men-at-Arms (Armor 1-3), but the Crossbows’ -2 Armor effect means the Men-at-Arms would avoid Rout only on a “1”.) One of Men-at-Arms unit of Cortona’s Garrison units Routs.
- The bow rolls are “1, 2, 2”, the Stronghold Walls block all of them, none apply to the units.
After the Archery step, the DISTRINGITORES Capability card (at the Guelph board edge) allows for a Podestà Lord (which Arezzo is) to roll for 2 Routed units’ Armor to recover. In this case, both fail.
2) a) Next, Defender Melee Strikes, followed by 2) b) Attacker Melee Strikes. We add the Melee Strike value of each unit and do the same as we did for Archery. At the end of 2) a) and 2) b), Round 1 of the Storm is over.
The Attacker has the option to end the Storm now. But my Guelphs choose to continue this Storm action, thinking it can still work; as they still have 2 Rounds to go (for a total of 3, due to the SURPRISE Event—usually, Storm is limited to Rounds equal to Siegeworks).
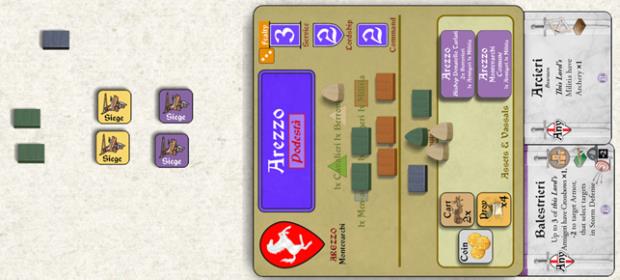
After the final Round, the situation is as follows. As all of the Garrison has not been defeated—a lone Armigeri unit still stands!—the Storm is a failure.
Now the Lords (and only the Lords, not the Garrison) try recover their Routed troops, to see if they will fight again. Usually, you roll their Protection (shown by their Armor value on the Forces chart), but the Attacker’s units in a Storm only recover on a “1”—scaling walls is a deadly business! Here, of Arezzo’s Routed units, only the Armigeri recover: the other units are Lost.
A Storm or Battle immediately ends the card, so even if Arezzo had Command actions left, the first Guelph Command card would be done.
More Command Cards
Players alternate flipping one Command card from their Plan stack each. The next card and first Ghibelline card flipped is Siena, who chooses to Tax to add Coin. A Tax action takes a whole Command card, regardless of a Lord’s Command rating.Unique to this L&C volume, some Lords in Inferno are Podestà Lords: those Lords represent the appointed leaders of the main cities of the different sides, and do not represent anyone in particular. If they are removed in Battle or Disband beyond Service, those Podestà Lords are still able to come back later.
Another characteristic of a Podestà is that his Tax action yields 2 Coin instead of the usual 1 Coin, but advancing his Service marker also costs 2 Coin instead of 1—both aspects representing their cities’ wealth and the concomitant cost of keeping the citizenry fighting in the field. It may sound like a wash, until we realize that Lords can Pay each other—so a Podestà could Tax 2 Coin then Pay a non-Podestà twice—and that use of Treachery cards and Ransoming Captured Knights require the same amounts of Coin, whether by a Podestà or not.
As written on his Lord Mat, Siena’s Lord is a Podestà Lord (as are Arezzo and Firenze), while Provenzano is not. Paying Siena, Arezzo, or Firenze to shift (extend) their Service from box 3 to box 4 of the Calendar would cost 2 Coin each, for example. Provenzano meanwhile would only need the usual 1 Coin to shift from Box 4 to Box 5.
Siegecraft
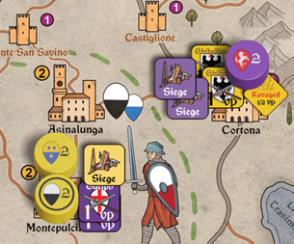
Skipping many details here regarding the Command cards that follow for the rest of this turn’s Campaign, in short, both sides try to Siege Towns. My Guelphs try to advance their Siege of Cortona after the Storm’s failure. Antoine’s Ghibellines establish a Siege of the rebel Town of Montepulciano.
Some important rules about Siege actions:
- A Siege action uses an entire Command card.
- If there is no Enemy Lord inside (only the Garrison), you get to roll for Surrender, regardless of how many Lords you have there. You roll a number of dice equal to Stronghold size (1, 2, or 3). For the Stronghold to Surrender, ALL dice need to be ≤ than the number of Siege markers there (in our example, Montepulciano has 1 and Cortona has 2) plus one more if a Ravage marker there.
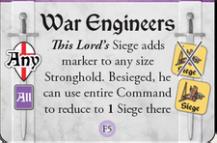
- If the Surrender roll fails, you add a Siege marker—but only if you have equal or more Lords there as the Stronghold size (or you have the WAR ENGINEERS card attached to the Active Lord doing the Siege action (meaning the Lord whose Command card is showing).
- If the roll Surrender succeeds, you remove all the Allegiance markers there (in your territory), or add a number of Allegiance markers equal to the Stronghold size (in Enemy territory). As each Allegiance marker is worth 1 VP, Stronghold size is also their value for victory (and for Supply, as explained above).
More on the Arts of War
We flip the Campaign marker back to “Levy” and advance it to the Calendar’s next turn box. From turn 2 of each scenario onward, the two randomly drawn Arts of War cards apply their Event (top side). Here are our draws:
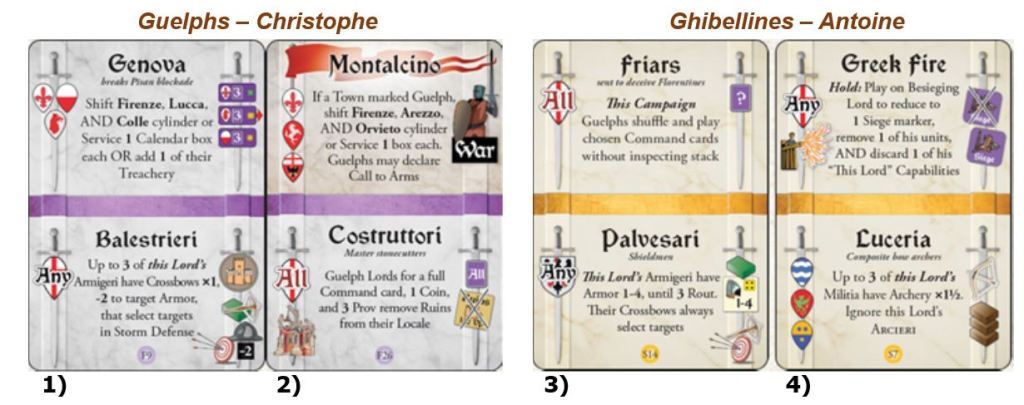
The draw above illustrates 4 kinds of Events in the game:
1) Regular Events, whose effects apply immediately. For example, drawing the GENOVA Event, the Guelph player reveals it and has the immediate choice to either:
- Shift Firenze, Lucca, and Colle cylinder or Service 1 Calendar box. The Guelph player would shift cylinders left (so the Lord is available earlier) or the Service markers right (so the Lord stays in Service longer).
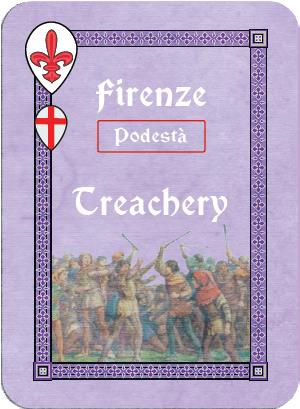
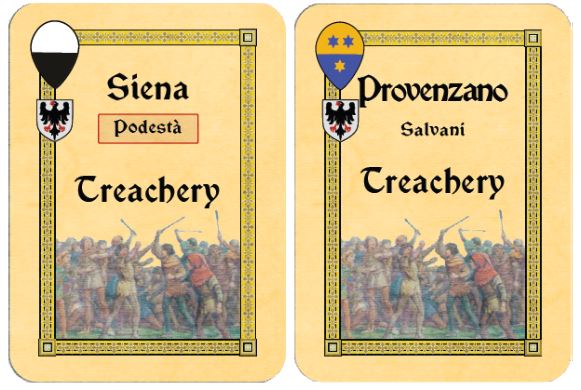
- Add 1 of their Treachery cards to their Command card deck. Unlike regular Command cards, Treachery cards (unique to Inferno) must be acquired before use. I will be explain later how they work. Here, I chose to add Firenze’s Treachery.
2) War Events, which both has an effect that applies right away, if the conditions are met, and gives the player the option to declare War during Call to Arms later that Levy. (I will explain later too.)
3) “This Levy” or “This Campaign” Events, with effects apply until the end of the current turn’s Levy or Campaign. As the Events on those cards remain in effect through the Levy, unlike immediate Events, the cards are NOT eligible during the upcoming Muster or Call to Arms to be Levied for the Capability on the bottom part of the card.
4) “Hold” Events, which are kept hidden until played at the player’s discretion whenever the conditions (if any) are met. These cards cannot be Levied as Capabilities until the Event has been played or the card voluntarily discarded at the end of the Campaign phase.
Turn 2– The Surrender of Montepulciano
My objective for the Guelphs in the late Spring Turn 2 will be to use the Treachery card that I just added thanks to the GENOVA Event to incite the Town of Poggio Bonizio to Revolt back to Guelph Allegiance. Ghibelline Antoine’s objective for this turn is to complete the Siege of Montepulciano.
During the Campaign, on the Ghibellines’ 5th card, a Siege action by Siena secures Montepulciano’s Surrender (as it happens, on rolls of “1” and “1”).
A successful Siege (“Surrender”) removes all Siege markers and flips Allegiance (either placing or removing 1 VP markers). Since Montepulciano is a Town with Enemy Allegiance, we remove 2 Allegiance markers from there, adjusting Victory Points along the Calendar track—in this case, shifting the purple Guelph Victory left (down) by 2 boxes.
Revolt and Treachery
We are not quite done with the Siege of Montepulciano. In Inferno, there is an additional benefit for major strokes such as Sacking a Stronghold (a successful Storm) or gaining its Surrender (a successful Siege)—Revolt and Treachery.
Upon the Surrender of the Town, both those things happen:
First, we roll dice on a random Revolt table, rolling a number of times equal to the Stronghold’s value (that is, its size). Since Montepulciano was a Guelph Town (value of 2) that Surrendered, we do 2 rolls on the “Revolt Against Guelphs” table.
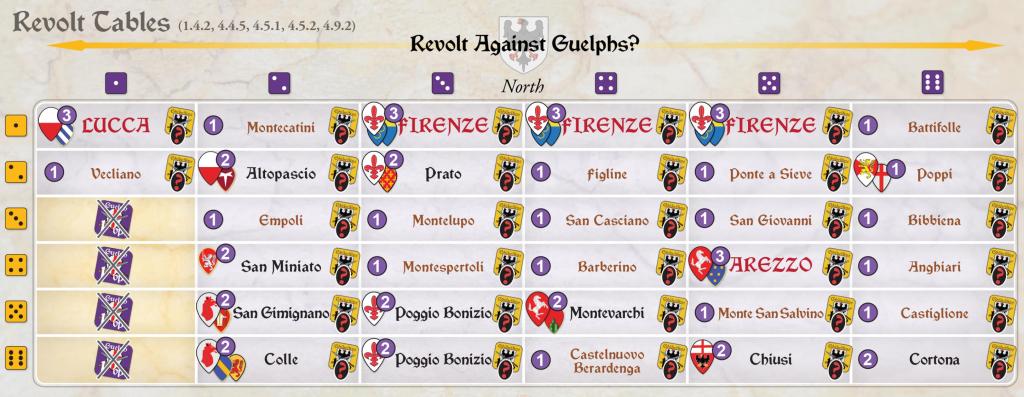

After EACH roll, we check if the roll corresponds to a Stronghold that is eligible to Revolt. Cross-referencing the colored dice on the Revolt Table, we see that purple “5” and gold “2” correspond to Ponte a Sieve, a Castle in the north, just east of the City of Firenze.
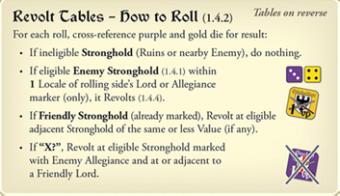
From the game’s Revolt & Treachery aid sheet—at left, how to roll on the Revolt table, right, definition of an Eligible Stronghold.
We check the result of the Revolt table dice roll against the “How to Roll” bullets shown above.
- The first bullet does not apply—the Locale is eligible since it is a Stronghold (not a Ruin) and no Lords Enemy to the rolling side (Friendly to the Stronghold) are at that Stronghold or adjacent. (Protecting one’s Strongholds from Revolt is one purpose of Lords on the map!)
- However, the second bullet does not apply either, since the rolling side (Antoine’s Ghibellines) has no Lord or Allegiance marker adjacent. (Both your armies in the Enemy’s territory and ongoing rebellions there can help Enemy Strongholds Revolt to your Allegiance!)
- The third bullet does not apply, since Ponte a Sieve is not already Friendly to the rolling side—there are no Allegiance marker there.
- The fourth bullet does not apply, as this case refers to results showing an “X” over an Allegiance marker. (If you have a nearby army, a Stronghold that is rebelling against you may come around!)
Since no bullet applies to Ponte a Sieve, nothing happens.
There is still a second Revolt roll to do. …
The second roll finds Altopascio, a Town in the northwest, near Lucca. (Notice that the locations on each Revolt table are arranged roughly geographically—north, south, east, and west—to make them a bit easier to find on the map.)
As with the first Revolt roll, this target is away from Ghibelline influence and does not Revolt.
So much for any Revolt rippling from the Guelph defeat at Montepulciano! Second is Treachery:
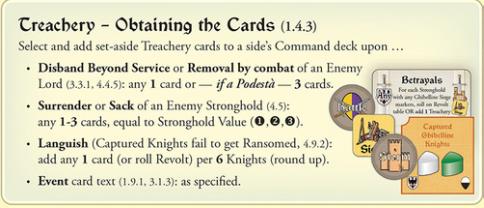
In addition to those Revolt table rolls, the side obtaining an Enemy Town’s Surrender is able to select two Treachery cards, which begin a scenario set aside, to add to that side’s Command deck. That is, these acquired Treachery cards become available to be selected as one of the cards in the next or any later Campaign’s Plan stack. (See the second bullet in the reminder list here from the Revolt & Treachery aid sheet.)
Each Lord in the game as a single such card that a side can add. The selection of which cards is secret. So I would not know which cards Antoine might pick. However, as the Ghibellines have only 2 Lords on the map—Sienna and Provenzano—those would almost certainly be the ones Antoine would add as Montepulciano’s submission opens possibilities for more Revolt by future Treachery.
We will find out in Part 2 of this replay how players can use these Treachery cards to target Strongholds for Revolt (among other deviousness). We now have many of Inferno’s key game mechanics in hand. So, in the next part, we will accelerate through our conflict, beginning with turn 3 and the onset of Summer, 1259. To be continued!


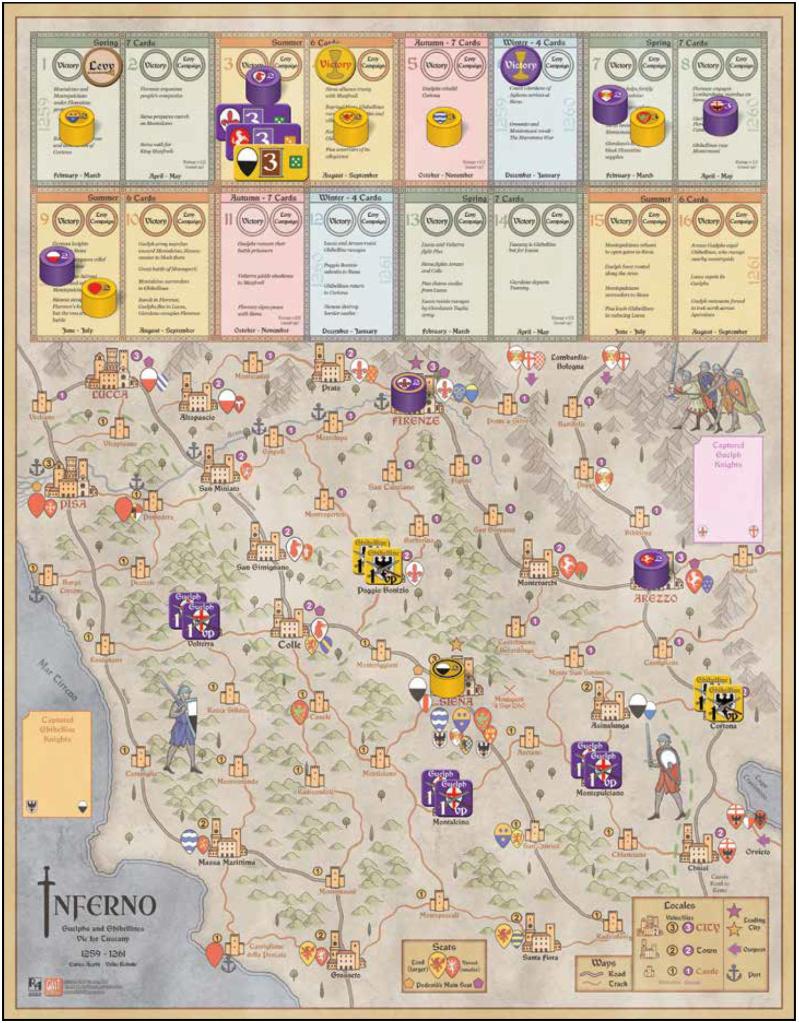
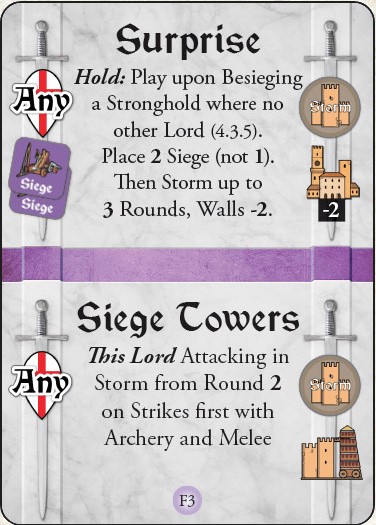
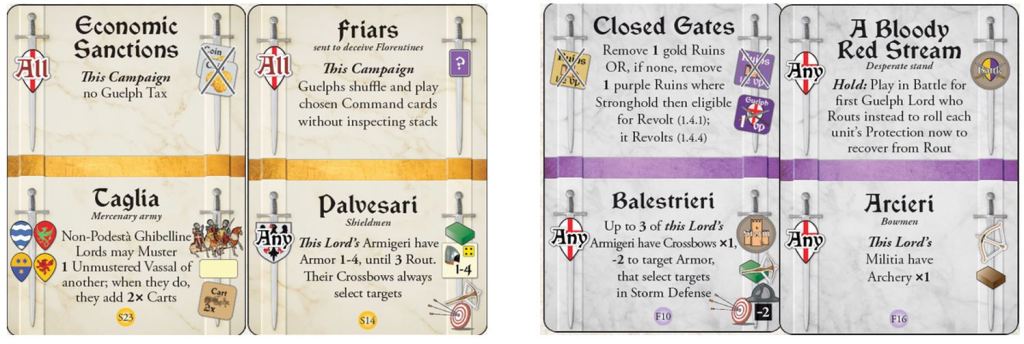















This is so great thanks! Really helped me learn the game.
LikeLiked by 1 person
Yes, this is great in telling the story and explaining the rules!
LikeLike