
It is long time since I last reported our Samurai Battles games – well, after its publication like two years ago we played very vigorously and extensively. Later on, other titles took precedence, but you know my weakness for Commands & Colors games – can play them always and everywhere 🙂
What I really like in this installment is grouping some of the scenarios into the linked, chronological, and logically connected sets. This usually means some particular battle being separated into couple of phases. That process can be done based on timeline with battle interlude, main action, and final phase (see: Sekigahara or Okehazama). But we shall also see the split based on troops location – like overview scenario, left flank, right flank, etc. (see: Nagashino or Anegawa). I find both approaches enjoyable and allowing for much closer familiarization with the particular historical event.
Still, there are some very interesting, stand-alone battles there and today I would like to focus on two such which we played!
Enjoy the picture-rich session report plus historical background!
Other Samurai Battles Session reports:
- Arita Castle 1517 AD - 2 scenarios
- Okehazama 1560 AD - 2 scenarios
- Koriyama Castle 1540 AD - 4 scenarios
- Azukizaka 1542 & 1548 AD - 2 scenarios
- Fourth Kawanakajima 1561 AD (Phase 1&2)
- Fourth Kawanakajima 1561 AD (Phase 3,4&5)
- Sekigahara 1600 AD - 3 scenarios
- Anegawa 1570 AD - 3 scenarios
- Nagashino 1575 AD - 4 scenarios
- Second Kondonai 1564 AD - 2 scenarios
The Game
As always, couple of sentences of introduction for those less familiar with that Commands & Colors installment – plus if you would like to see the actual gameplay, links to the two videos!
The Commands & Colors: Samurai Battles game allow players to portray important engagements of Japanese history mainly from the XVI century, before Tokugawa Shogunate. The scale of the game is flexible and varies from battle to battle. For some scenarios, an infantry unit may represent an entire clan of soldiers, while in other scenarios a unit may represent just a few brave warriors. The game follows the well-proven mechanics of Commands (cards driving the moves and creating Fog of War) and Colors (the units designation, having huge impact on battle results). The dices allow us to quickly resolve all battles and the components in the box allow for creation of countless scenarios. In essence, Richard Borg at his best!
Without further delay, let us jump to session reports!
1. First Samurai Skirmish
Historical Background
he “First Samurai Skirmish” is a non-historical scenario expressly designed to introduce you and a friend to the basics of Samurai warfare using the Commands & Colors rules. This is the format that we will be using for the Commands & Colors scenarios. The scenario map shows where terrain, units, and leaders are positioned along with how the units and leaders for both armies are placed. In this Historical Background area, there normally will be a brief recap of the battle and other historical information. The scenario’s battle notes detail the starting player, the number of Command cards, the number of Dragon cards, and the number of Honor & Fortune tokens each player receives at the start of the battle. The notes also detail the number of victory banners needed to gain victory and any special rules that apply to the battle.
Welcome to the age of Samurai Battles and enjoy!
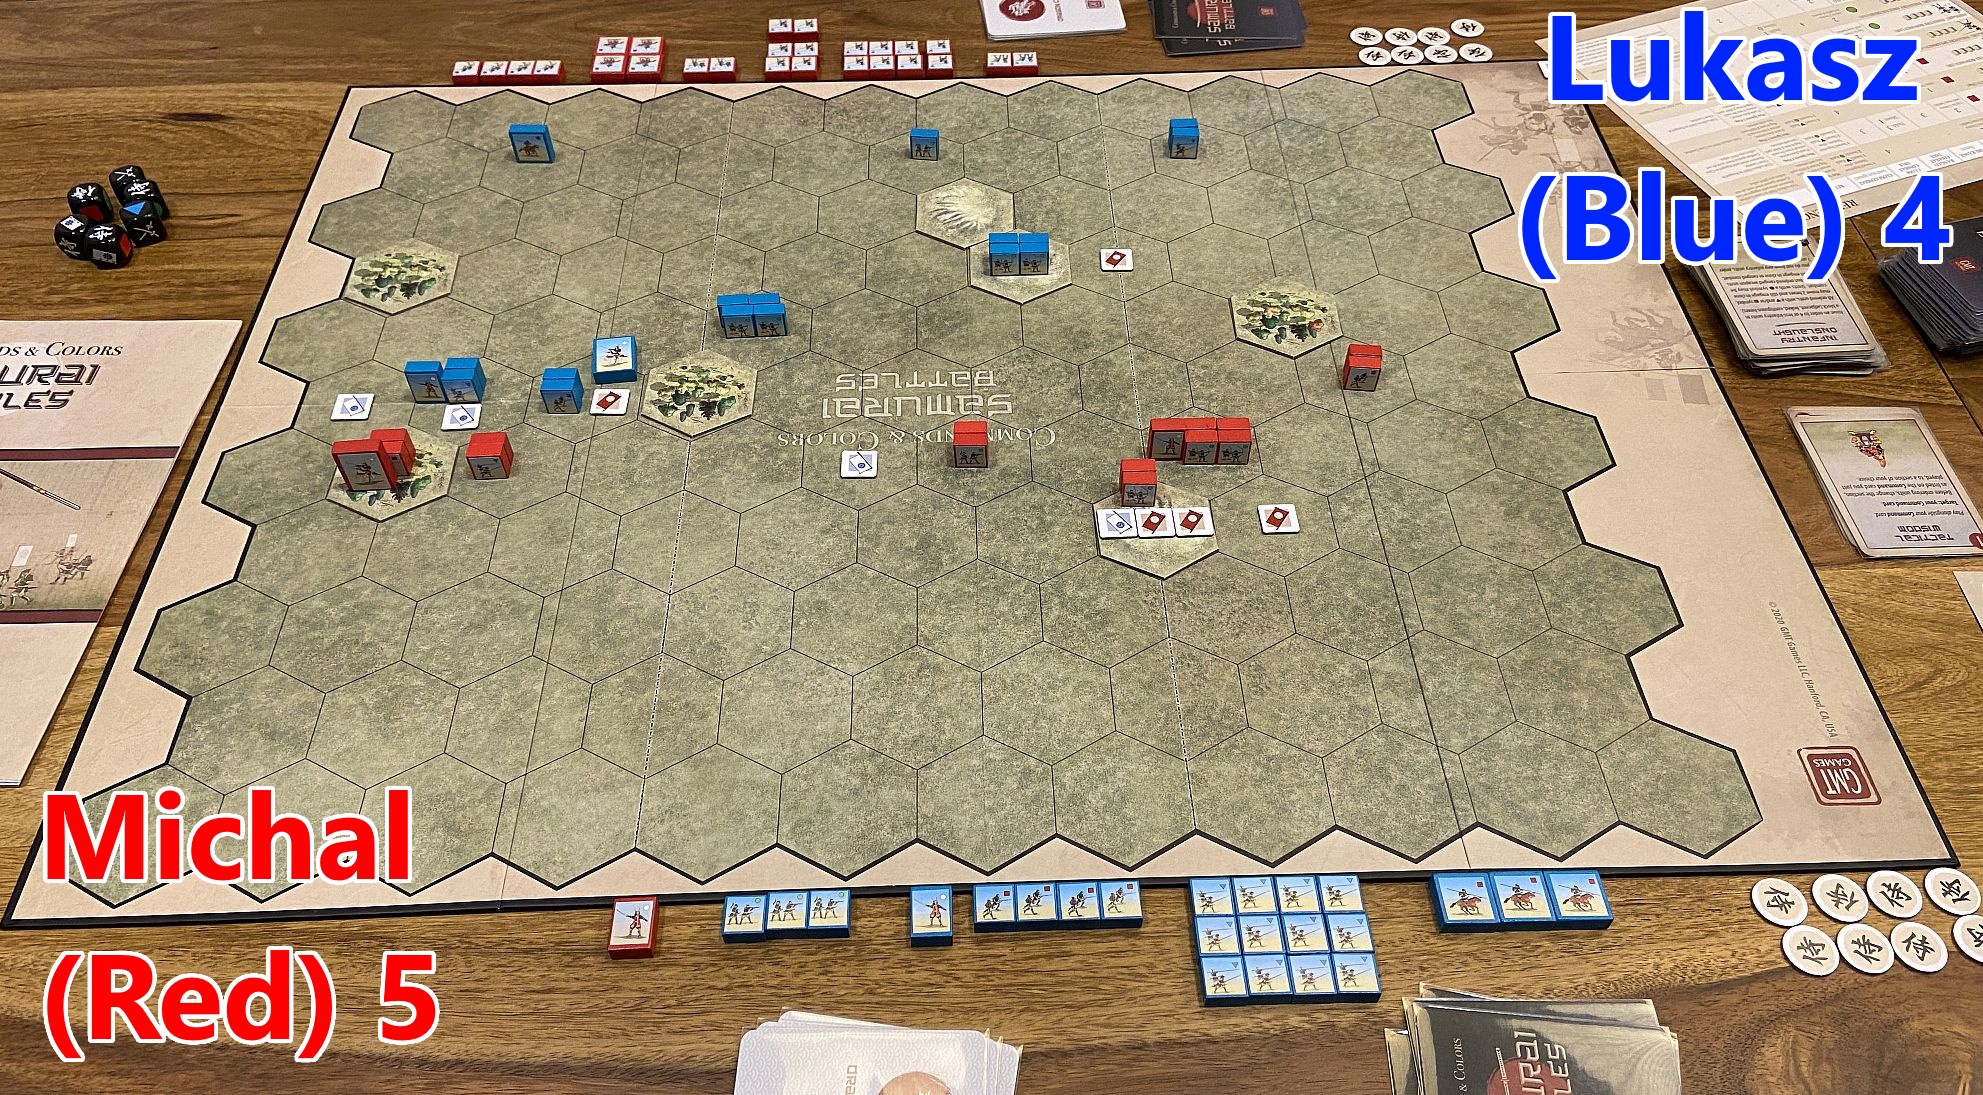
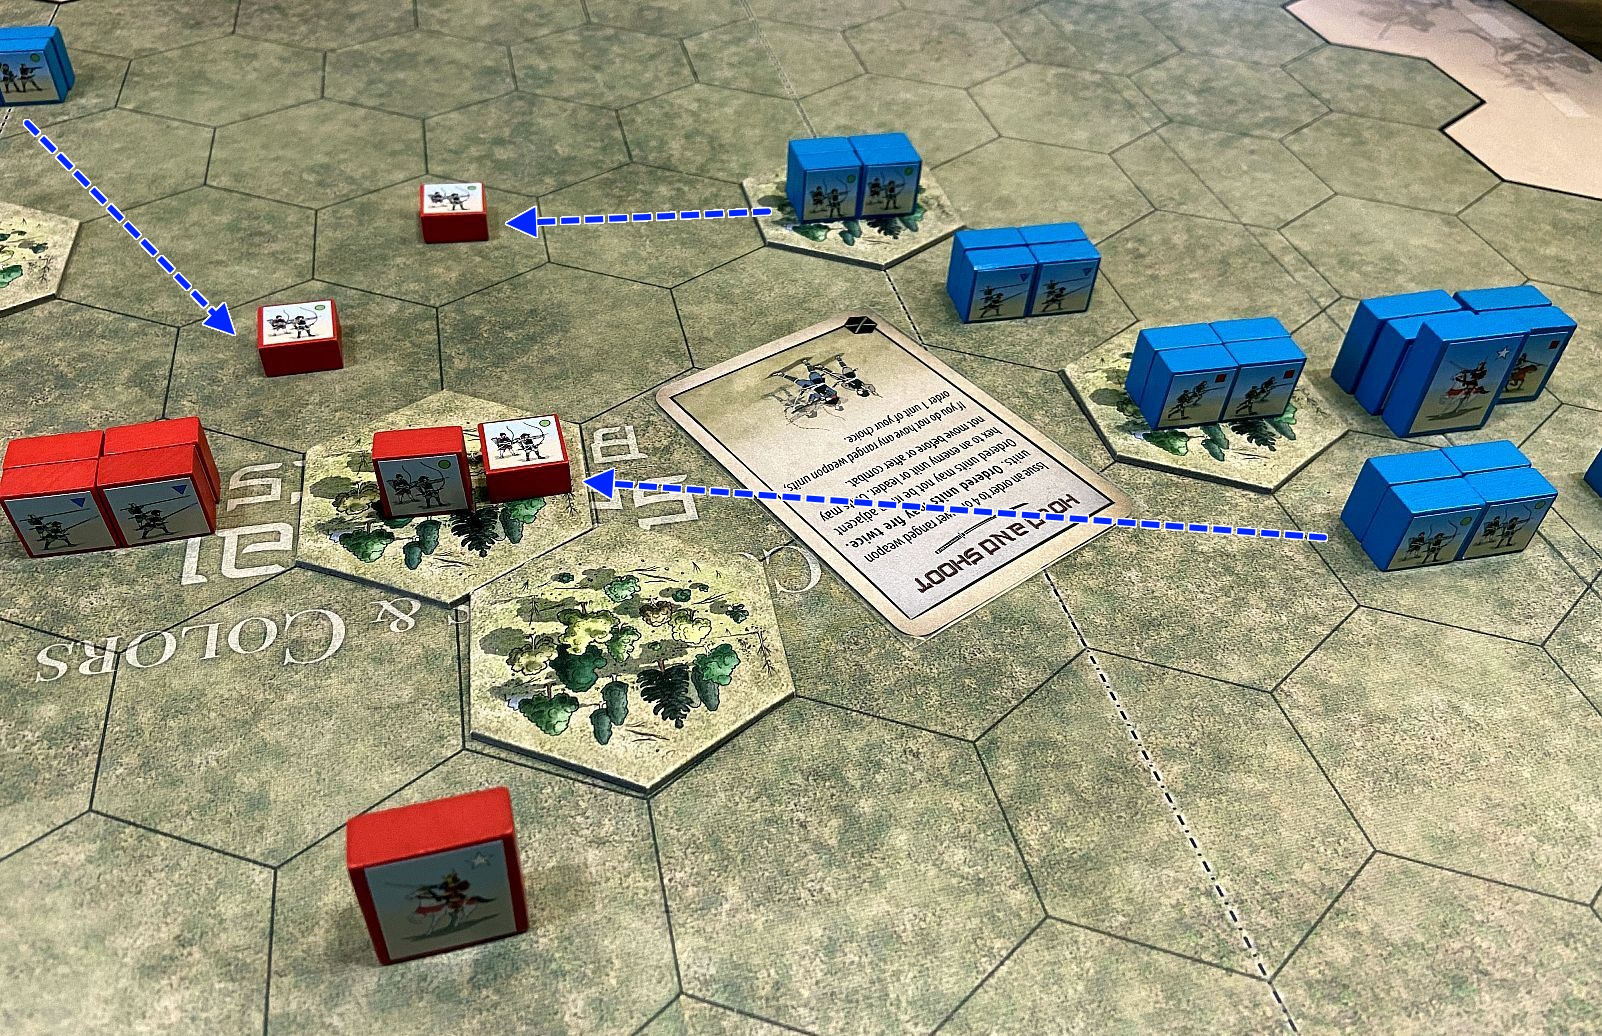
Session Report


2. Kawagoe Castle (1546 AD)
Historical Background
In 1545-1546 Uesugi Tomomasa, with the assistance of his powerful relative Uesugi Norimasa and the Kamukura shogun, Ashikaga Haruuji, besieged the strategically important Kawagoe Castle, then held by the Hojo clan. Despite an overwhelming attacking force, numbering around 85,000, the 3,000 men in Kawagoe Castle’s garrison, led by Hojo Tsunashige, held out until a relief force arrived. That relief force, numbering only 8,000, was led by Tsunashige’s brother, Hojo Ujiyasu. A single warrior was sent to sneak past the Uesugi siege lines to inform the garrison of the relief’s arrival. Though still strongly outnumbered, ninja spies informed the Hojo forces that the attackers, Ashikaga Haruuji in particular, had relaxed their vigilance due to their overconfidence in victory.
The Hojo tried a risky tactic, coordinating a night attack between the garrison and the relieving force. The Hojo samurai were ordered to leave behind any heavy armor, which would slow them down and perhaps reveal their position, and were forbidden to take the heads of their defeated enemies, denying themselves much honor. The Uesugi were totally surprised, thrown into confusion, and routed. This was Hojo Ujiyasu’s greatest victory and one from which the Uesugi never recovered.
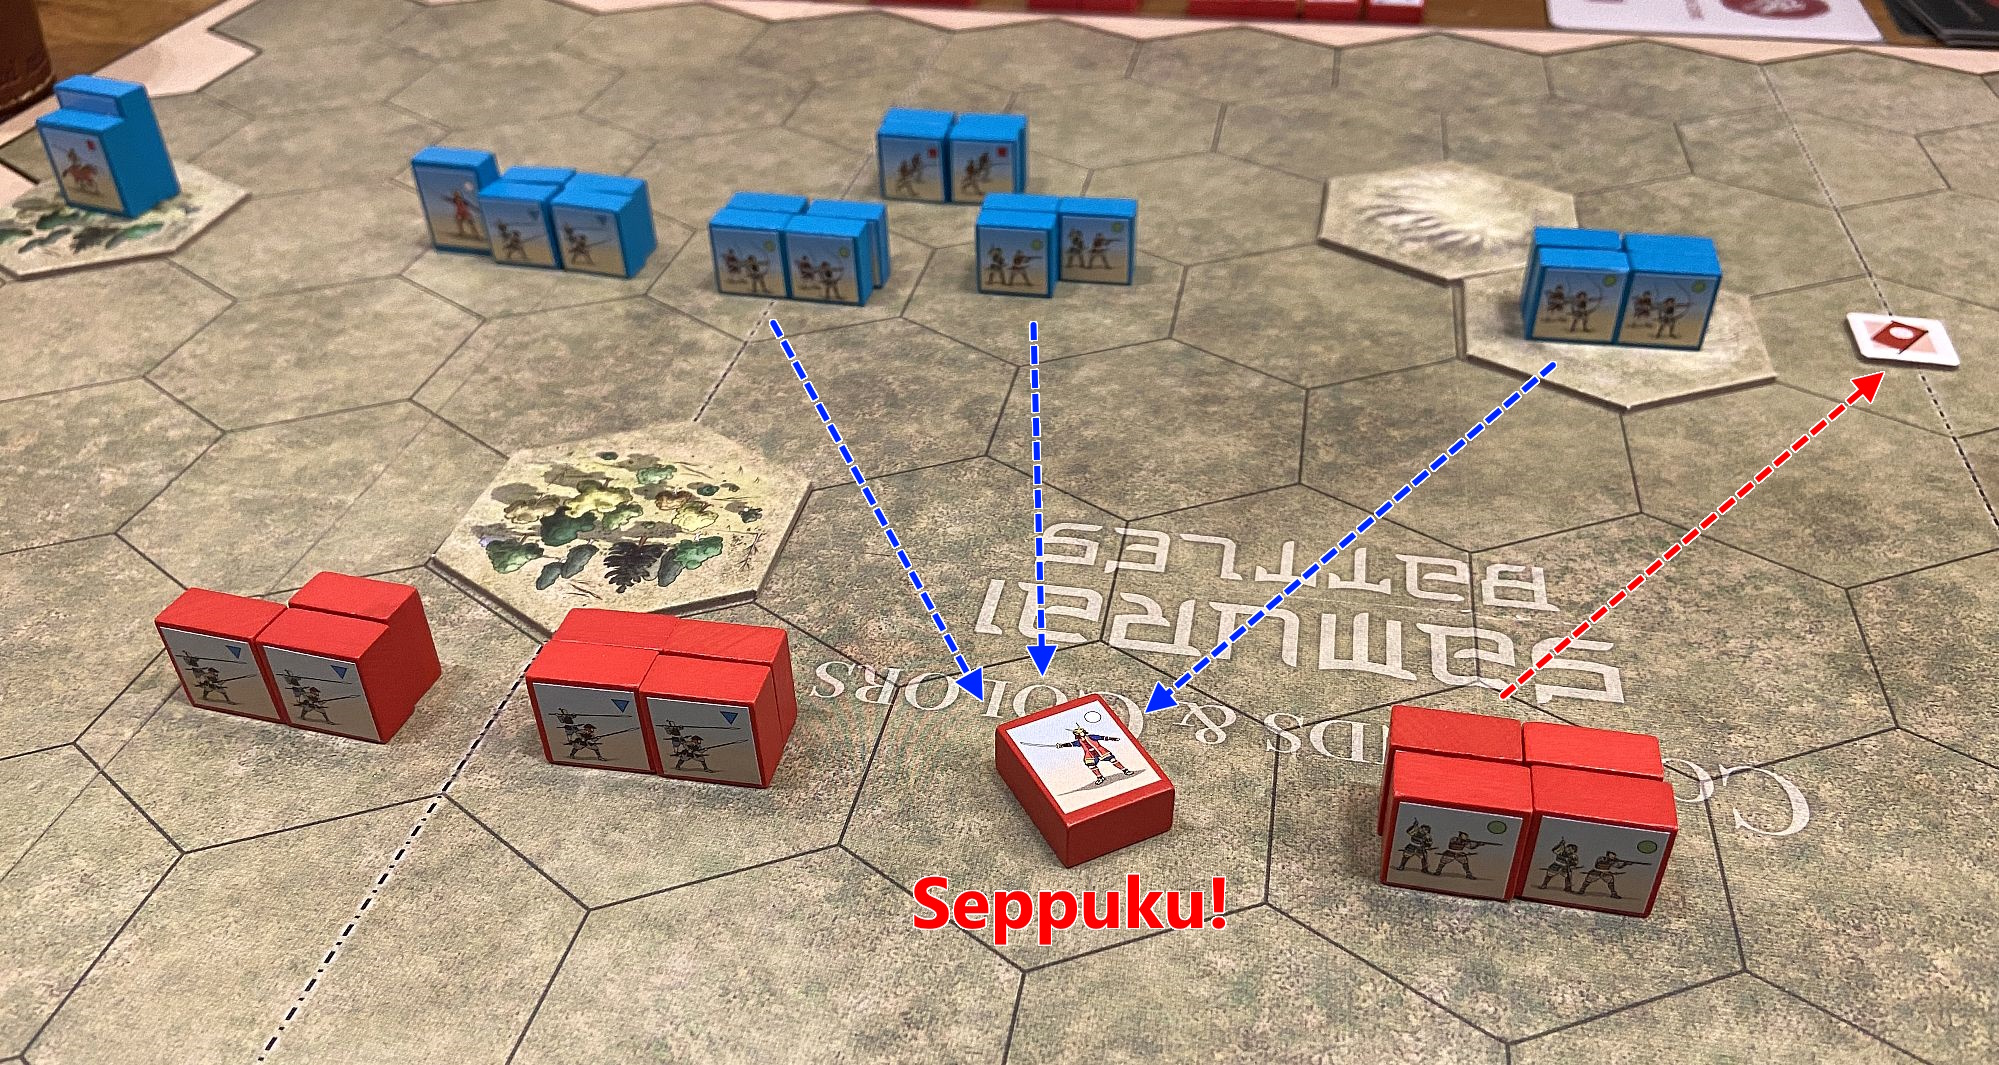
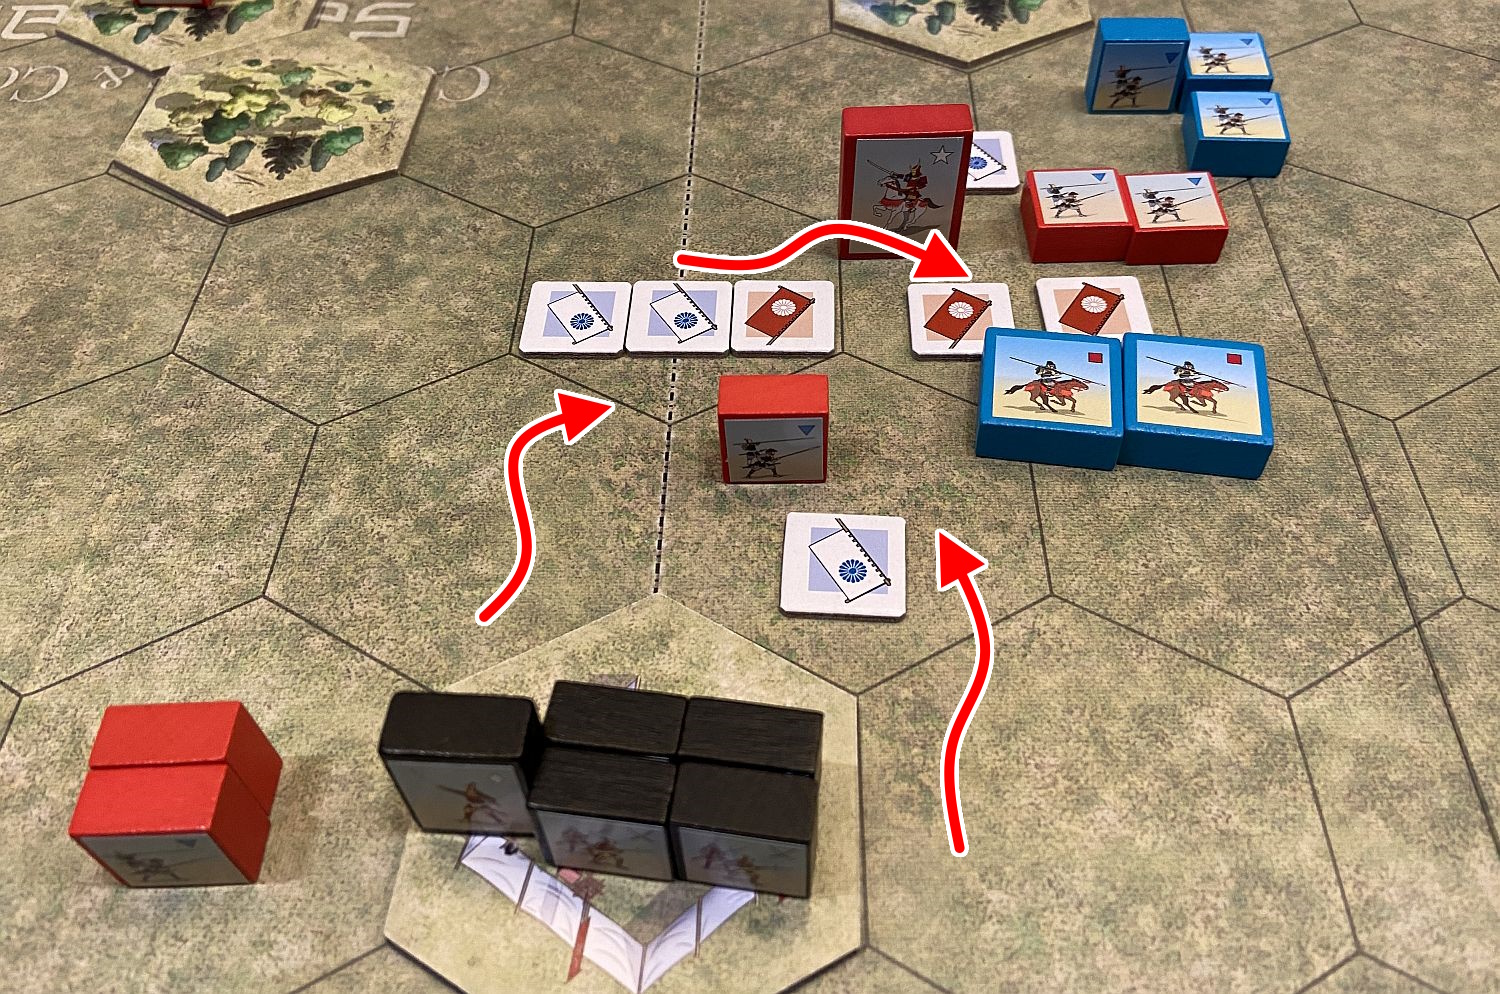
Special Rule: If your unit occupies the enemy’s Command Tent at the start of your turn, the camp (Command Tent) hex is removed from the battlefield. The capture of the enemy Command Tent is worth 3 permanent Victory Banners. When your command tent is removed, you must discard one of your Command cards at once, selected at random.
Session Report


Summary
These were two very close and exciting games; first with only basic rules and similar forces – good when you start with that title. Second battle with all advanced rules, again very balanced, and being decided till the last moment. That is exactly what Commands Colors Samurai Battles are bringing – great fun with beautiful components (simply love those colors!)!
More historically accurate reports will come – stay tuned!

I have to get this one played. It’s sitting on my shelf at work. Great AARs!
LikeLiked by 1 person
You will enjoy it. It is beautiful and great game!
LikeLiked by 1 person