
Breaking The Line, Holding The Line
PART ONE
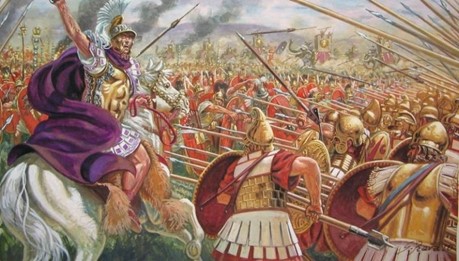
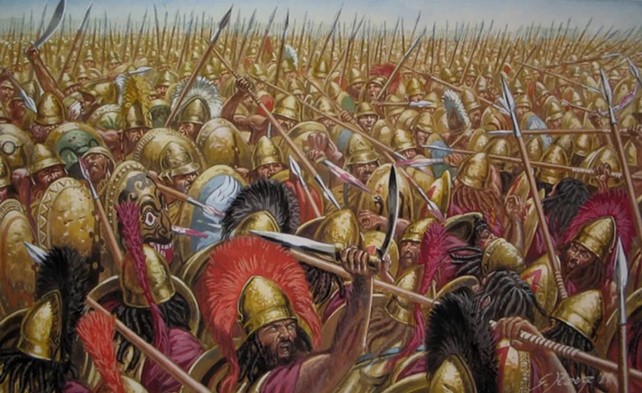
There are many important elements that contribute to the outcome of an Ancients battle. Skirmishing, cavalry manoeuvres, feint and ruse, move and countermove, all play their part in the integrated coordination of arms that leads to success on the battlefield and a good commander must be skilled in all of them. But as in real ancient warfare, the decisive moment on which the battle hinges is invariably the bloody clash of the main infantry lines. Marathon, Plataea, Cannae, Leuctra, Chaeronea and many more, battles that were turning points in history, all decided at the sticky end of the conflict, close and personal, spear and sword against armour and shield.
C&C:Ancients has a deceptively simple rule set that belies its tactical depth. If I want to demonstrate anything with a strategy article it’s the degree of skill, finesse and psychology that a capable commander can bring to bear on the course of battle. However, it would seem to many players that the most decisive phase of battle, the clash of main line infantry, is anything but an opportunity for exercising tactical mastery. Slow-moving units lumber into each other, roll fistfuls of dice and whoever gets lucky wins.
For many new players it seems that this is what the battle is all about, the strongest units meeting in a random dicefest. As with all honest misconceptions, there is a kernel of truth to this viewpoint. There is a great deal of luck involved in the buckets of dice that hit the felt when multiple Heavy and Medium Infantry meet. Of course this ignores all those important and subtle elements that lead up to the main event. I would also propose that there is true tactical advantage to be gained by clever play when the phalanxes meet…..which is the subject of this article.

Alea Iacta Est
As in many wargames, luck plays a major role in Ancients. Players are subject to the lottery of card draw and dice rolls. For some players this randomness is too much and exceeds their threshold of tolerance, their desire for control of the game or their perception of what constitutes simulation. I would suggest, however, that all ancient commanders were at the mercy of fate and random events. What would have happened if the Gothic cavalry had not returned from foraging when they did to join the battle of Adrianople and kill a Roman Emperor? Would the Western Empire have eventually fallen? What would have happened if scouts of both armies had not stumbled into each other in dense fog and started the cascade of fighting that led to the battle of Cynoscephalae? Would Macedon have preserved its strength and endured? Famously, what would the world be like now if Cleitus the Black and his kopis had not been on the spot to save the life of Alexander at the Granicus?

The truth is that luck influenced real ancient battles. Commanders had little control over what happened in the tight press of melee once the lines engaged…..and yet the great generals of history were still able to exert their will over the battlefield and claim victory time and again. This opportunity also presents itself to the player general in C&C:Ancients.
I cannot emphasise this strongly enough. As with so many aspects of Ancients, it is not about determinism. It’s about doing what the great generals of antiquity did……exercising planning, patience, position, timing, skill, vision and bold, decisive action to ensure that the weight of probability is in your favour when the phalanxes meet. In many cases these advantages are minor and incremental but they matter. Fine margins are often the difference between a triumph and inglorious defeat. There is no guarantee of victory because the dice gods will have their say, as all ancient generals knew (just ask Caesar) but over time and more battles, good generals will consistently be rewarded for good play.

In this article we will look at some strategies which may be used to gain those incremental advantages to edge this climactic phase of the battle in your favour, from the perspective of both the attacker breaking the line and the defender holding the line. We will also focus on the initial impact and exchange of close combat. While the melee may extend over several rounds, invariably it is the result of that very first clash of arms that determines the outcome, and the decisive moment over which a commander has most influence.
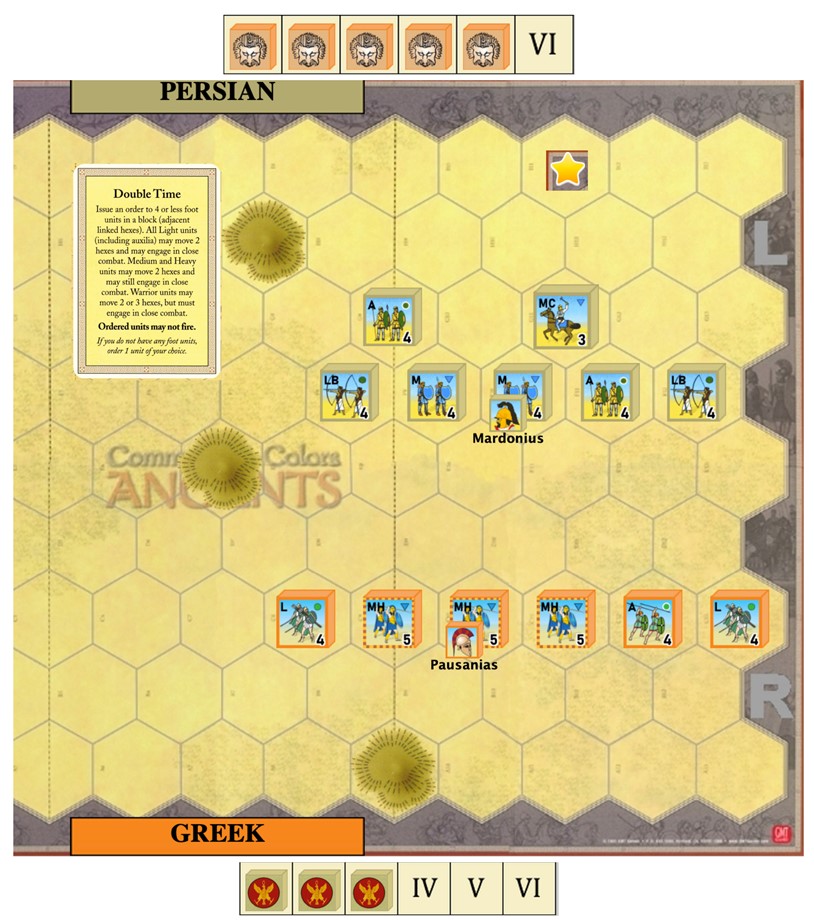
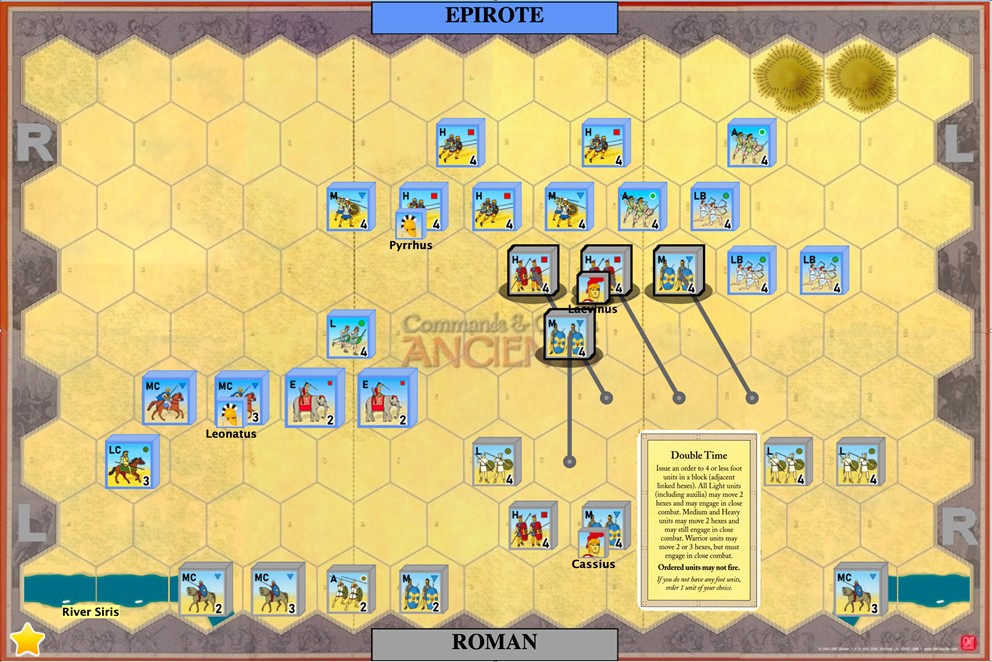
Throughout the article there will be a number of play examples to illustrate strategy points. All are screen captures from the C&C:Ancients Vassal module. For reference the symbols are:


Main Line Units
Let’s define what we mean when we are talking about main line infantry units. These are foot units that hit on swords. In most cases this will be Heavy and Medium Infantry, slow moving units that hit hard; Auxilia, although they are not the ideal option if given another choice; and Warriors.

Warriors
Warrior units deserve special attention as they were made for the line assault. They do feature in ones and twos in many armies, such as the Spanish and Gallic contingent for the Hannibalic Carthaginians or barbarian auxiliaries for the Imperial Roman armies. They are the backbone of Gallic, Germanic and Slave armies in Expansion 2 and in some Expansion 4 scenarios, where whole hordes of the screaming heathens are lining up to throw themselves at their anxious foes.

They are formidable, particularly en masse. Two hex charge movement, three with Double Time (triple time?). This means that they have an increased potential engagement frontage over their slower, more delicate foes, a concept we will discuss shortly. They are all able to momentum advance into broken lines and bonus close combat, meaning multiple charging Warriors can cause carnage. And at full strength they hit as hard as Medium Infantry. Their reduced close combat dice and 2 hex retreat once they are depleted makes them weak on subsequent turns, but for the first impact, the important moment we are interested in, they are a powerful weapon.
In truth any unit can close combat but we want to inflict maximum potential damage in the first engagement. Barring Auxilia, lights don’t hit on swords and shouldn’t be invited to the main event unless the commander is crazy or desperate. Mounted units have a theoretical advantage in possessing greater mobility and a wider potential engagement frontage and temptingly they can be ordered with Cavalry Charge for greater impact. However they roll less dice, have a lower block count and retreat further than their infantry counterparts. They are excellent at preying on already broken formations but tend to shatter catastrophically charging well prepared enemy infantry lines, as they did historically.
Leader Placement
A foundation of optimal Ancients play is leader placement. It is one of the defining features that differentiates this game from others in the C&C stable. While leaders certainly perform varied and important functions in other games such as Napoleonics and Samurai Battles, they do not share the critical role they do in Ancients. And at no other time is this as important as the clash of lines, where helmet symbol hits for leader adjacency can be the difference between life and death. This applies to both the attacker and defender.
The Case for the Defense
While not explicitly written into the rules, the most important principle to note is that the defender has the advantage when an attacker engages in melee. Whatever the whims of the dice, the defender will get double close combat rolls, responding first with battle back and then follow up ordered attack in his own turn against the original attacking units that are already weakened by the initial combat, if he has the card orders to do so……and if he’s been building his hand waiting for the enemy to engage you must assume he has. So given roughly equal numbers of main line units across the engagement frontage, and allowing for the uncertainties of elimination and retreat of defending units, the attackers will suffer up to double their initial assault dice in return before they are able to eventually respond with their own battle back..…if there are any left to do so. I have seen dozens of assaults in Ancients battles fail because this simple principle is ignored.
The attacker is also advancing onto enemy ground. With the exception of Line Command, he is ordering 5 units at most with a section Leadership card. These are the committed units and if he has pushed those forward of his own lines they will be what he has to work with in subsequent turns. The defender is limited by the same card order numbers and is battling across the same frontage but he is likely to have other nearby units already in the zone of engagement, so he has more options for ordering in fresh, full strength reserves.

Apply Strength Where the Enemy is Weak
So if the odds are with the defender, why would the opponent ever attack his main line? The answer is that the attacker has the advantage of initiative. He is choosing the time and place of the assault and the order in which his units attack. A well known aphorism of military doctrine, paraphrased from Sun Tzu, is to apply strength where the enemy is weak. Consistent with its ever surprising and endlessly satisfying portrayal of military strategy, Ancients gives a player the opportunity to put this principle into practice when attacking the enemy lines. We will return to this precept again and again throughout this article.
BREAKING THE LINE
We will first examine the approach of the attacker to the clash of lines. We’ll explore strategy in four broad phases… preparation for the attack; the decision about when to attack; the choice of approach paths and where to attack; and the close combat itself, including selecting target units, order of attacks and momentum advancing.
Why “breaking the line”?
In the introduction we highlighted the main advantage of the defender, the battle back-enemy attack double blow. If no enemy units are destroyed or retreat, even if they are weakened, your attacking units will suffer consecutive rolls against them and the chances are they will be on the losing end of the exchange, and probably the battle. You need to eliminate units and force retreats, so that you prevent the enemy battling back against every single attack roll, and so that you have the potential to momentum advance-bonus close combat. The key to doing this is applying strength where the enemy is weak. This principle will inform every aspect of our attacking strategy.

1. Preparation
The first consideration when preparing to attack is the use of skirmishers to soften up the enemy line and to screen your own line while you are making your preparations. I won’t go into this in detail as the use of skirmishers is the subject of a whole strategy discussion in itself. Suffice to say that weakening an enemy formation by removing even a single block from a main line unit with missile fire can be the difference between a successful line assault and historical footnote failure. The degree of success of your skirmishers in weakening enemy units may even dictate where you eventually attack. Particularly successful missile fire can also force the enemy commander to rearrange his lines, possibly into a weaker and more breachable formation. Get those skirmishers up and harrying as soon as possible.
Very rarely does a scenario have line units positioned ready for the assault, so the attacker needs to spend time and cards getting them positioned. It should also go without saying that a line assault without orders to follow up may be great heroic drama but is generally suicidal. So preparation also involves building a hand that has orders for the attacking units in subsequent turns or planning the attack around cards you have already drawn. These may be section, troop or leadership cards. We will also focus on several cards that are particularly important for line on line battle when we come to them in the discussion….. First Strike, Double Time and Clash of Shields.

While we are preparing and building an attacking hand, it is a good time to discuss the wild card in the Ancients deck. By definition this is a defensive card as it allows a pre-emptive battle back. However, if you’re holding it when formulating an assault on the enemy line, I’d recommend that you consider it part of your attack plan, because what it can effectively do is interrupt or even completely negate the defender’s double battle roll advantage. Invariably the defender will want to capitalise on the damage he’s inflicted on battle back after the first clash of the lines and pick on your weakened units with his own follow up attack……but often he will need to do this with units damaged by your first assault. If possible, ignore the full strength units, wait until a weakened enemy unit tries to battle and spring the First Strike to destroy it. This may thwart the entire enemy plan if it involved his leader and he was hoping to capitalise with a momentum advance - bonus close combat.
2. When to Attack
There is no definitive guidance that can be given about when to make the big decision to attack ……and it is a big decision. This is brown breeches time and why attacks usually happen at the climax of the battle. They come with no guarantee. Once you order units into close combat with the main enemy line they are committed and it is very difficult to extract them if things go wrong. Multiple units will die on both sides and invariably the clash of lines will be the greatest determinant of the outcome of the battle. You only want to initiate the attack when you feel you will gain more advantage than your opponent. This is all down to unit positioning, your hand and the stage of the battle.
The most common time to strike is when you are pushing for victory. Perhaps you are only one or two banners from winning and are prepared to lose units in the bloody exchange if it means you can claim those final trophies.
However, there may be several reasons that you choose to attack earlier in the battle. If the enemy line looks weak and you can make a quick, bold assault to destroy it, it could give you an early tempo advantage from which your opponent may never recover.
Command differential may lead you to attack early. While no formal attacker and defender roles are assigned to armies in Ancients scenarios, one of the great organic features of the game is that the order of battle often leads players to adopt those roles. If there is a command differential of 6 cards to 4, then Command 6 will usually adopt the attacker role. Given Command 4’s limited order resources, it is in the interest of Command 6 to use his card advantage to engage his opponent as quickly as possible, before he can prepare and settle.
Maybe your hand leads you to an early assault. If you have nothing but orders for your infantry in one section of the battlefield, the gods have spoken and you have to build your strategy around them. You may as well make good on the auguries to push forward and follow through with the resources they have granted you.

In previous articles I have enthused about the ability to feint in Ancients. This unwritten psychological aspect is one of my favourite features of the game. An aggressive offense in one section of the battlefield, particularly a line assault, can divert the attention of the enemy from another section of the battlefield where they are pressing you hard.
In the next instalment we will continue our exploration of Breaking the Line with the next phases of the attack, when we discuss where to engage the enemy line and the bloody melee itself.

This was an excellent article, thanks W
LikeLiked by 2 people
Thank you! Even more will come!
LikeLike
While Brent is preaching to the choir with me as the audience, I very much appreciate how Brent is able to tie the game mechanics to the history which they abstract, enriching and, in cases, altering players’ perceptions of the game.
LikeLiked by 2 people
That is what attracts me to CCA – and to the way Brent writes – the game mechanics reflecting the historical situations & limitations.
LikeLiked by 2 people
Todd! Where have you been?!? Great to hear from you. We were a bit concerned.
Brent.
LikeLiked by 2 people
Brent (and anyone else my incidental ghosting left wondering), I’ll go into more detail on a more appropriate medium, but while there’ve been a couple scares (the first one factored into, though not solely explains, my half decade+ abscence), I am well and intending to carve out time to get back into C&C on Vassal!
LikeLiked by 1 person
Excellent Article! It shows remarkable knowledge of the game and love for it!
One of the things that makes this game great, is that every unit has it’s mix of strength and weakness:
– HEAVY INFANTRY
The most powerful attack (5 die) BUT
(Slow, activated by fewer cards and very vulnerable to Elephants)
– MEDIUM INFANTRY
Second most powerful (4 die) BUT still slow
– WARRIORS
A unit that requires more skill to be used at best, but that could reward many victory banners in few turns if properly used.
Powerful charge (4 die if full strength, at 2 or even 3 hexes with DOUBLE TIME CARD),
they can also make a bonus attack without leader and ignore 1 flag at full strength.
they are also less vulnerable to elephants (3 die) . To conclude, Warriors retreat 2 hex per flag.
– AUXILIA
A unit often underrated, because of only 3 melee die but:
They are activated by much more cards, they are more mobile to provide support or other tasks, and able of ranged attack.
Auxilia is perfect in maps with lot of terrain, and they are the stroger unit to defend hills!
As the Author said, Leader placement is critical, and also hitting the enemy Melee Infantry with Skirmishers in order to reduce the possibility of battle back
LikeLiked by 2 people
Thanks for your input! The Part2 and Part3 of article will definitely go one level deeper with analysis!
LikeLike