As it is not so easy to get the players for the Great Battles of History (GBoH) sometimes the best option is to play solitaire, trying to win against yourself! One of the greatest installments in this series is SPQR – battles of ancient Roman Republic. It allows you to re-play variety of engagements, and the latest Deluxe Edition covers all the expansions. As I acquired SPQR some time ago, it was already high time to get into this – and as for the scenario, I picked the one suggested by the designer – Bagradas Plains.
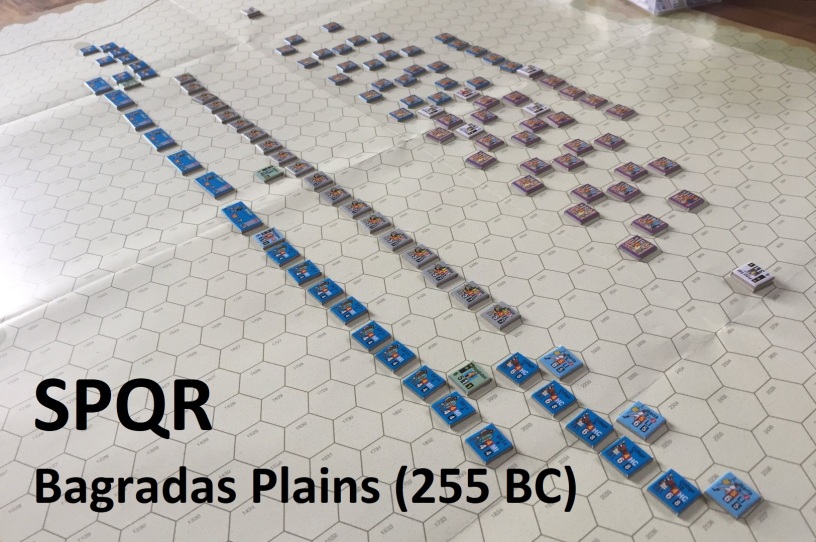
THE SCENARIO – Bagradas Plains (255 BC)
It is nearly end of the First Punic War. The Carthage is almost defeated – the Romans landed in North Africa! The Punic leaders being desperate hired a Spartan general, Xanthippus, who managed to actually organize the Carthaginian forces and plan for the best use of their assets.
And so the battle on the Plains of Bagradas River started – the Carthaginians initiated the battle with an attack by the elephants. That in result tied up the main force of Roman infantry which was quickly exploited by Punic cavalry (outnumbering the Roman counterparts eight-to-one). Legions had some luck on their left where they routed mercenary Celts, but once Carthaginian cavalry redressed their ranks and attacked form both flanks, the battle turned into slaughter. Only 2000 Romans managed to return to Italy.
Would history be changed and Romans manage to withstand tactically more able Carthaginians? Enjoy below photo-session report!
SET-UP
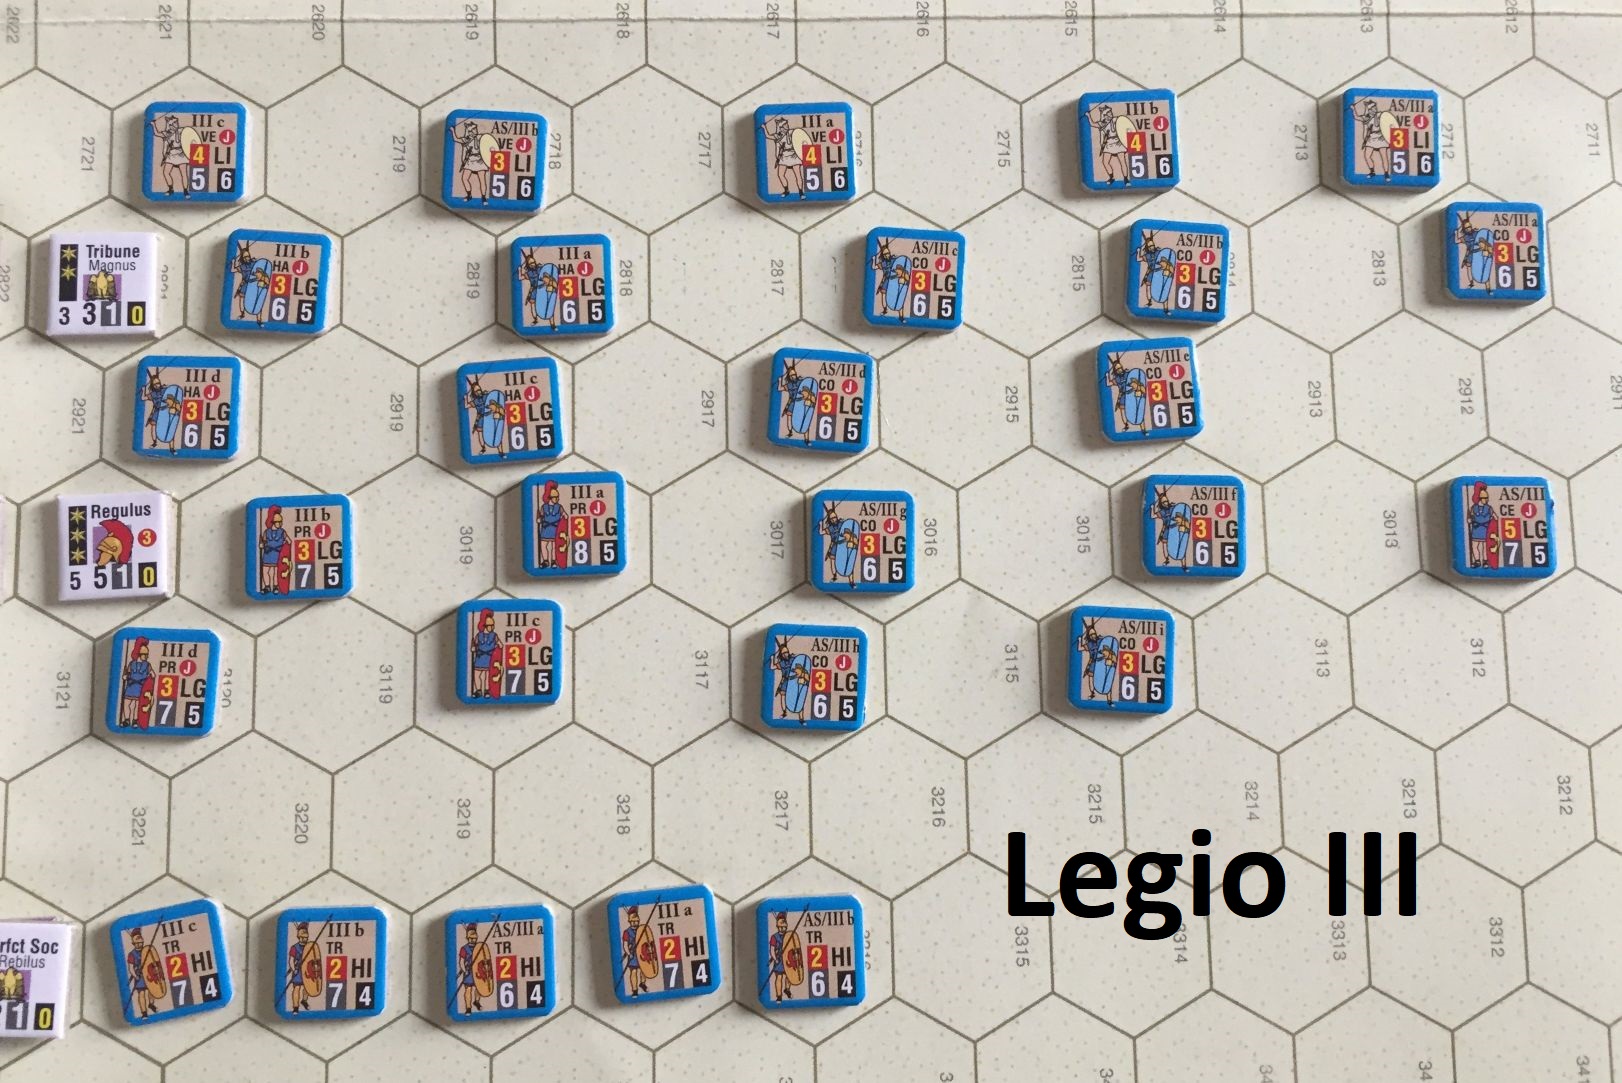
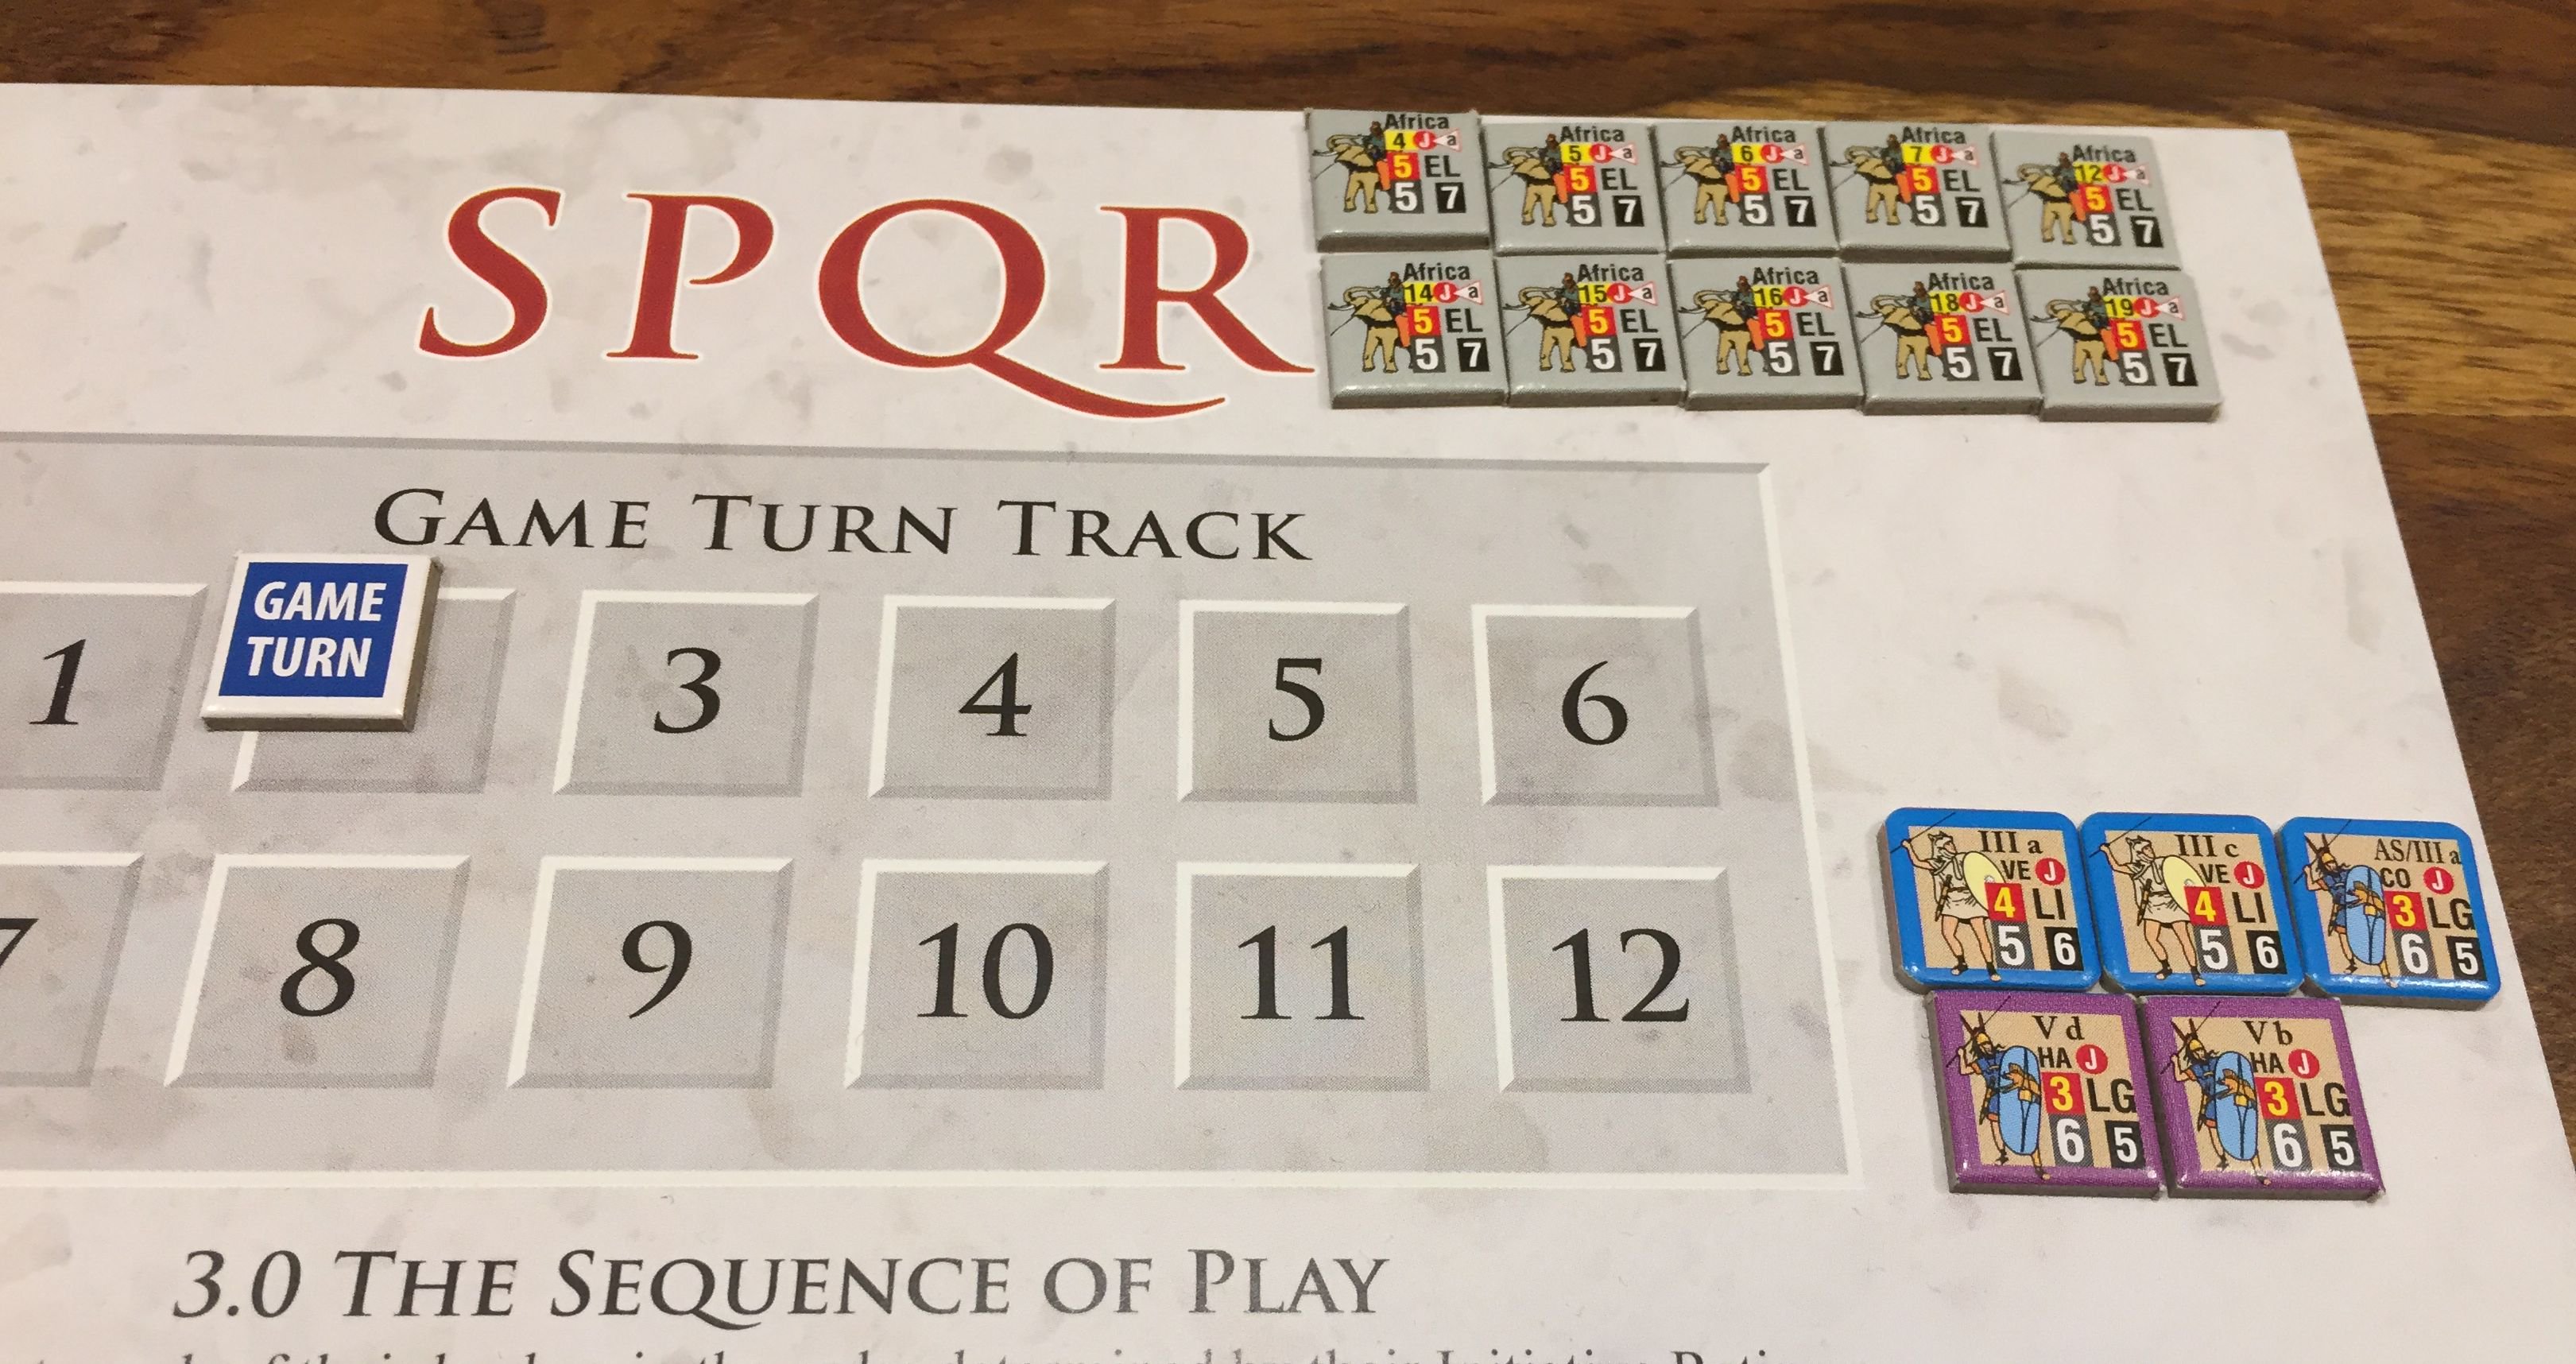
The initial deployment of the forces. Lack of Roman cavalry is clearly visible (click the picture to enlarge)Legio III prepared specially for the battle – the only unit fully clipped! (click the picture to enlarge)
TURN 1
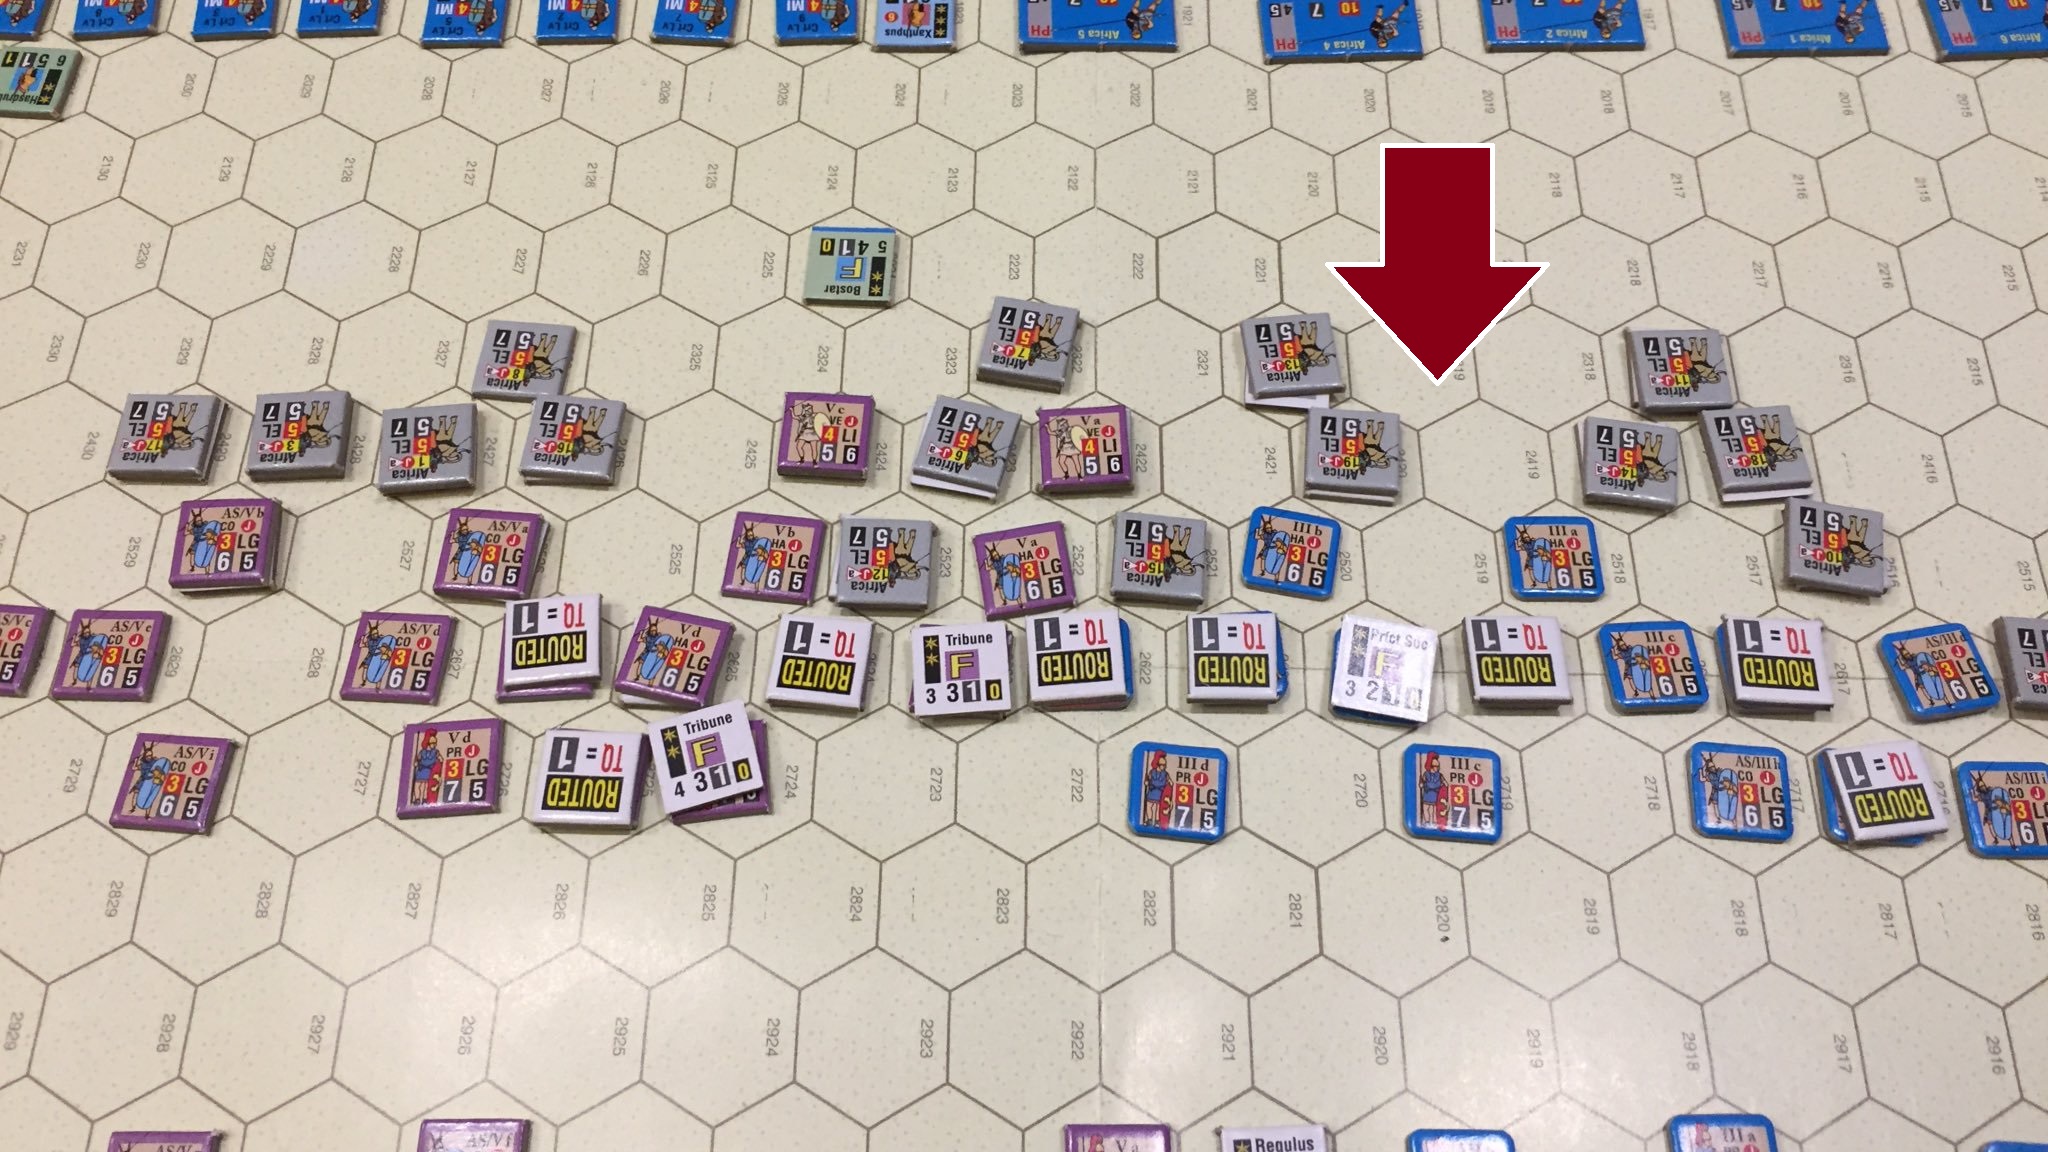
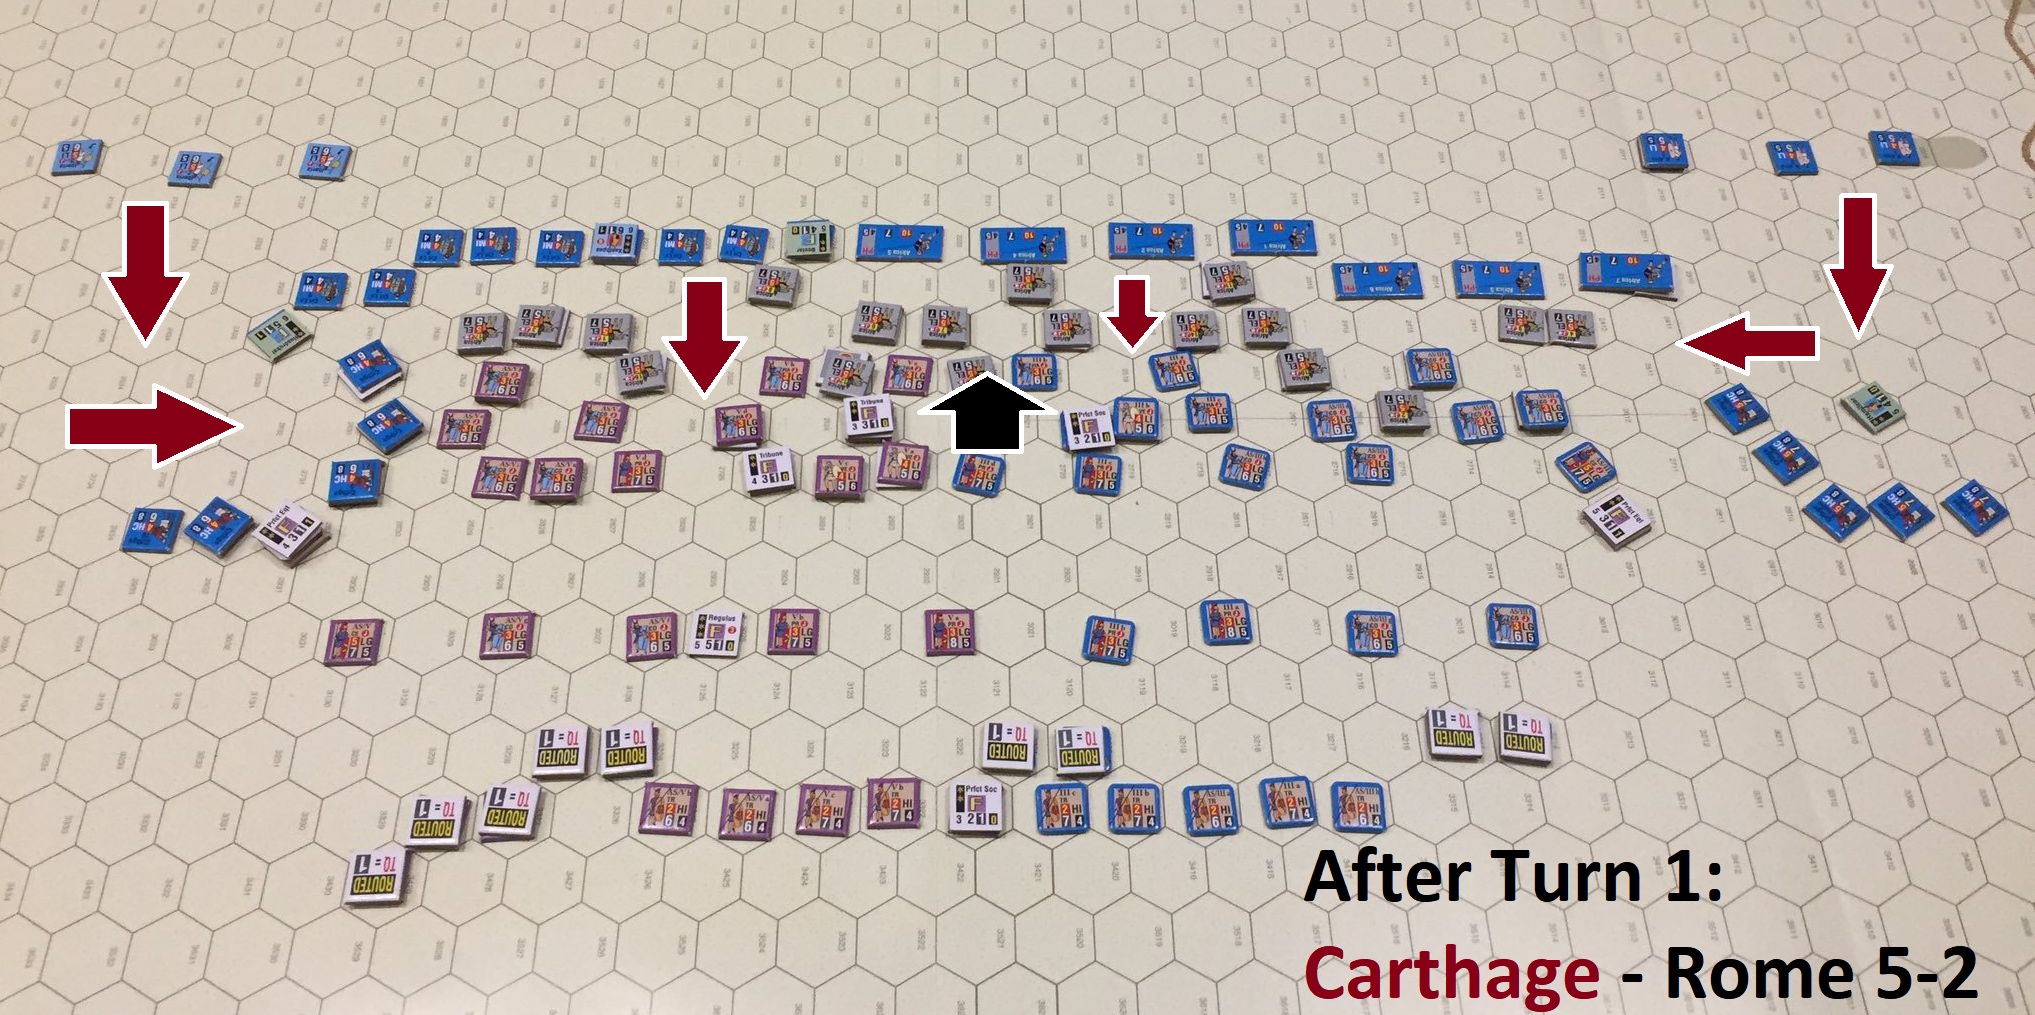
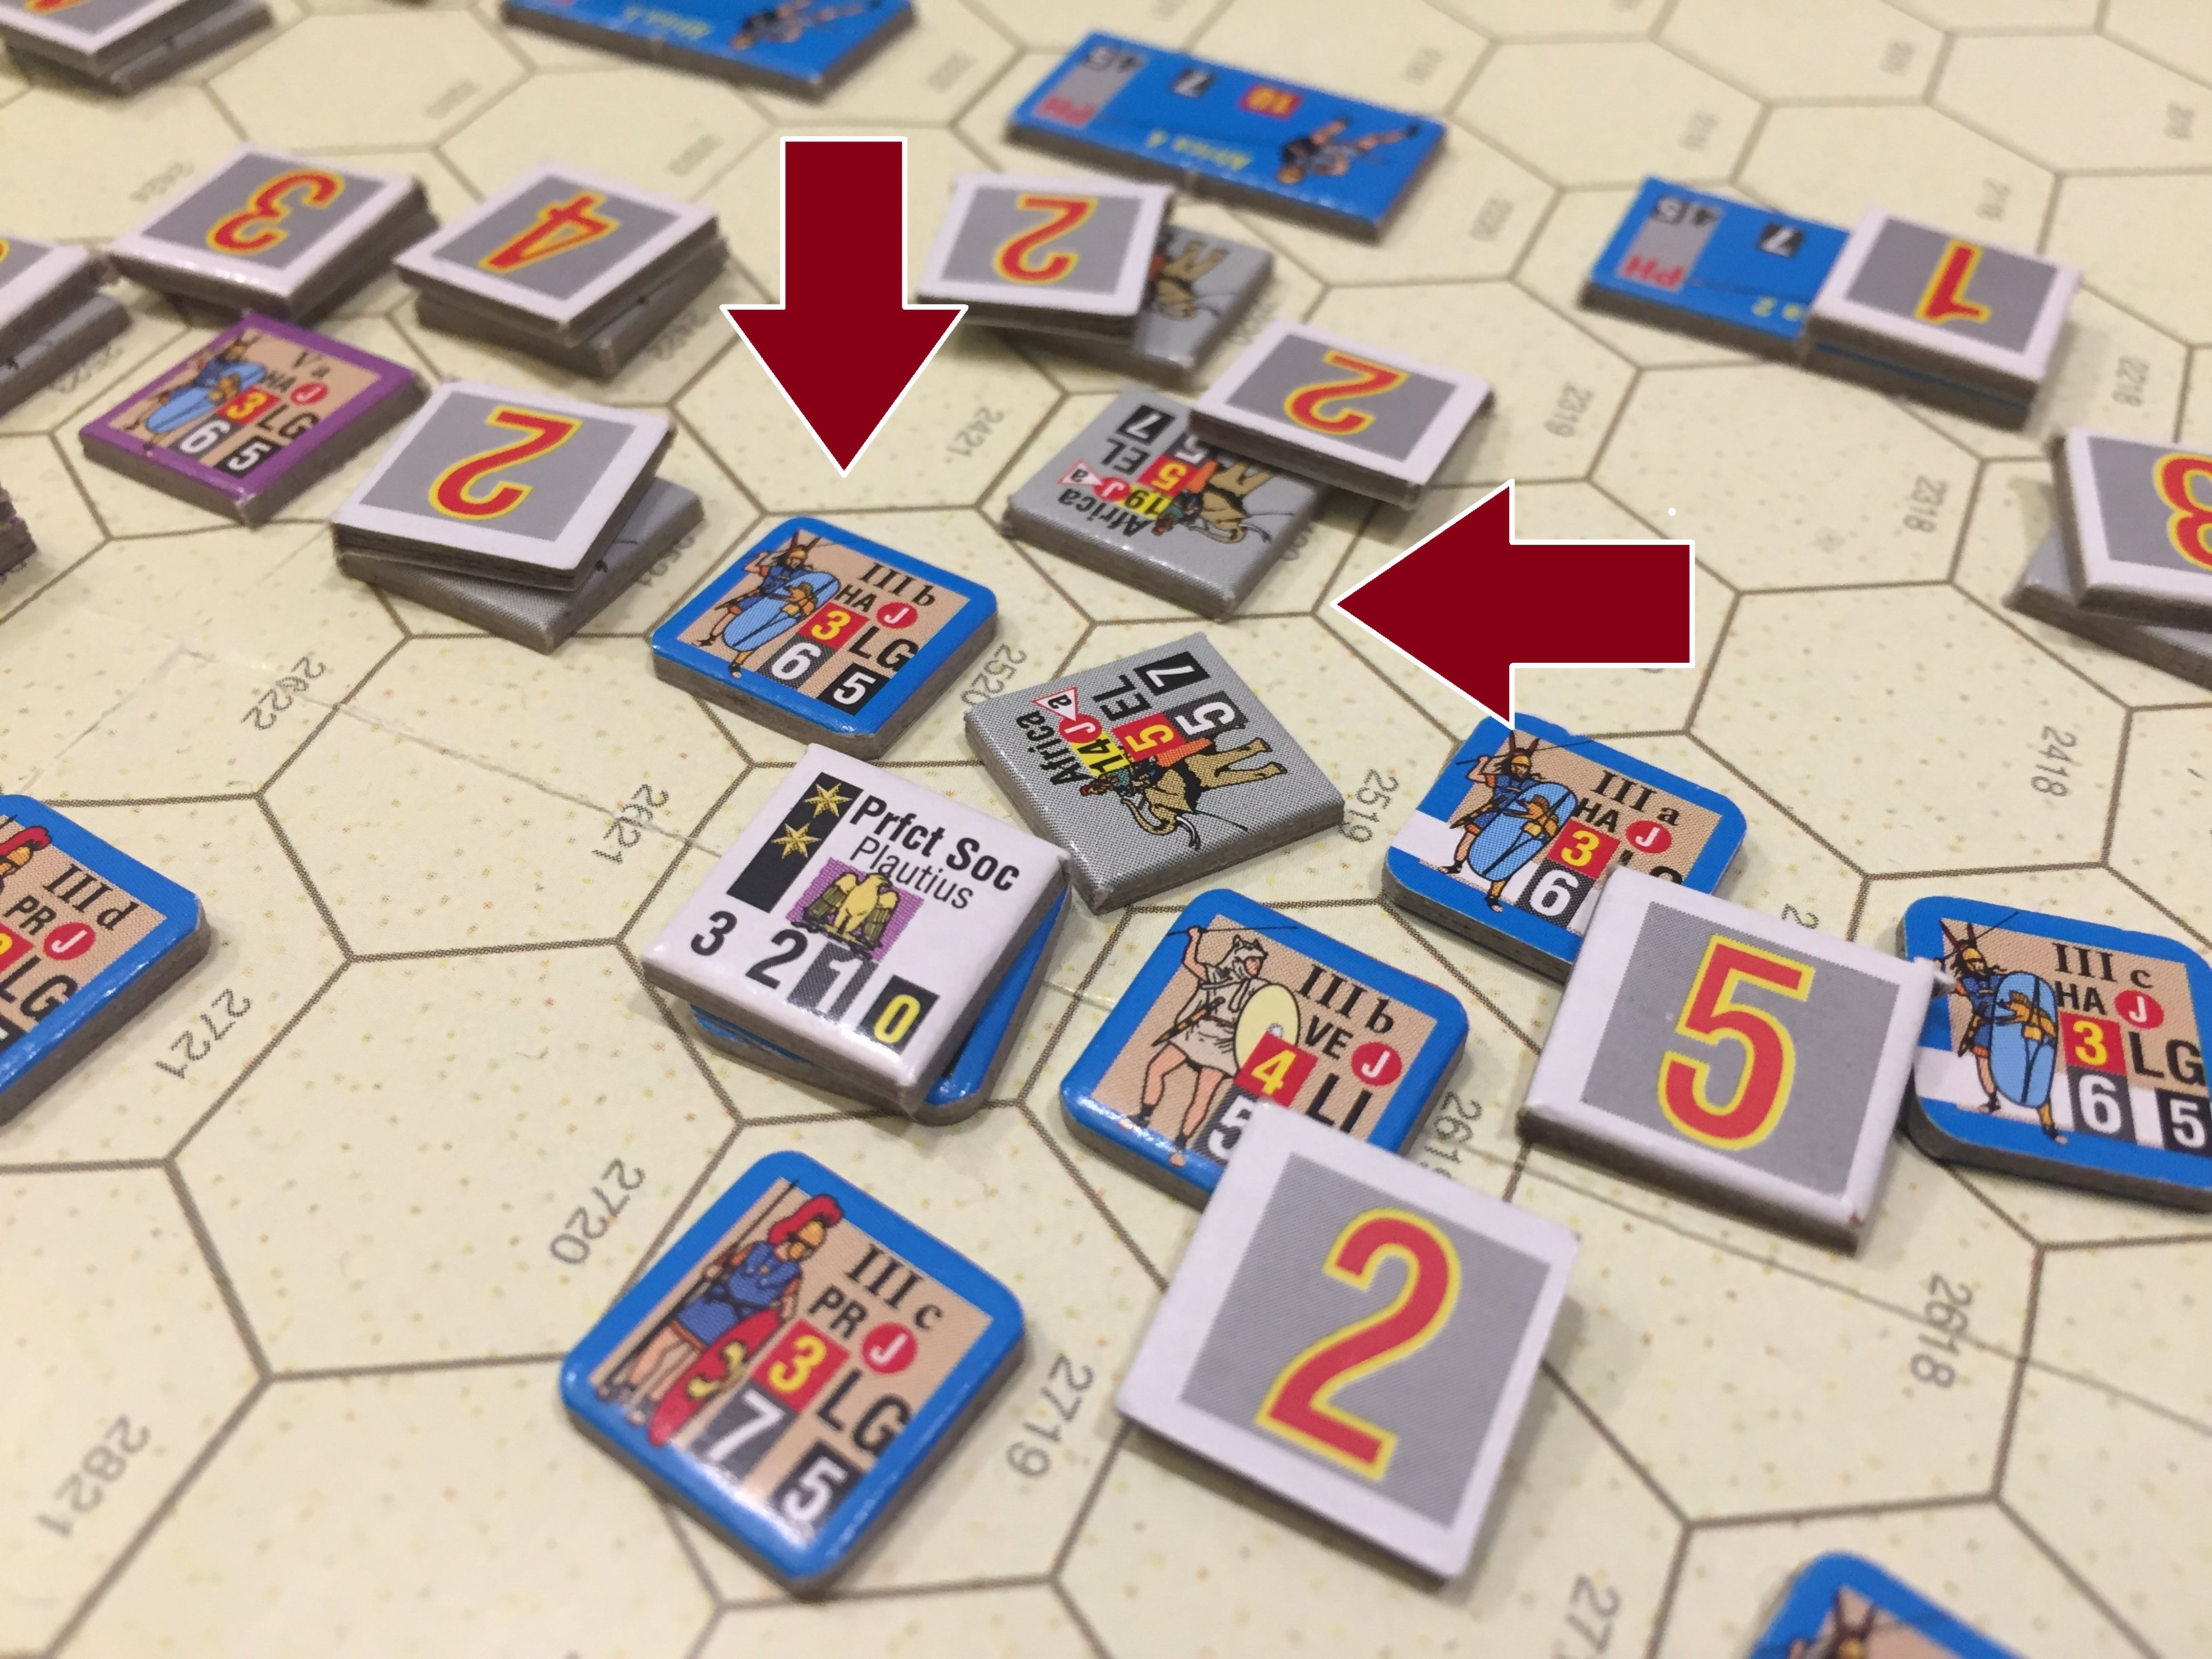
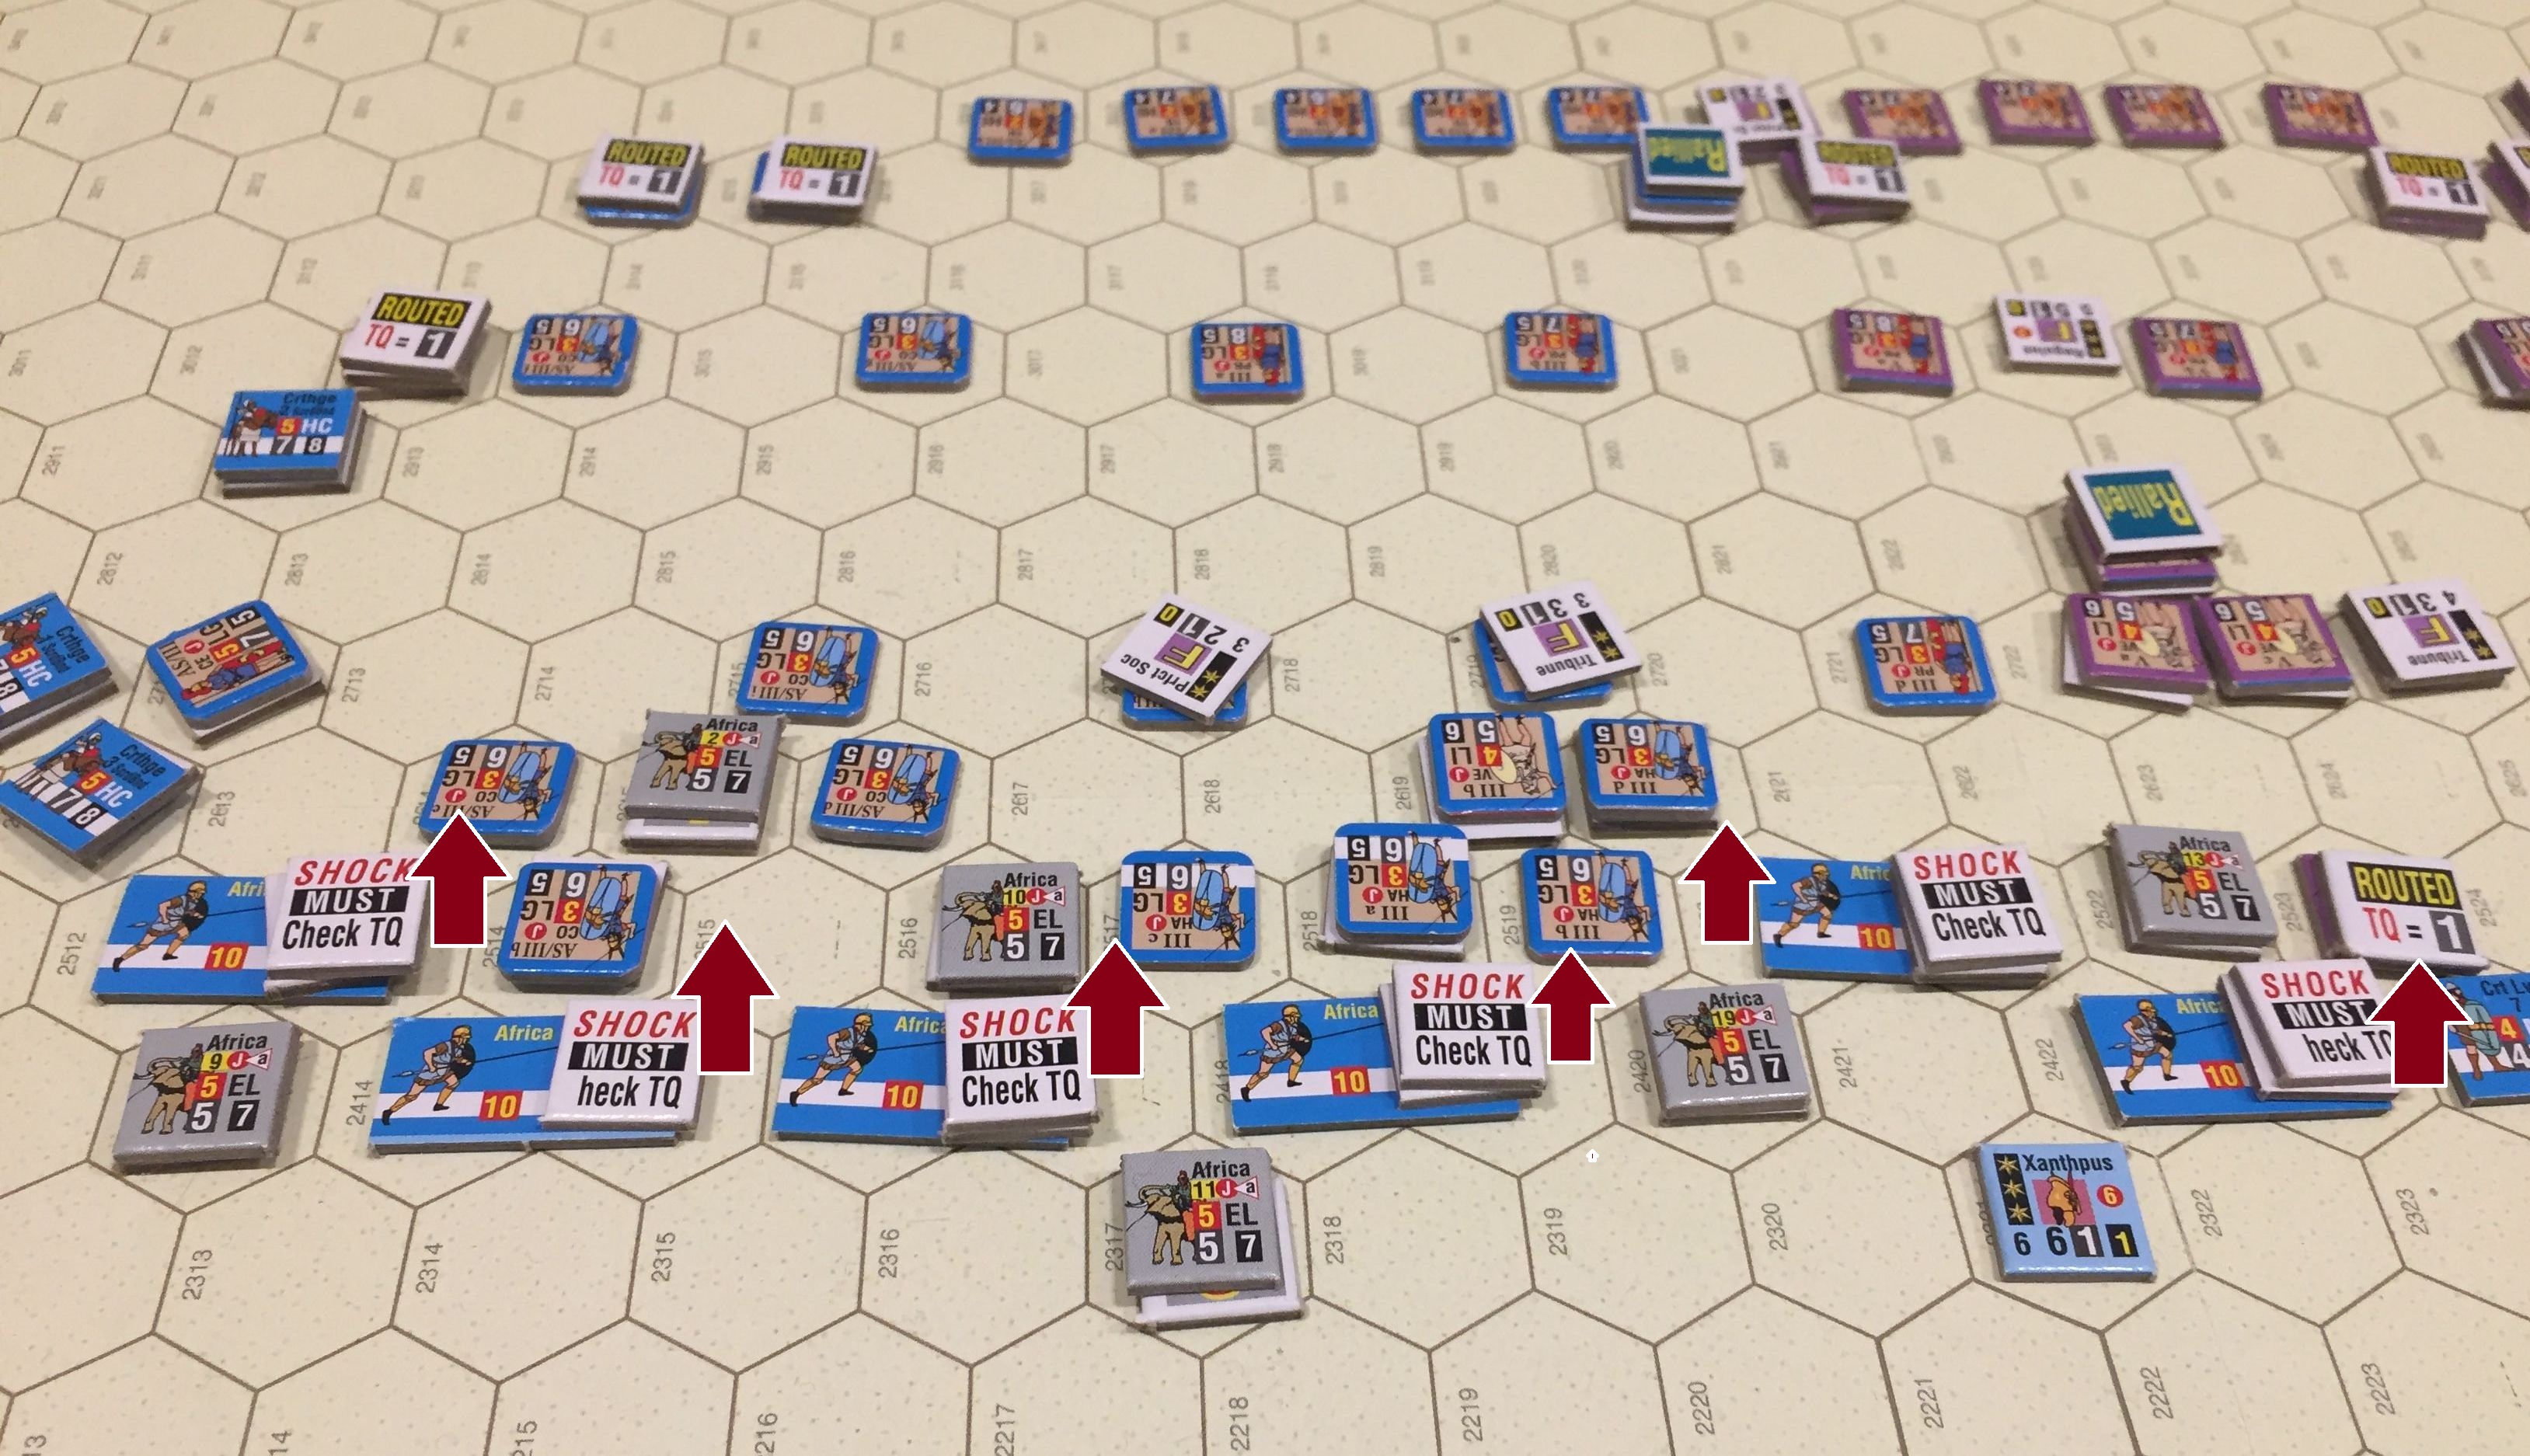
Velites try skirmishing in the center but are repelled by the Elephant Screens and other range weapons (click the picture to enlarge)Then the Elephants charge and even with pass-through, many Romans are routed (click the picture to enlarge)Troops movements in the first turn – Elephants tied up the center, while Punic cavalry started encirclement maneuver (click the picture to enlarge)Causalities after Turn 1 (click the picture to enlarge)
TURN 2
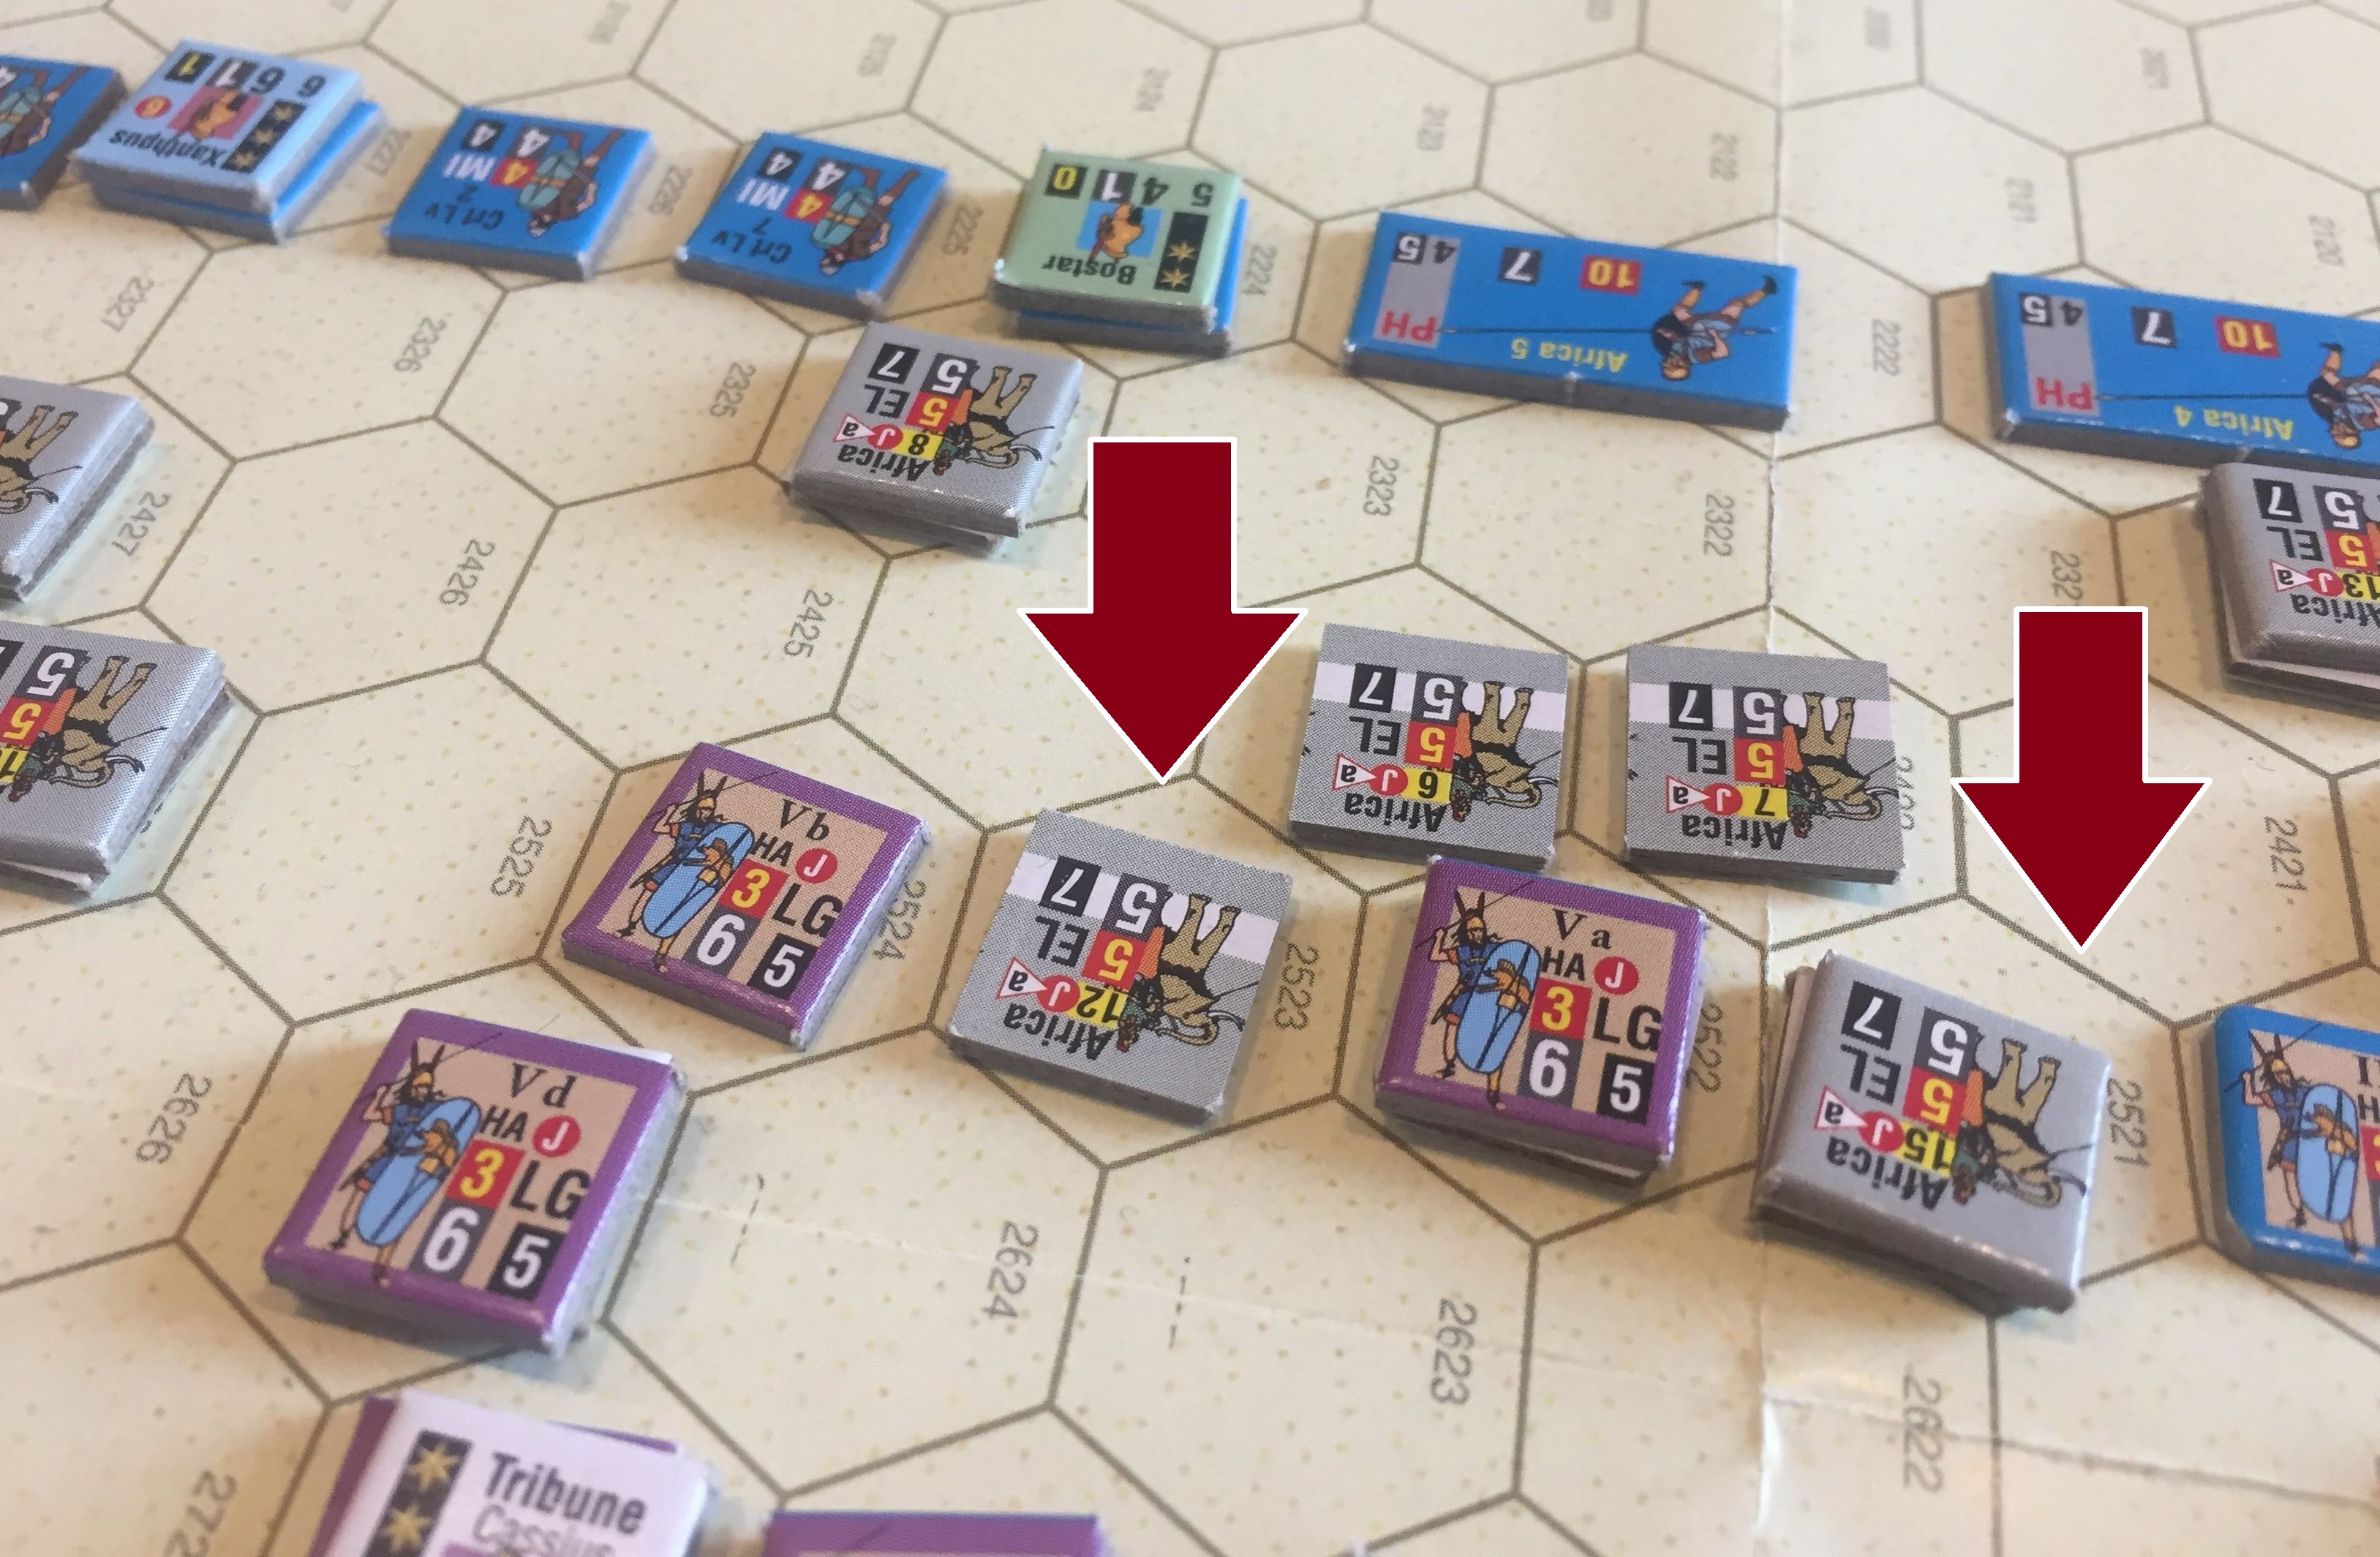
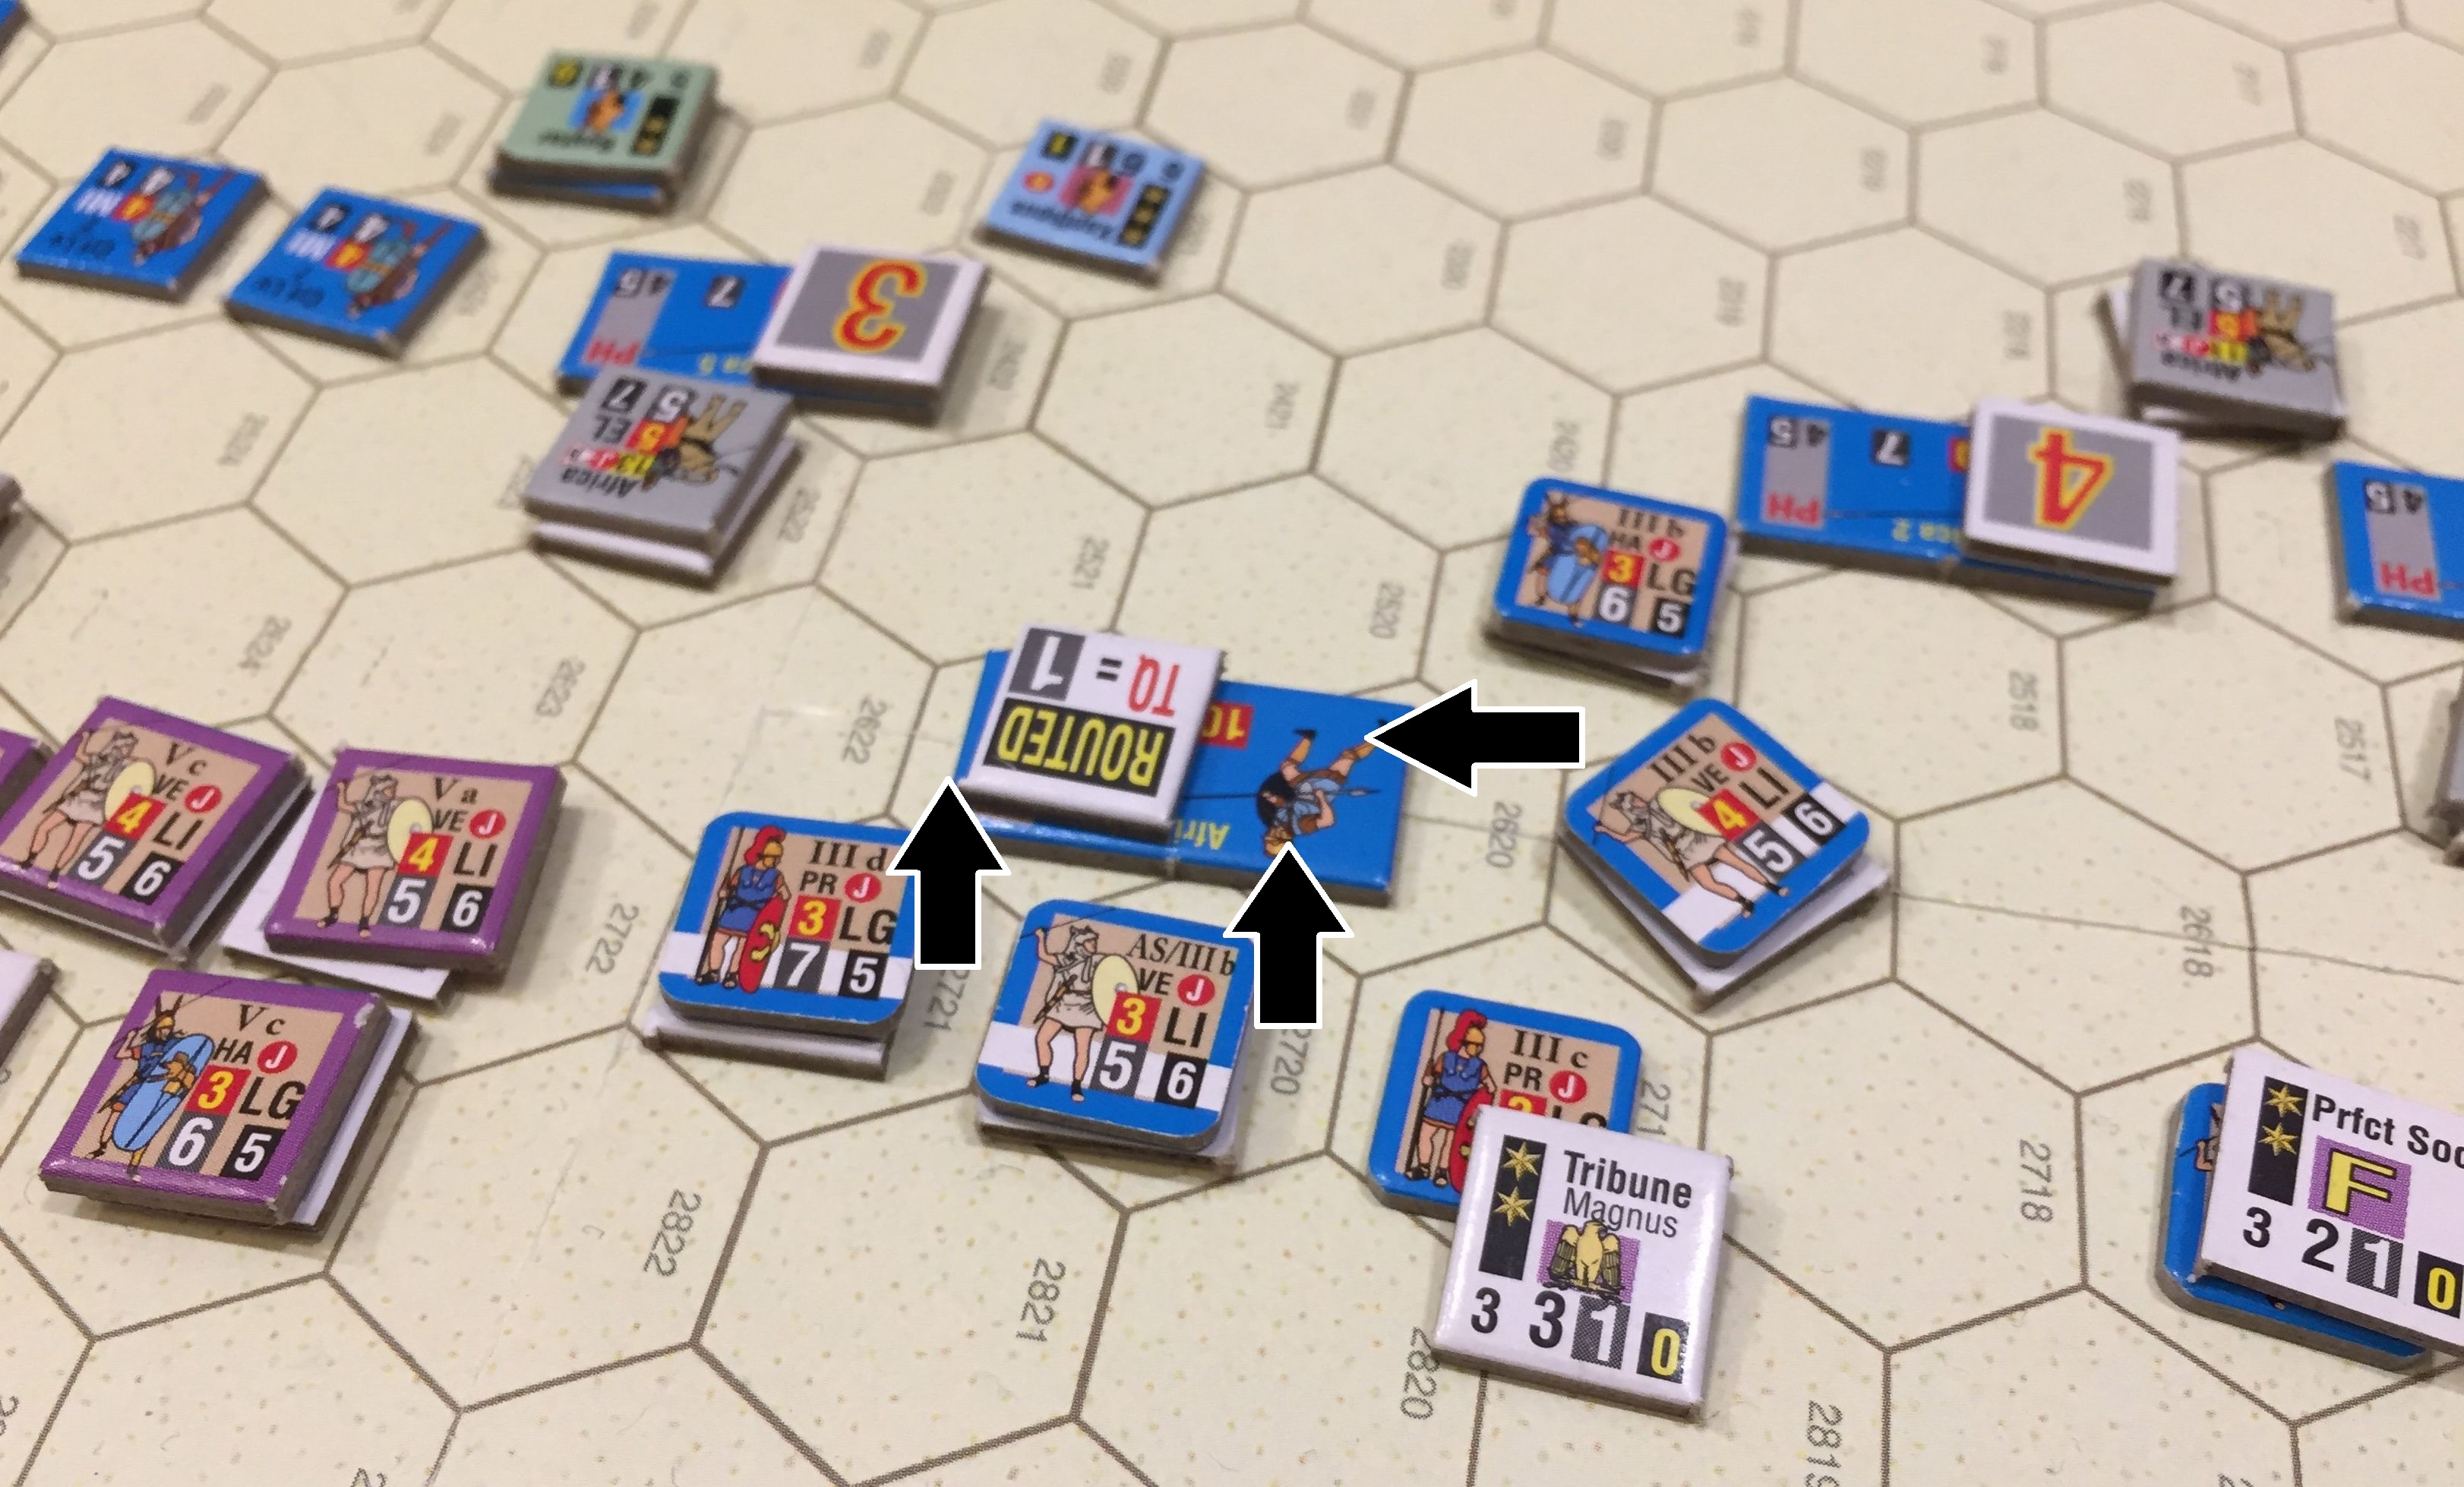
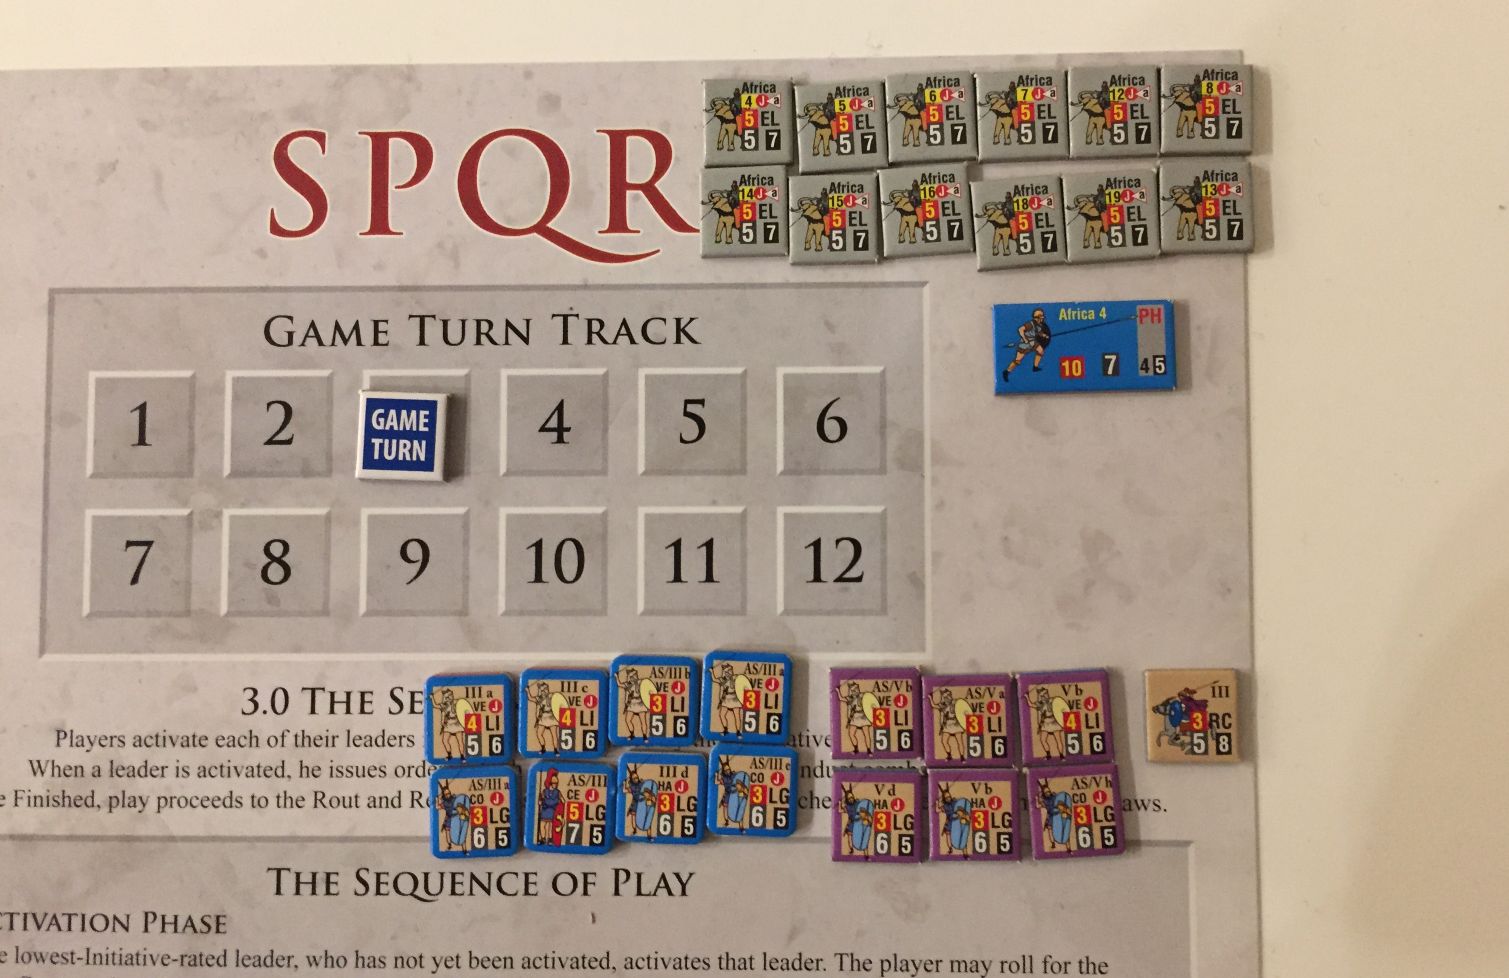
Elephants continue wrecking havoc in the center and Prefect Plautius barely escapes! (click the picture to enlarge)Another charge by the beasts but many of them will be routed and their unpredictable rout will damage both sides to great extent! (click the picture to enlarge)The left-wing Punic cavalry strikes! (click the picture to enlarge)In the end, Phalanx move on to attack! (click the picture to enlarge)Main actions of the second turn – in Rout Points the situation is balanced but there is already 14 routed Romans on board. Triari still not activated (those rigid Roman doctrines!) (click the picture to enlarge)Causalities after Turn 2 – elephants, as powerful as they are, die quickly on the battlefield (click the picture to enlarge)
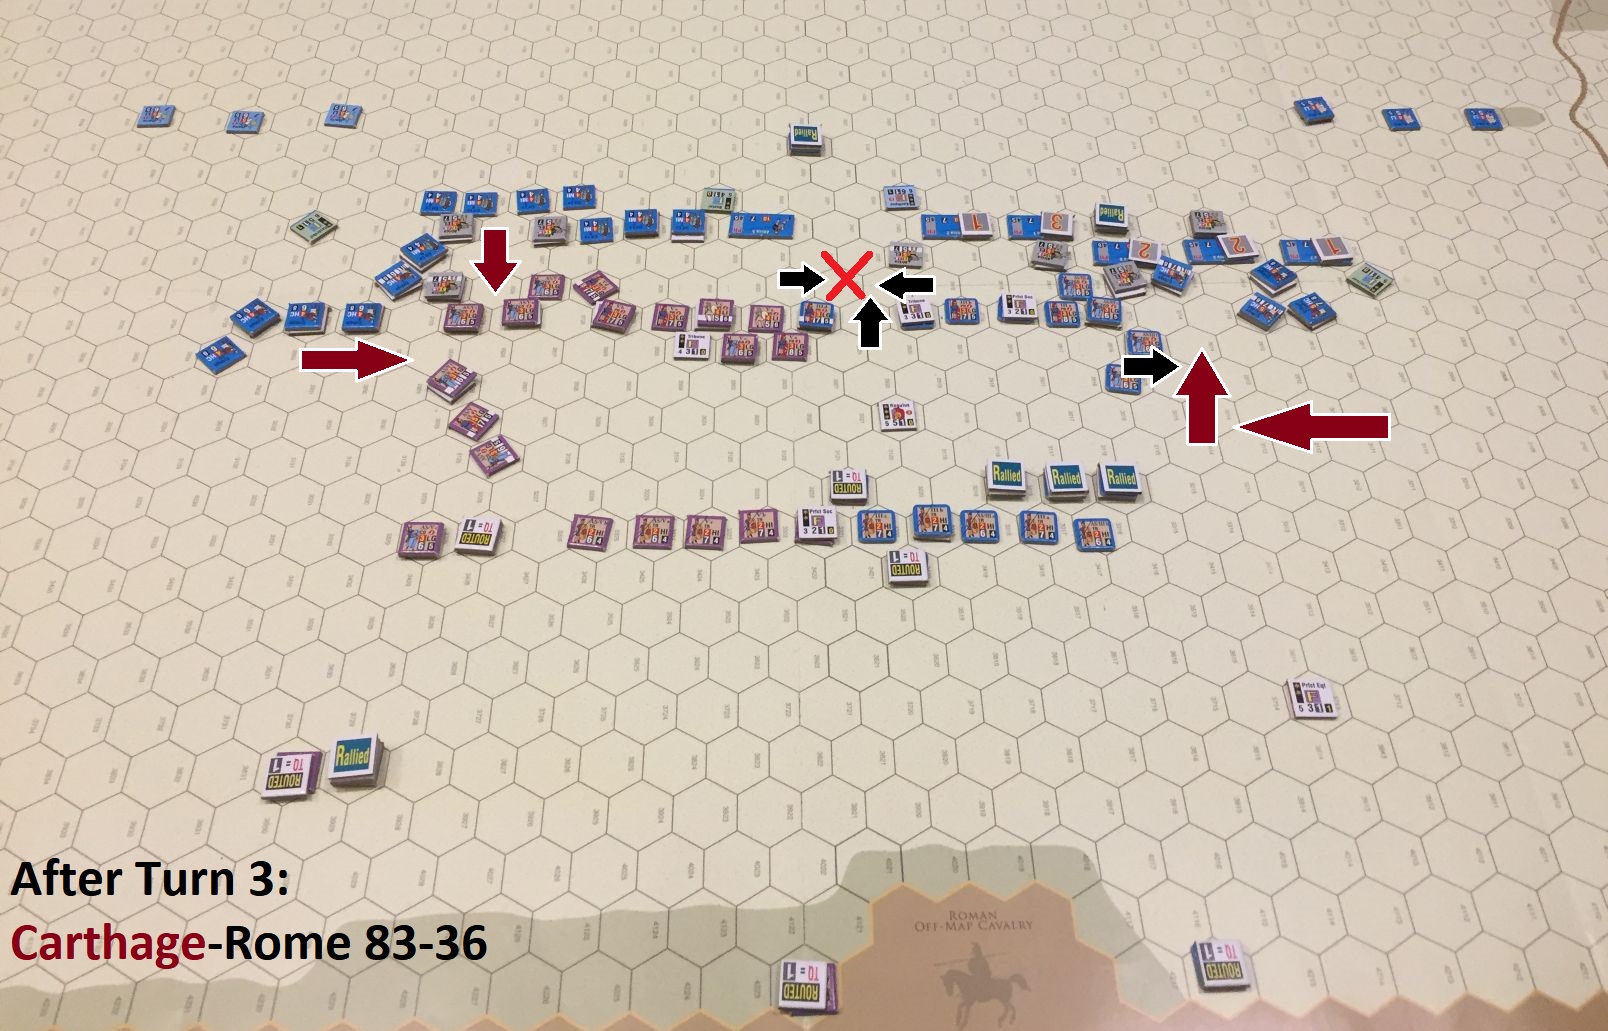
TURN 3
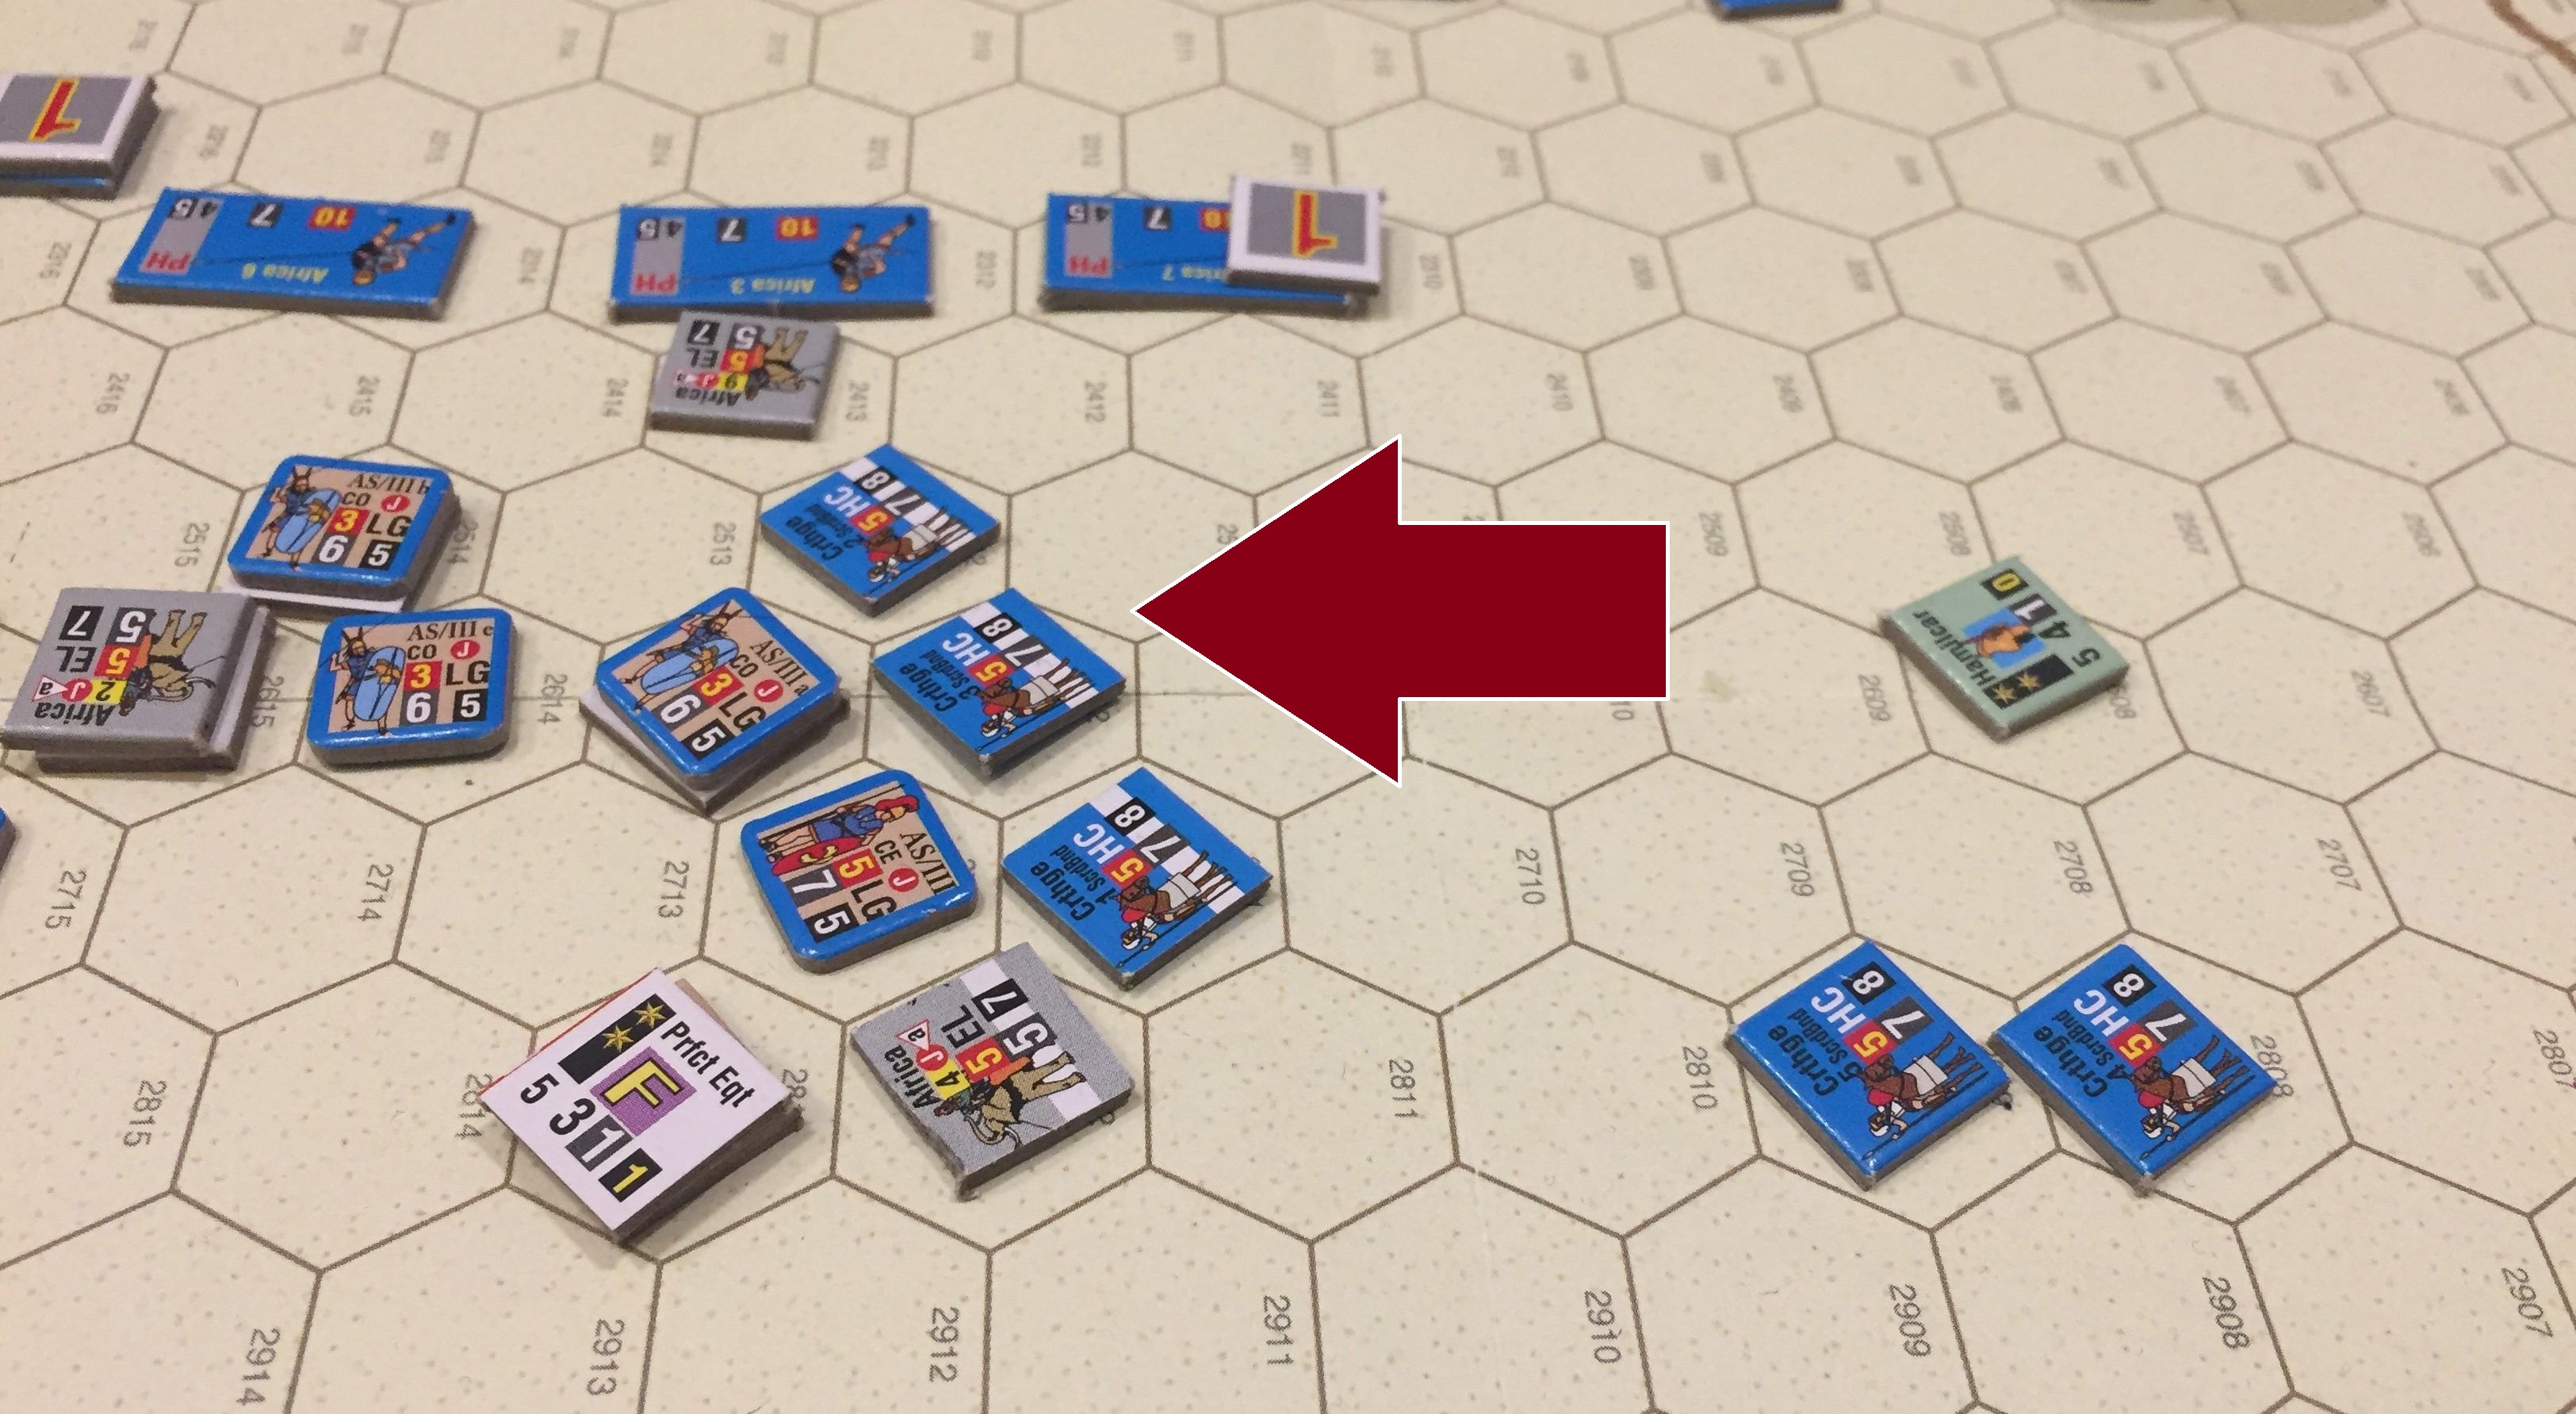
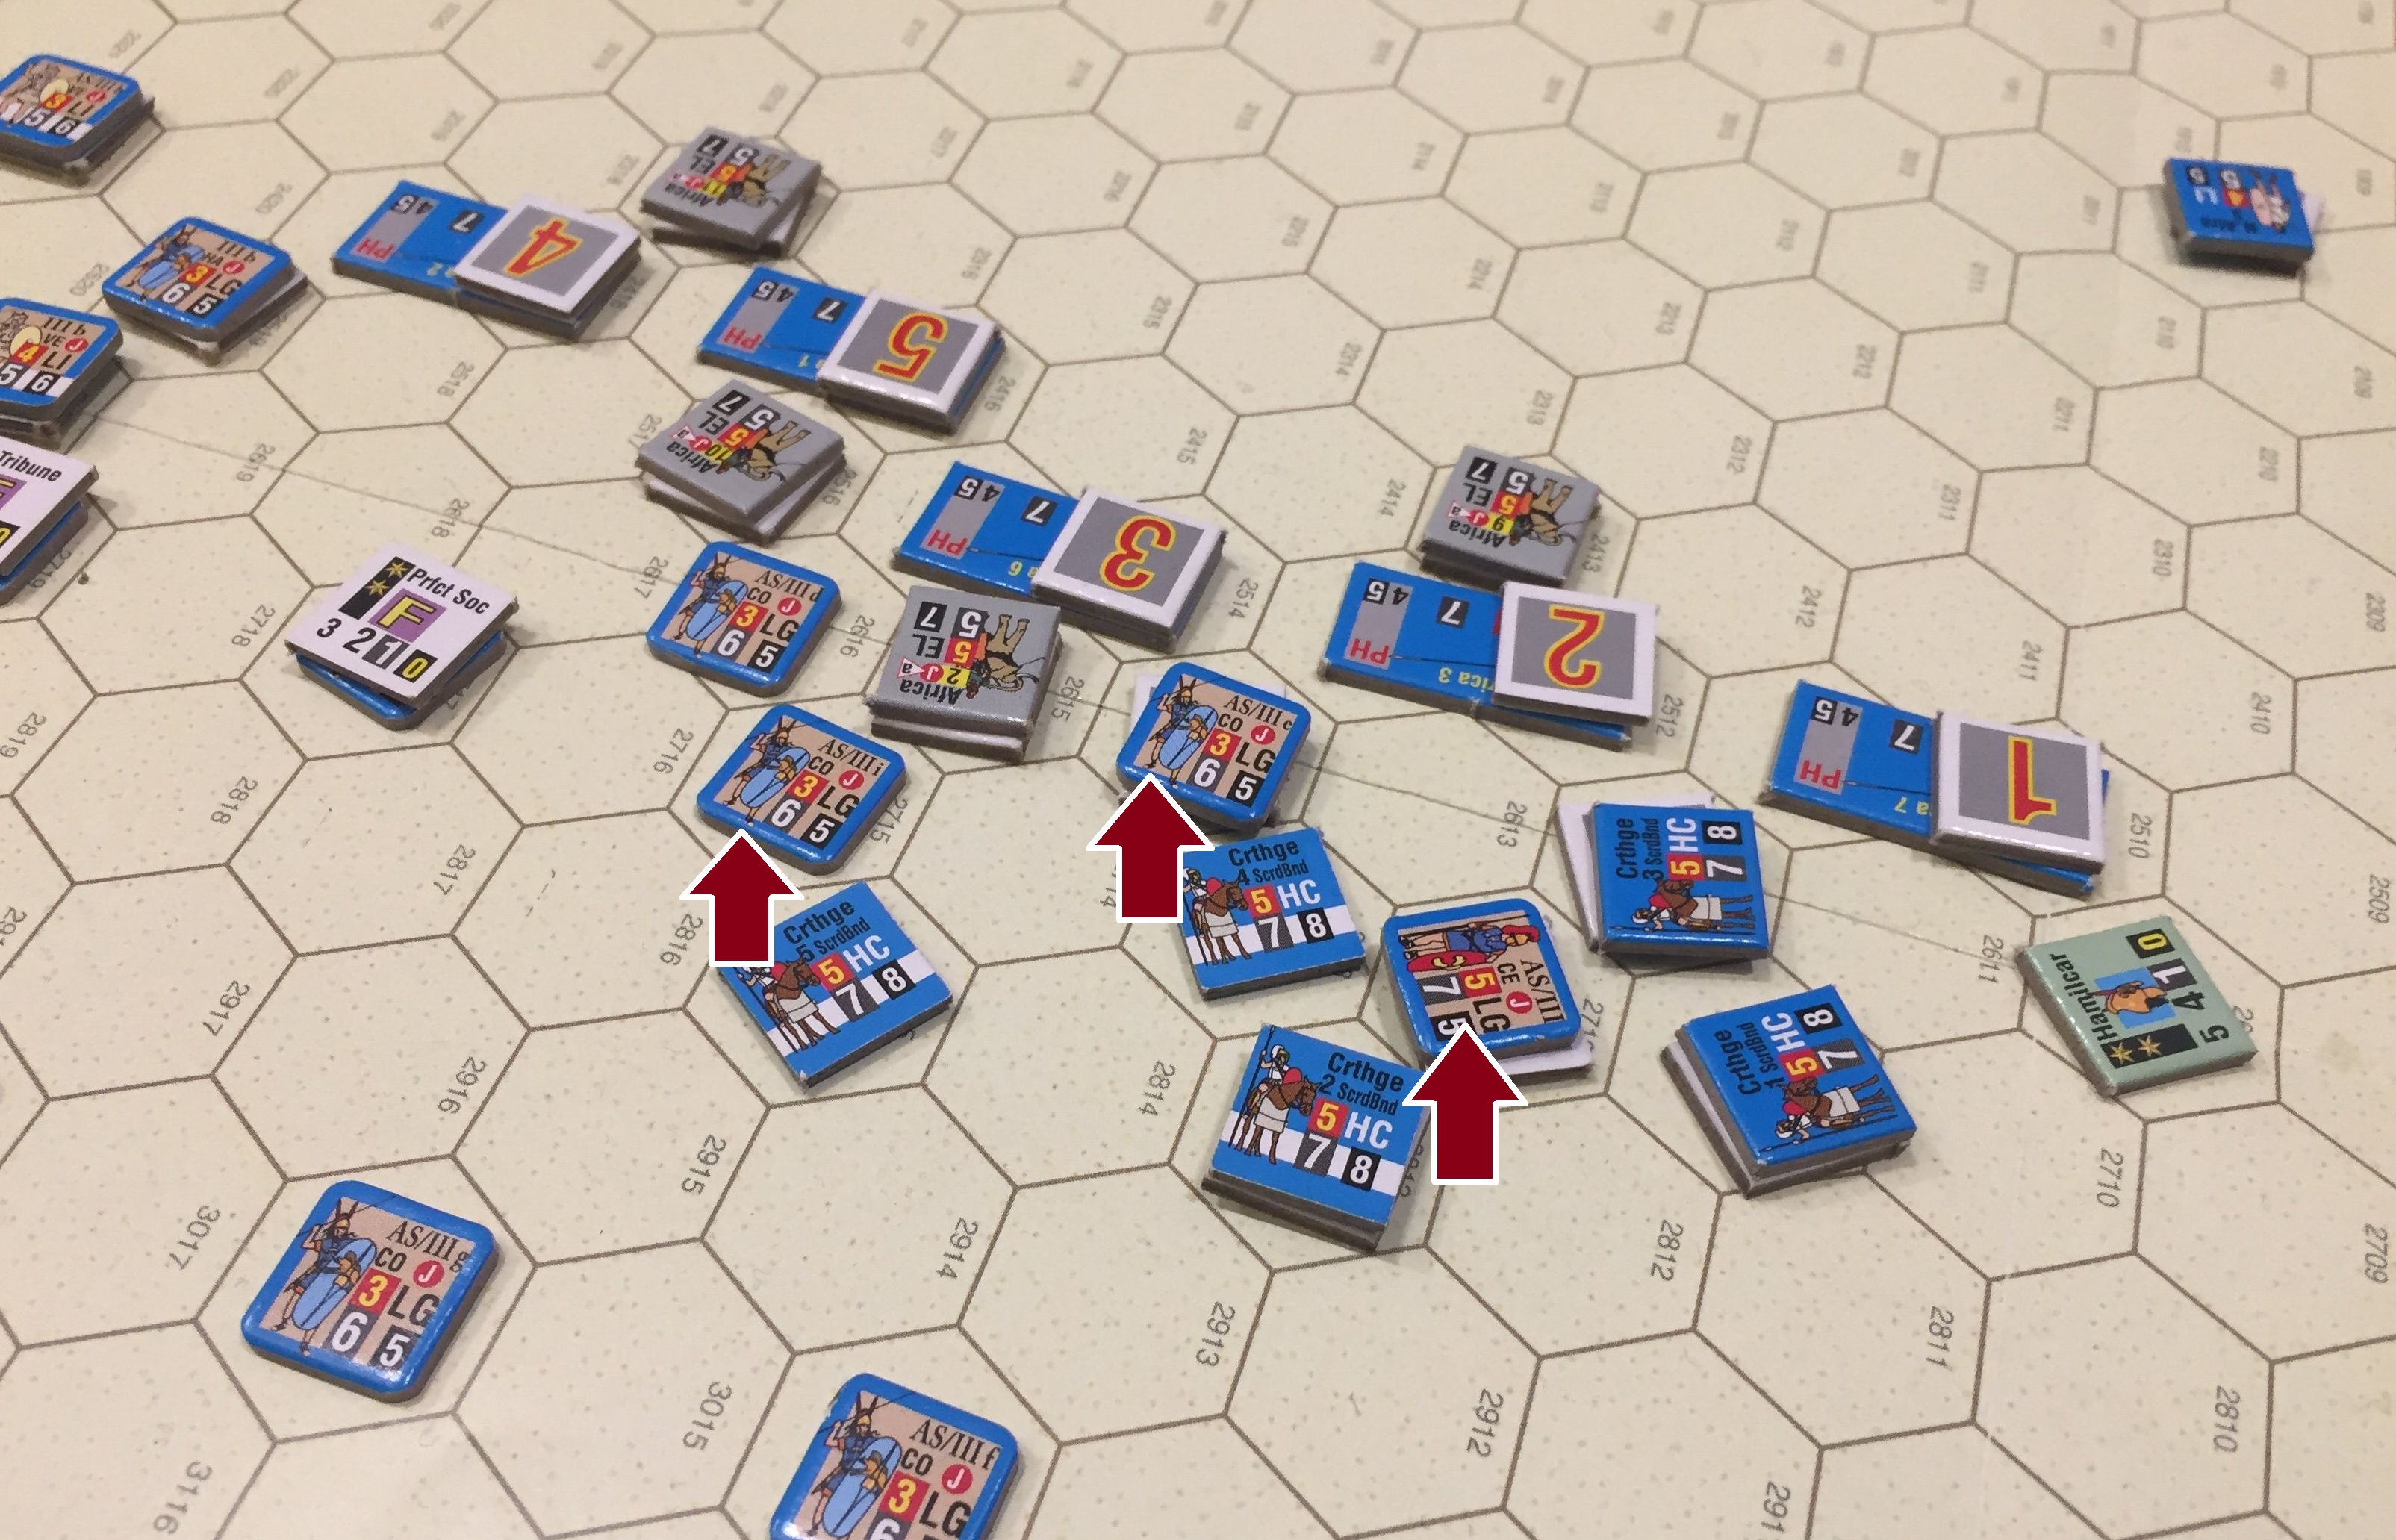
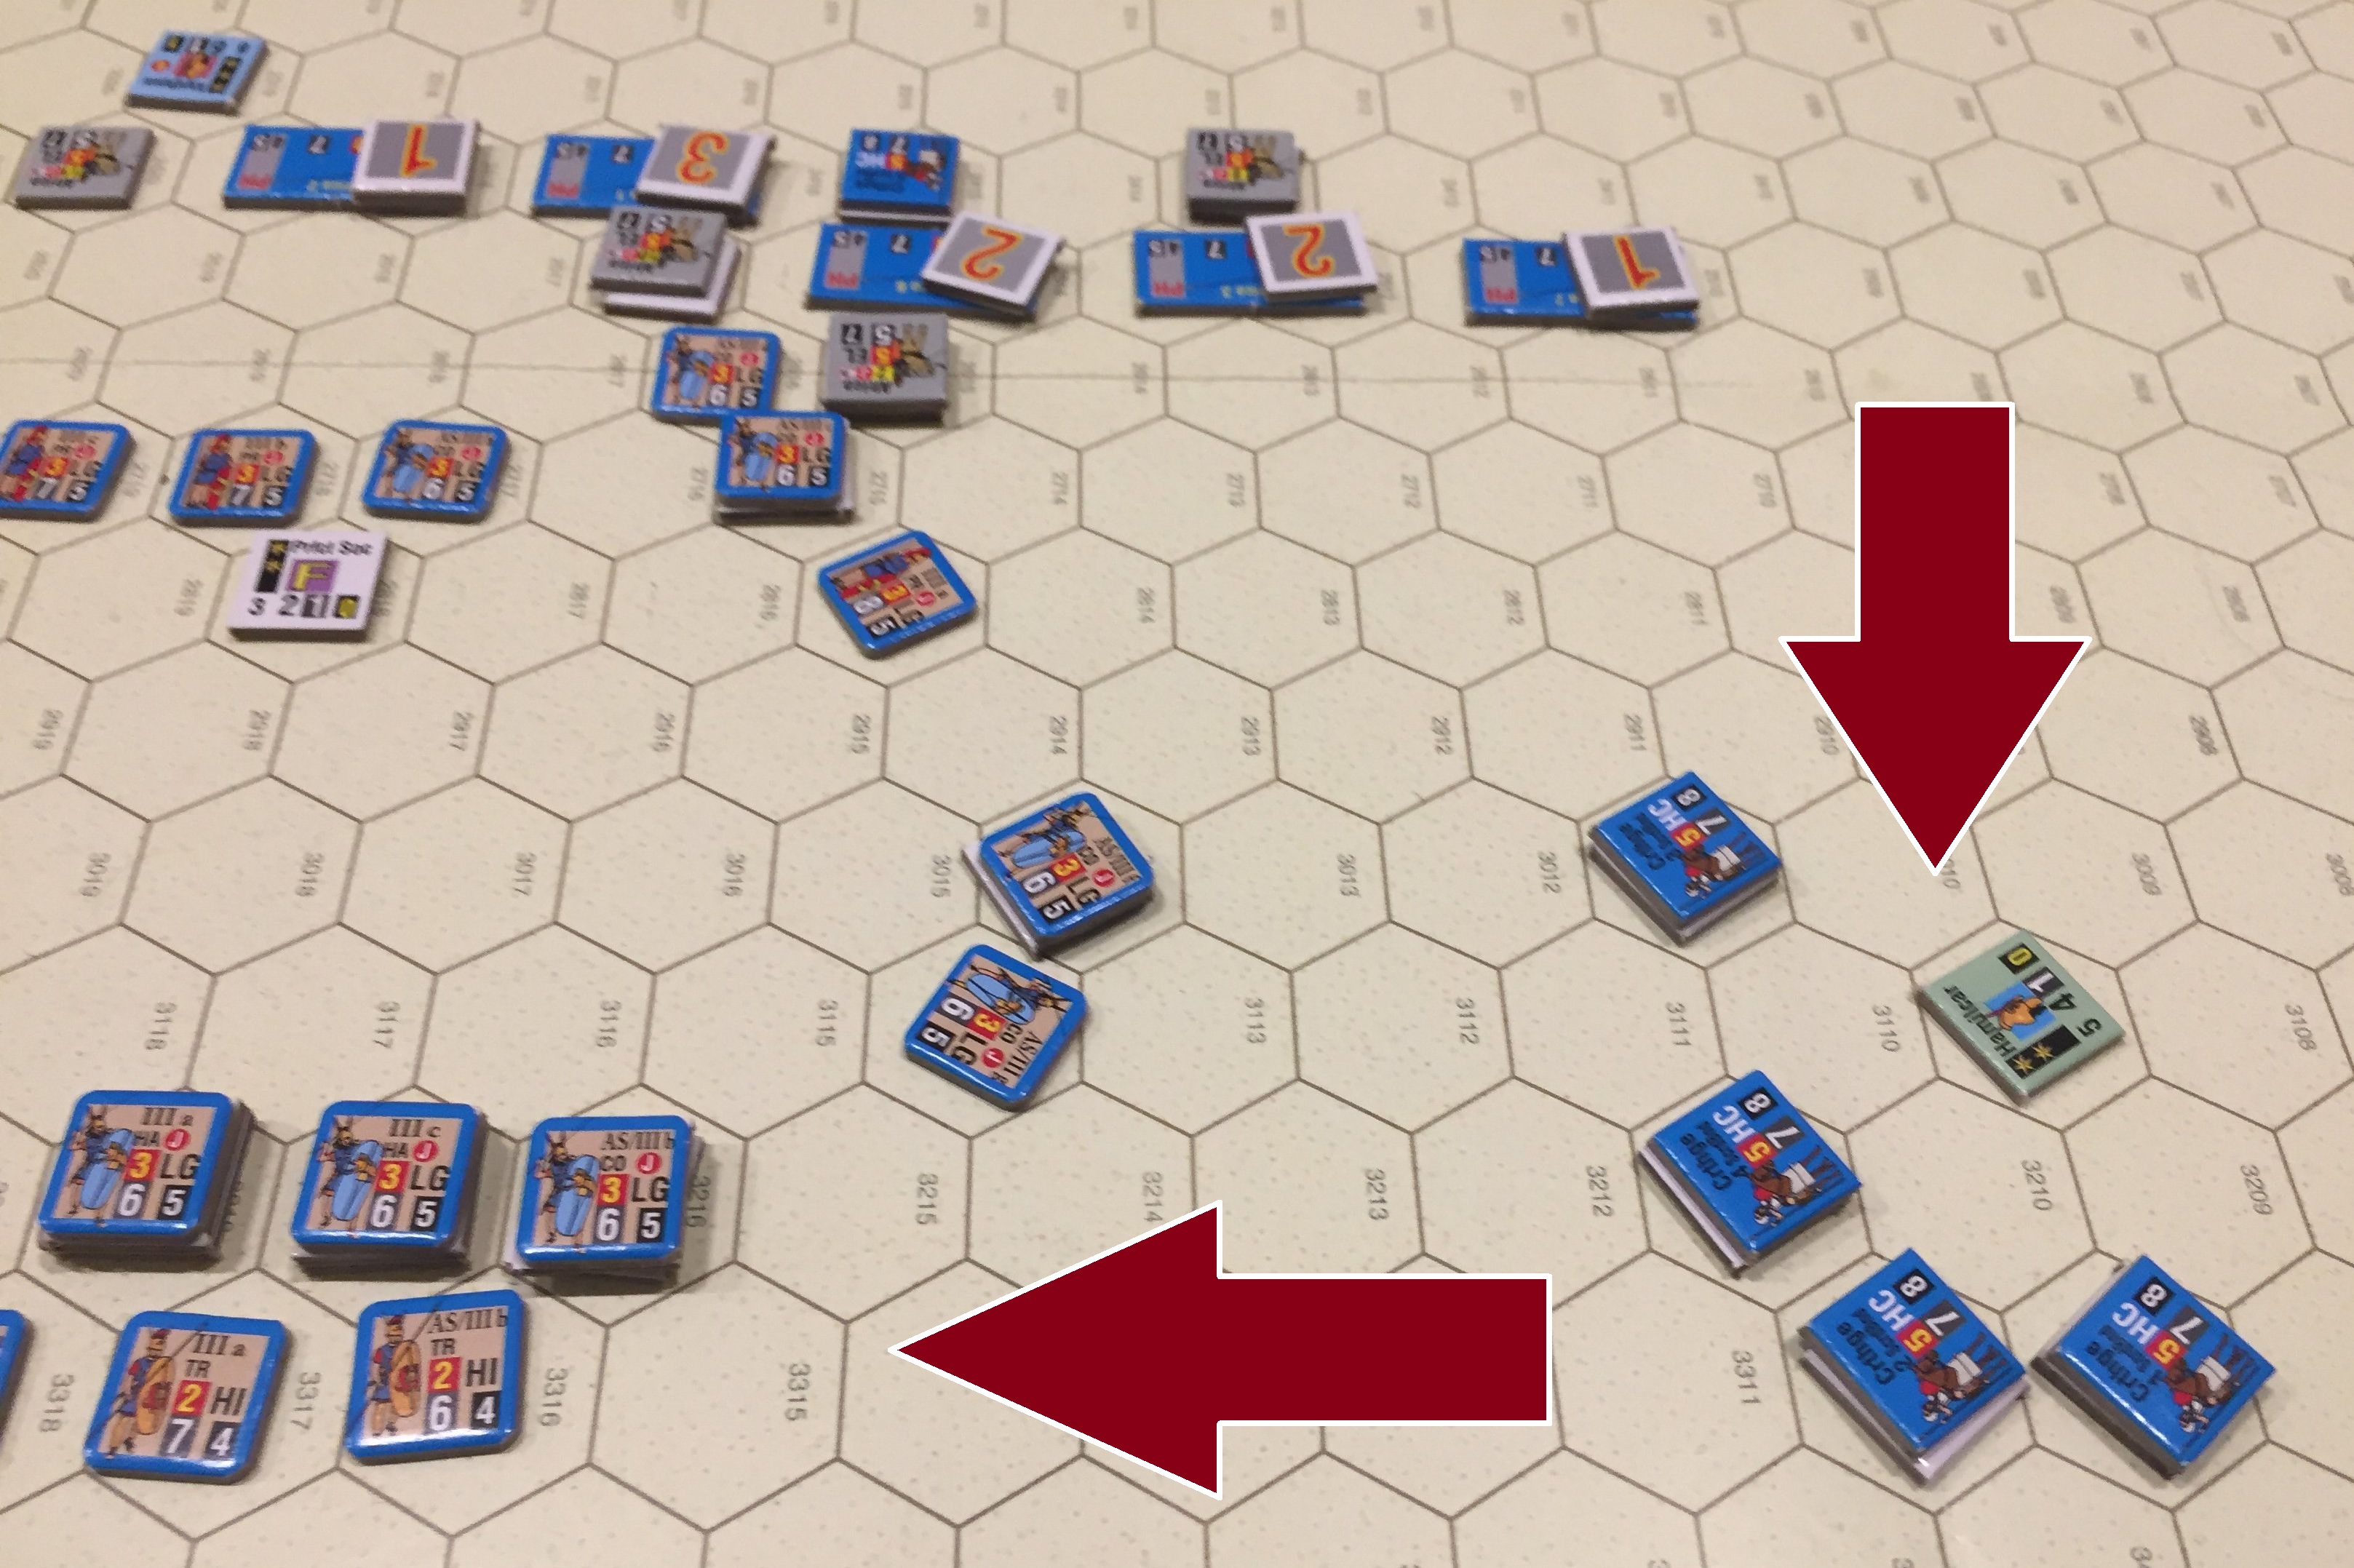
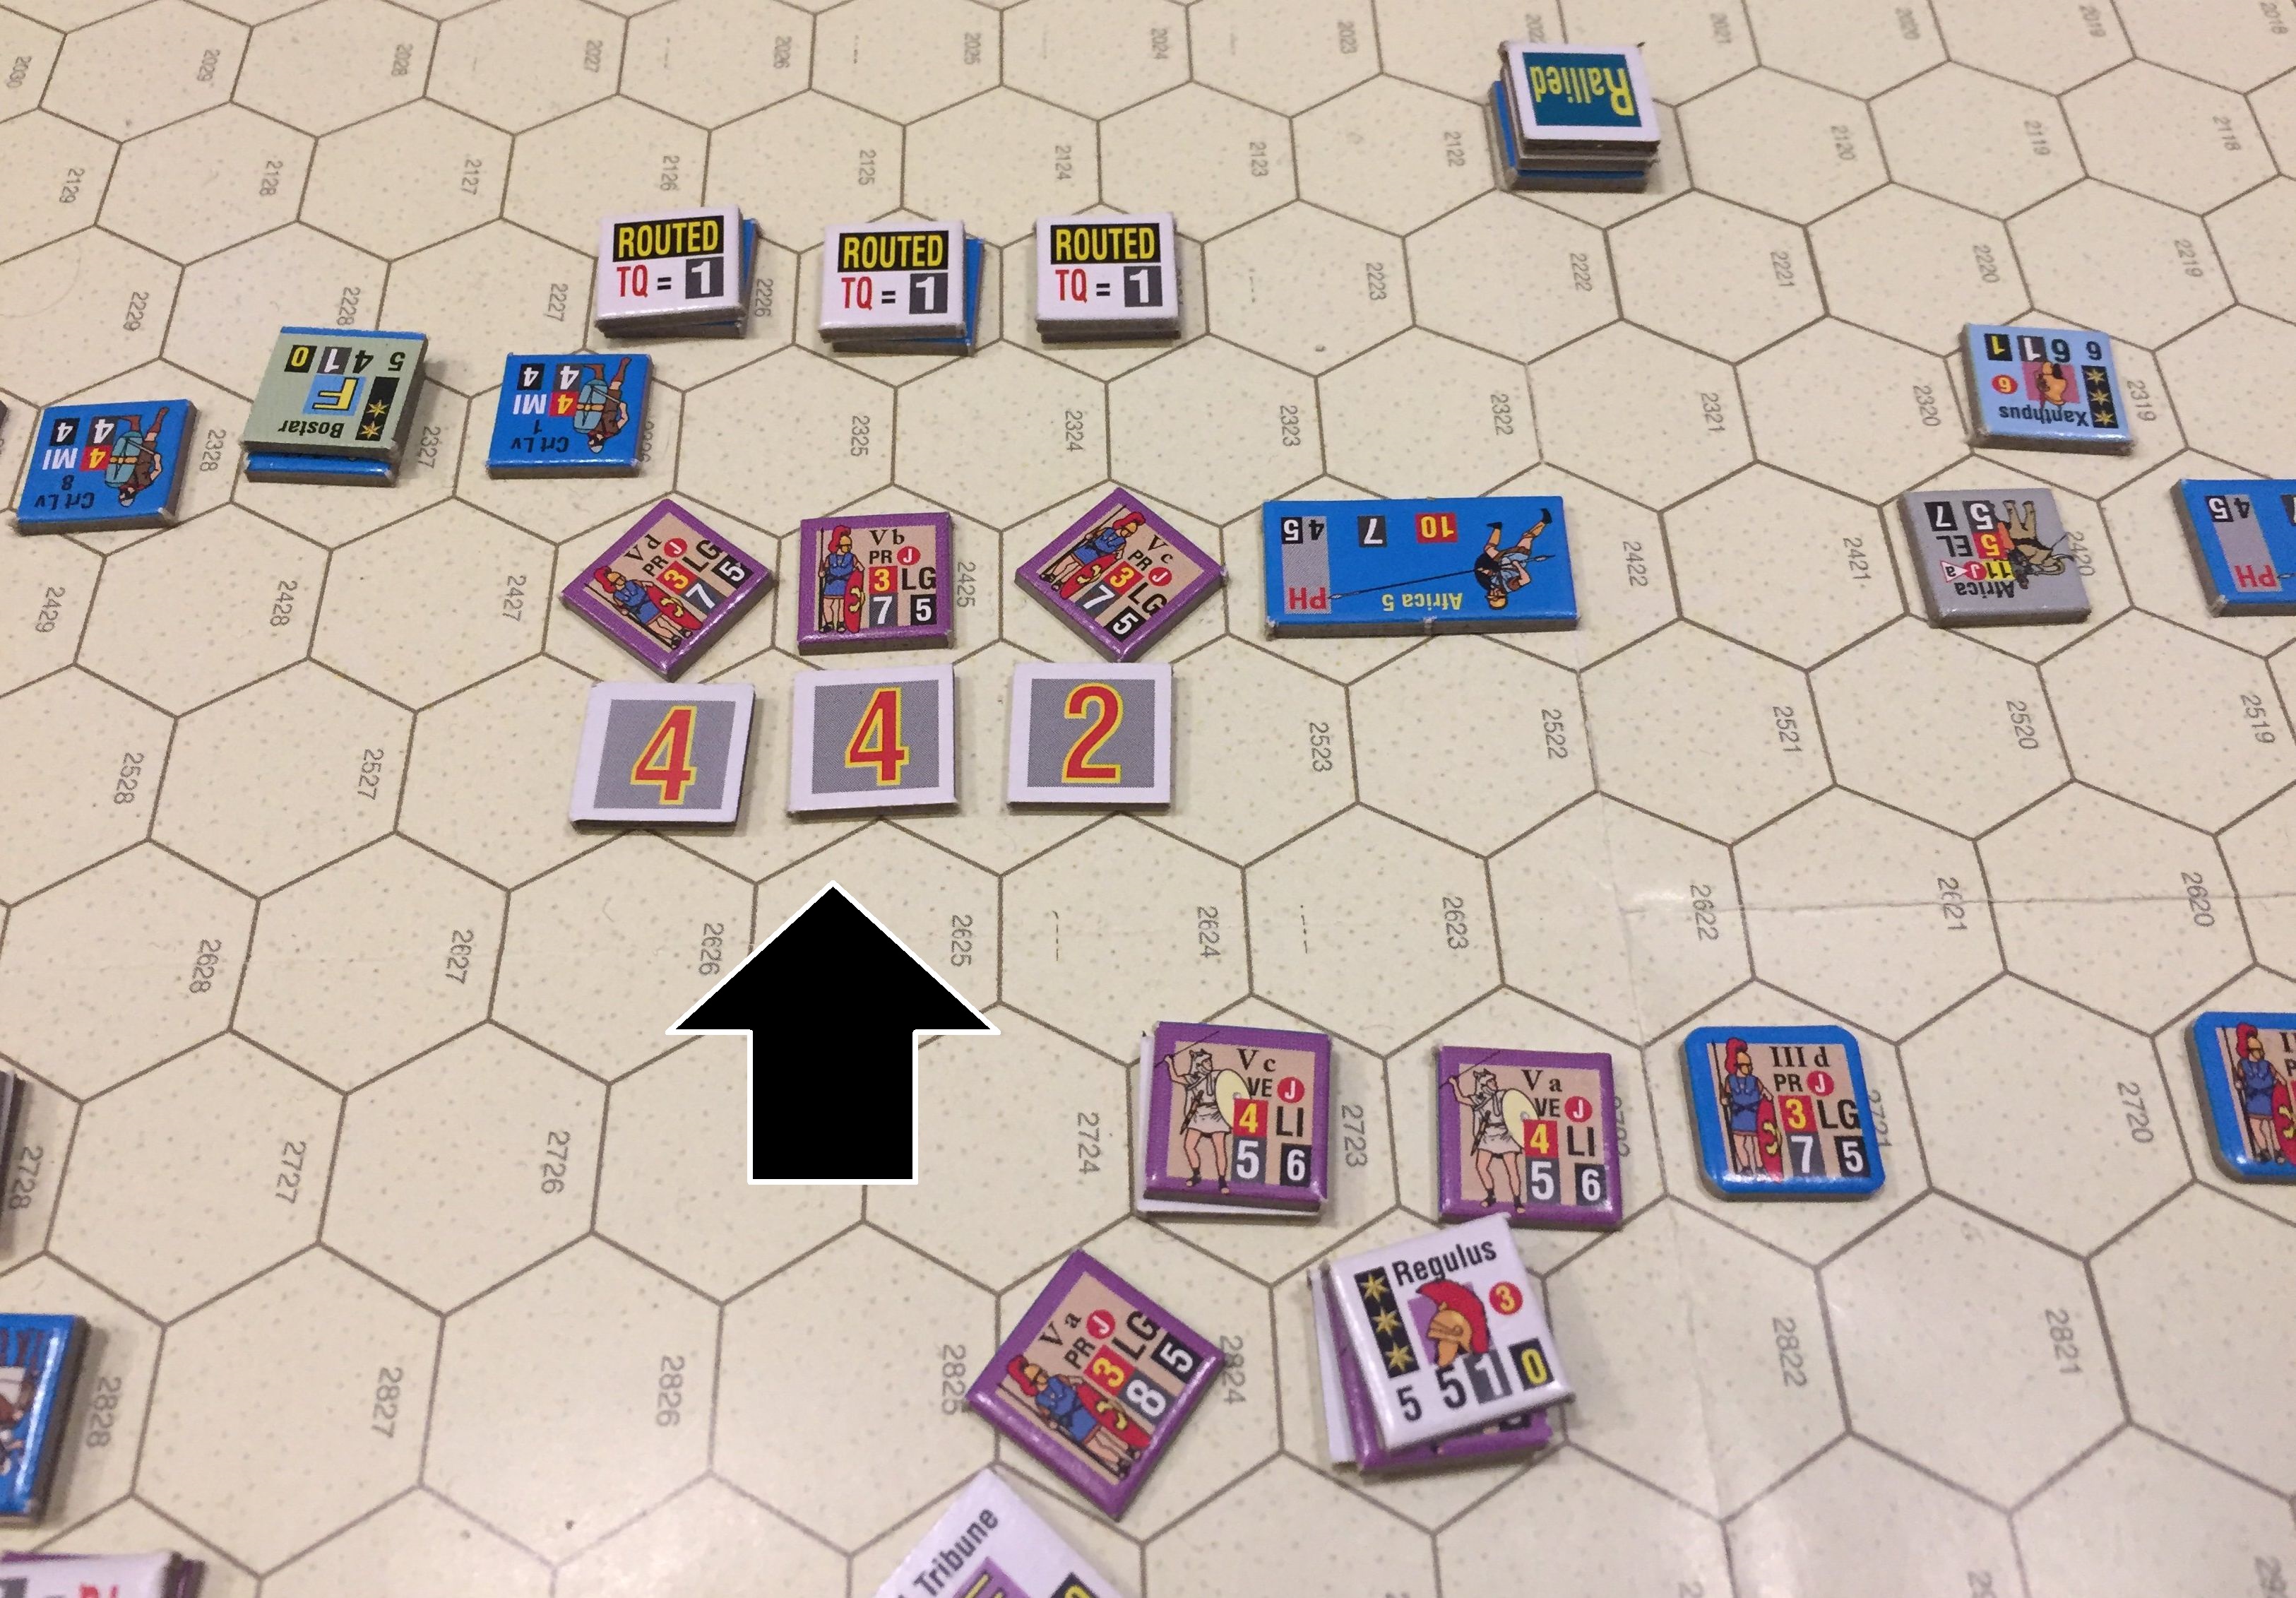
One overextended Phalanx was encircled by the Romans, routed and utterly destroyed! (click the picture to enlarge)Left-wing cavalry continues its destruction of the Roman right (click the picture to enlarge)Key developments of the third turn – phalanx killed in center, bot cavalry wings attacking the Romans (click the picture to enlarge)Causalities after Turn 3 – the Roman one sky-rocketed (click the picture to enlarge)
TURN 4
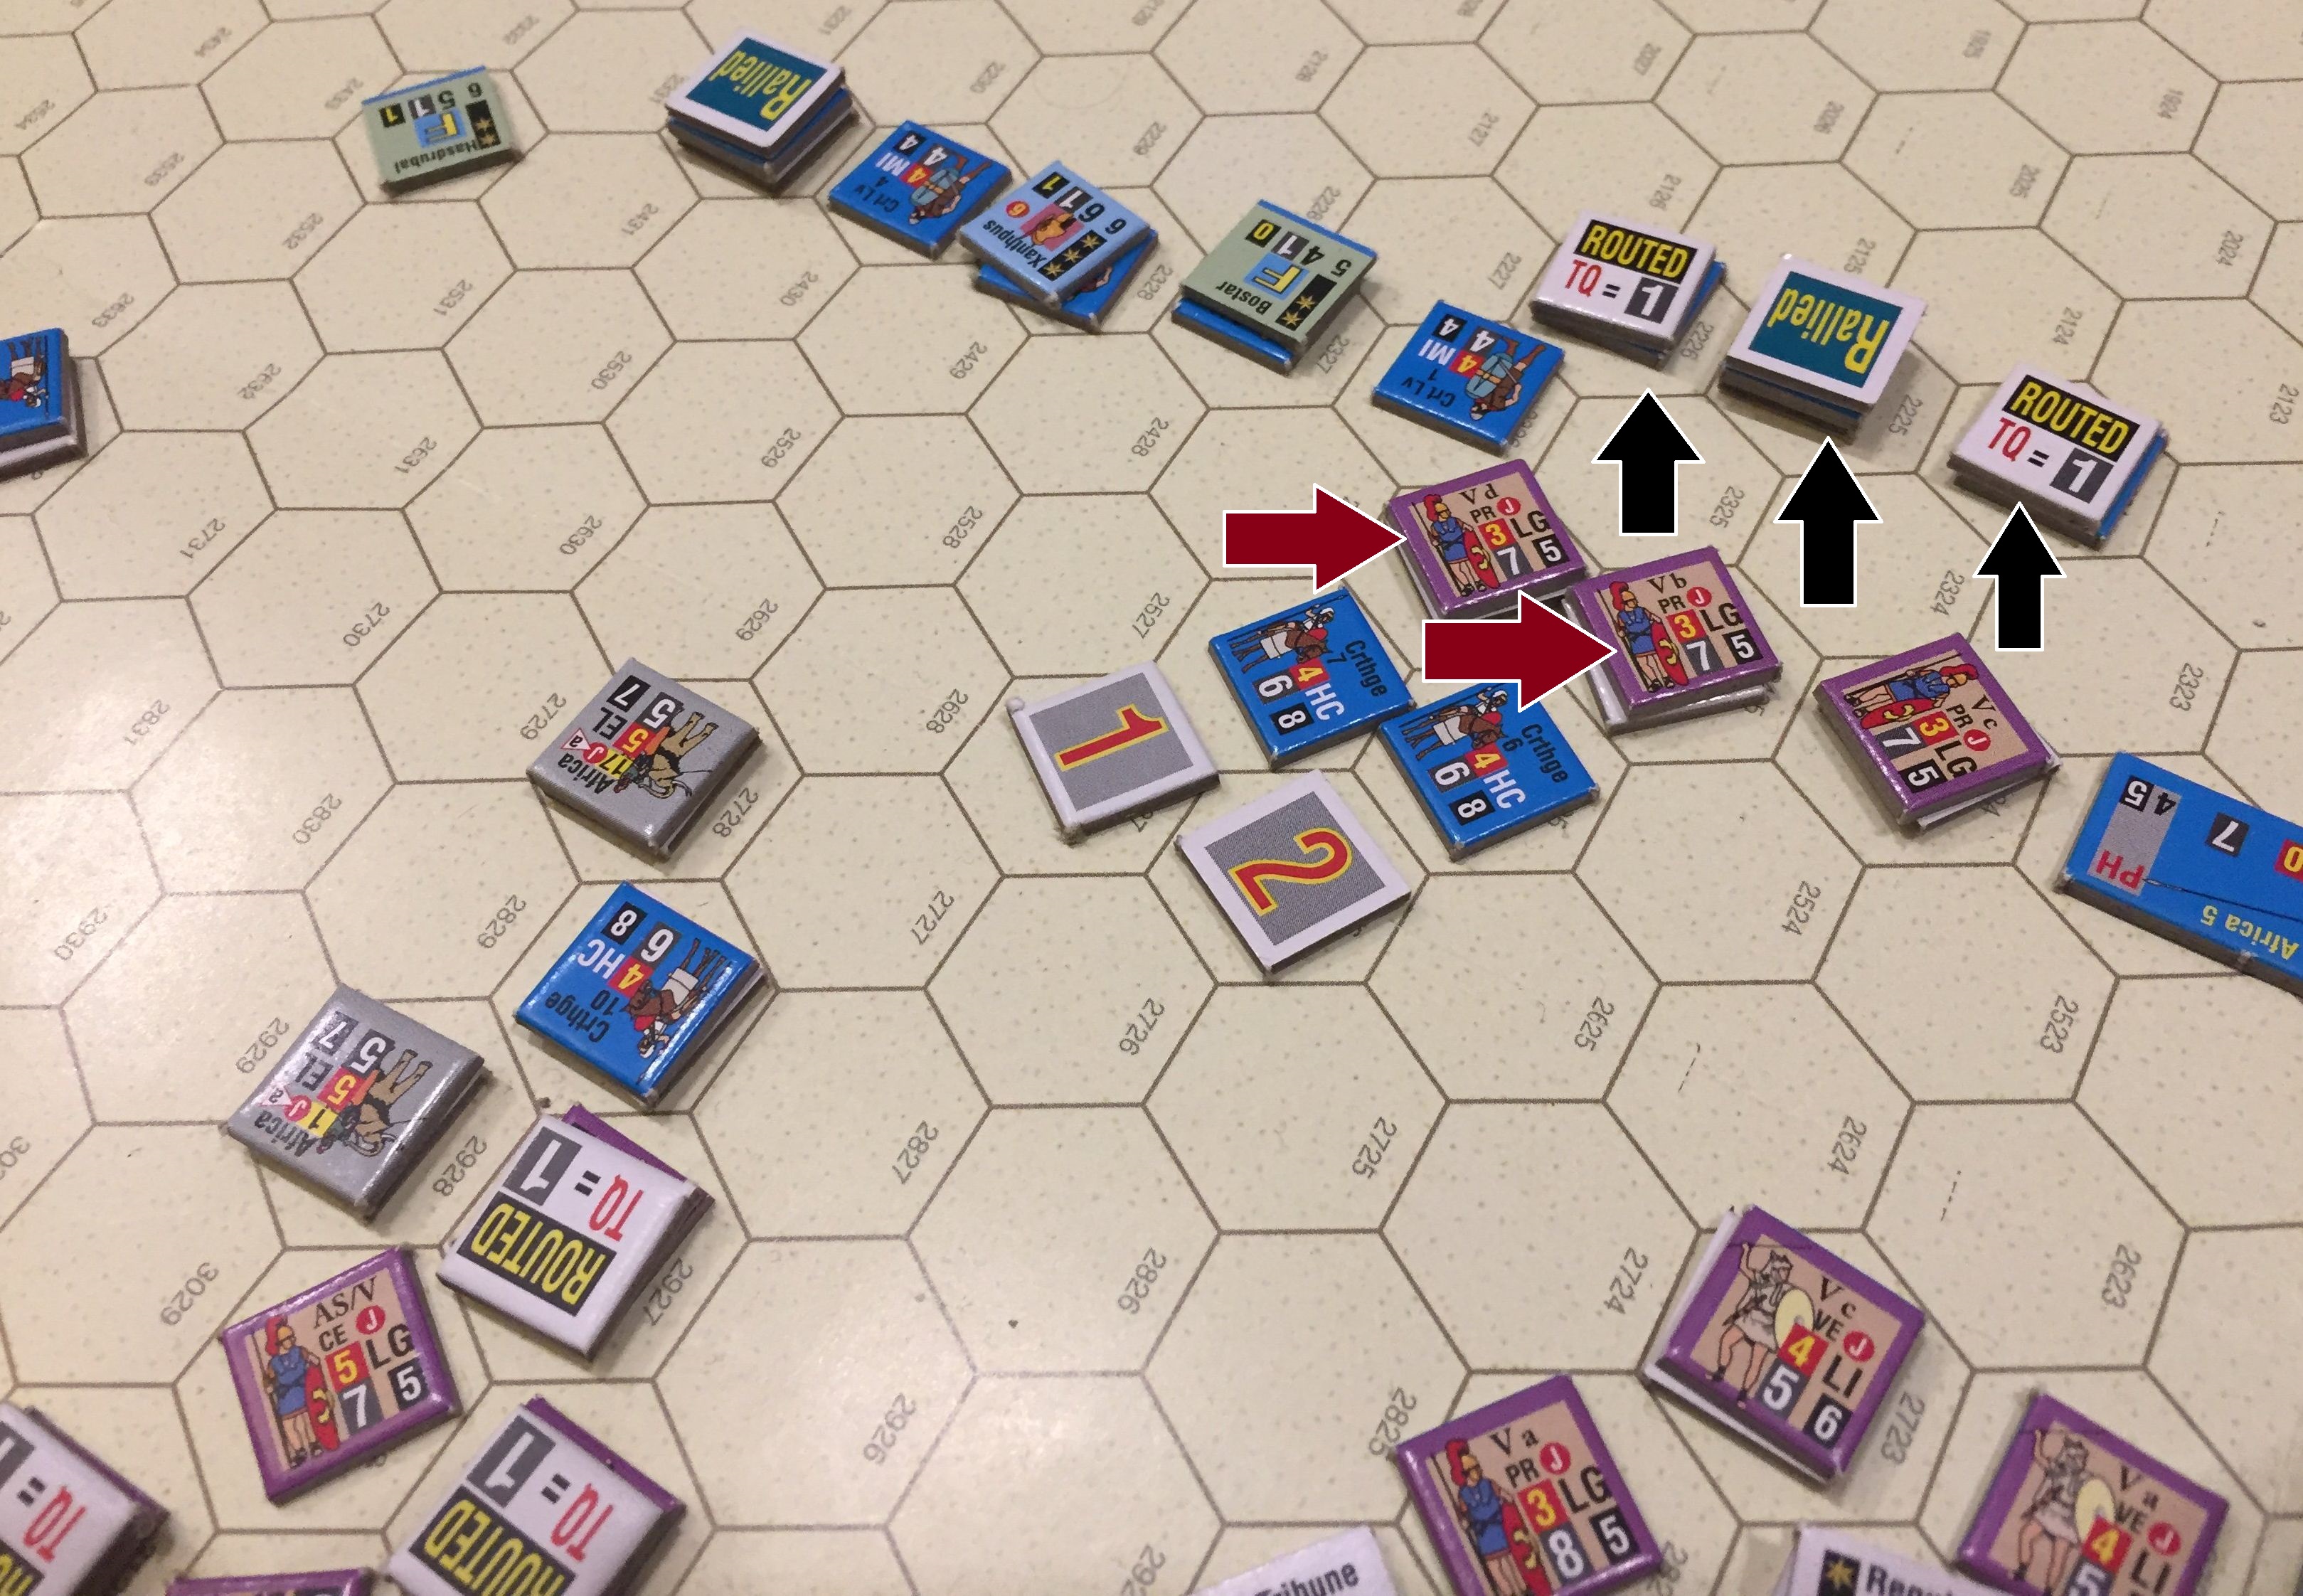
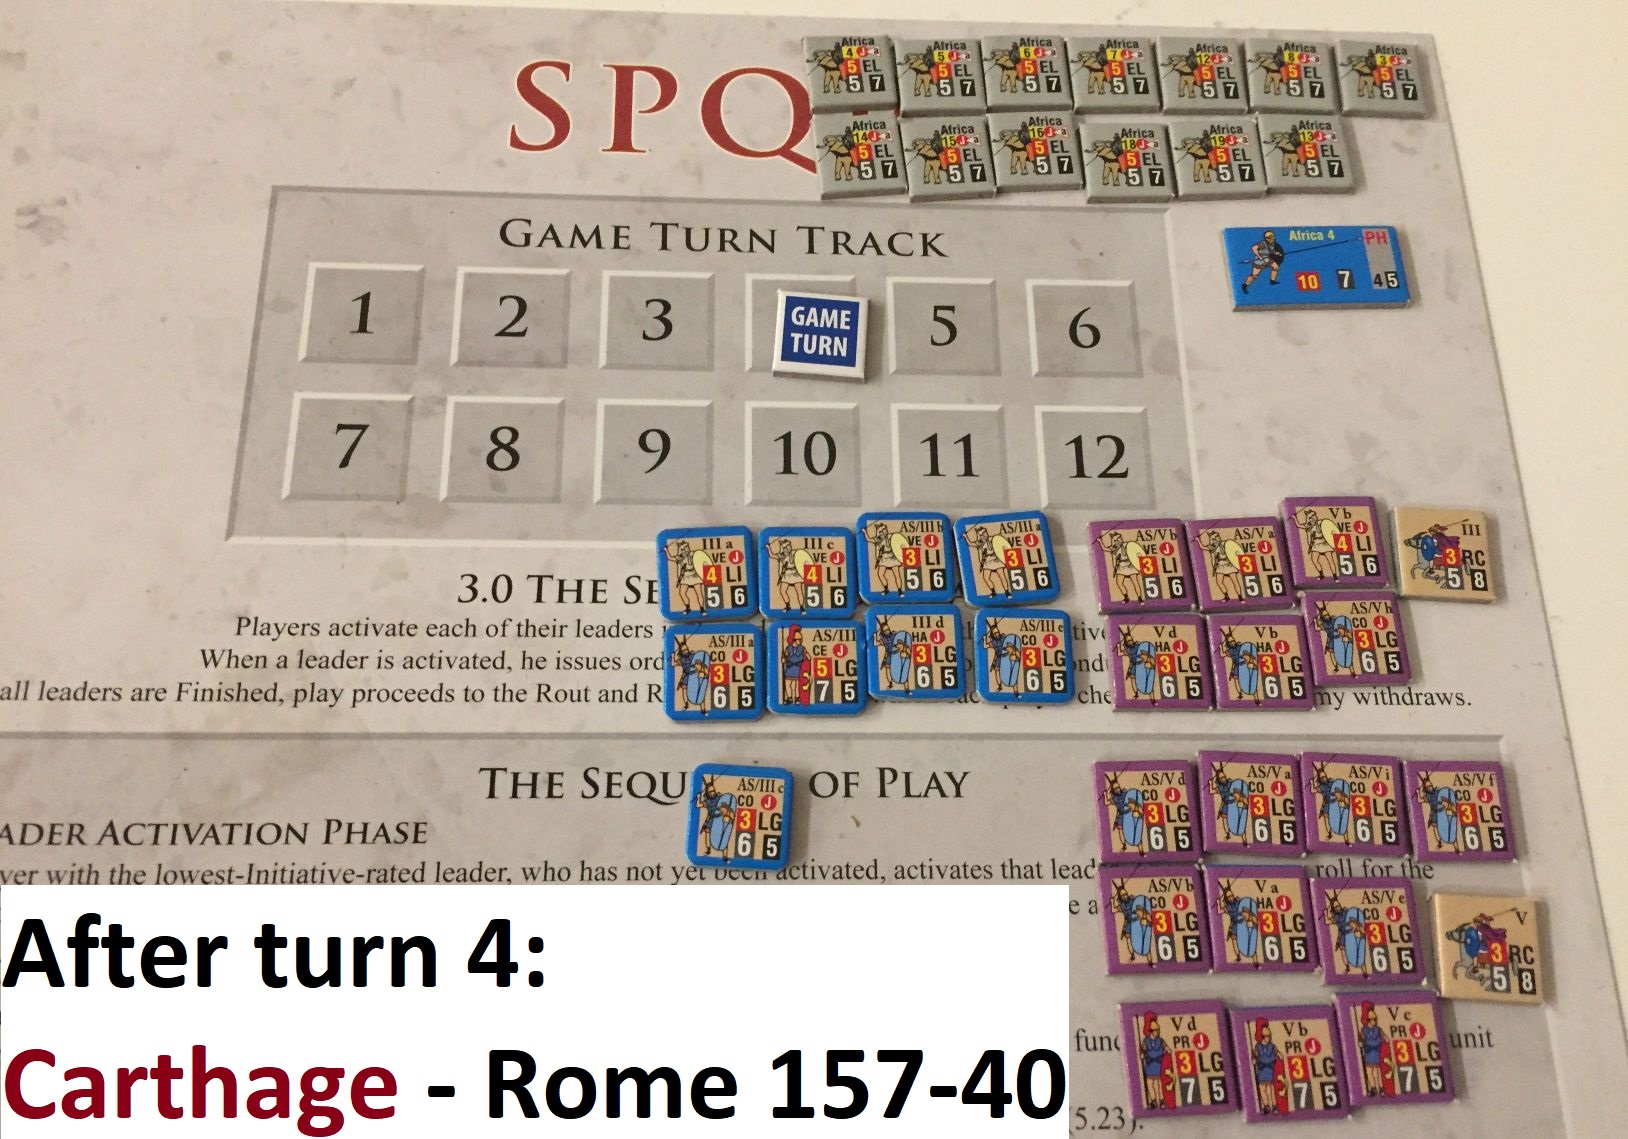
Left-wing Punic cavalry redressed the units, removed cohesion hits and were planning for another attack (click the picture to enlarge)In the last desperate effort – as in history – Roman legionnaires attack and rout Celt mercenaries (click the picture to enlarge)Unfortunately, they are caught in the rear by the Carthaginian cavalry. And then the full-swing slaughter begun… (click the picture to enlarge)Causalities after Turn 4 – Roman Legions utterly destroyed (click the picture to enlarge)
SUMMARY
Well, that was an interesting experience and much needed learning exercise in GBoH. Elephants proved to be a powerful but brittle and unpredictable creatures. The role of cavalry cannot be emphasized more – that battle shows this clearly. Another learning is that even if you are winning and pushing back the enemy, you should not overextend your forces (remember, they momentum advance) as they can get caught in ugly counter-attack – see the Phalanx case.
All in all that was great fun and you can expect further reports soon!
Great job with this; I always enjoy all of your AARs.
A couple of questions to clarify my understanding of the 4th ed rules I’m using to relearn the game:
In the photo of the Turn 1 of the Velites skirmishing with the elephants, how did the Velites incur their Hits from 2 hexes away? Missile range for the Mounted Javelins, Foot Javelins and Elephant Screens is 1 hex, no?
Also, I think you shorted the Velites a hit on the elephants; hits on the beasts are 2 CH, I think.
In the first Turn 2 photo, how did the two HA become depleted (indicated by the white stripe)?
I will admit – playing so many games I am making errors 🙂 Let me address your questions:
1) These were actually elephants attacking Velites with Harrasement action and getting hits as reaction fire (Velites approached first)
2) Yes, Elephants should get 2 hits, my error
3) In other modules of GBoH when you flip the unit that means it moved; depletion is in SPQR, it is not in Alexander nor Cataphract. I got used to flipping units once they moved. HC is by no means depleted.
Thank you for interest in my AARs. That gives me motivation to create more!
Ah, that explains it – thanks for the knowledge. I have the Alexander game but haven’t gotten it to the table yet, so I thought the stripe on the back of the counters all meant depleted. I think I prefer your way; I find placing the “moved” markers a bit of a pain (but this system is so outstanding, that’s a very small price to pay).
Yes, please do. I even enjoy reading your AARs of games I don’t have or don’t have a particular historical interest in. I appreciate the time you take to take the photos and provide the narrative. And the scope of your gaming interest is impressive. You’re definitely not “channeled” into one era or one type of game design. They’ve all been great wargaming reading during this global shut-down time. Thanks!


Great report! Thanks for sharing and Merry Christmas!
LikeLiked by 1 person
Thank you!
LikeLiked by 1 person
I see two big errors at this placements for Carthage :
The x3 “IBERIA” LI, is not at the good line !
And the x9 “Carthage Levy” MI, is not units exact !!!
= replaced for the x9 MI Celtes.
Thank.
LT
LikeLiked by 1 person
Thanks! Still, that was great fun!
LikeLike
Michal,
Great job with this; I always enjoy all of your AARs.
A couple of questions to clarify my understanding of the 4th ed rules I’m using to relearn the game:
In the photo of the Turn 1 of the Velites skirmishing with the elephants, how did the Velites incur their Hits from 2 hexes away? Missile range for the Mounted Javelins, Foot Javelins and Elephant Screens is 1 hex, no?
Also, I think you shorted the Velites a hit on the elephants; hits on the beasts are 2 CH, I think.
In the first Turn 2 photo, how did the two HA become depleted (indicated by the white stripe)?
Many thanks; well done!
LikeLiked by 1 person
I will admit – playing so many games I am making errors 🙂 Let me address your questions:
1) These were actually elephants attacking Velites with Harrasement action and getting hits as reaction fire (Velites approached first)
2) Yes, Elephants should get 2 hits, my error
3) In other modules of GBoH when you flip the unit that means it moved; depletion is in SPQR, it is not in Alexander nor Cataphract. I got used to flipping units once they moved. HC is by no means depleted.
Thank you for interest in my AARs. That gives me motivation to create more!
LikeLiked by 1 person
Ah, that explains it – thanks for the knowledge. I have the Alexander game but haven’t gotten it to the table yet, so I thought the stripe on the back of the counters all meant depleted. I think I prefer your way; I find placing the “moved” markers a bit of a pain (but this system is so outstanding, that’s a very small price to pay).
Yes, please do. I even enjoy reading your AARs of games I don’t have or don’t have a particular historical interest in. I appreciate the time you take to take the photos and provide the narrative. And the scope of your gaming interest is impressive. You’re definitely not “channeled” into one era or one type of game design. They’ve all been great wargaming reading during this global shut-down time. Thanks!
LikeLiked by 1 person